
Crochet Tiny Summer Swimmers: A Doll with Hair Buns and a Colorful Swimsuit
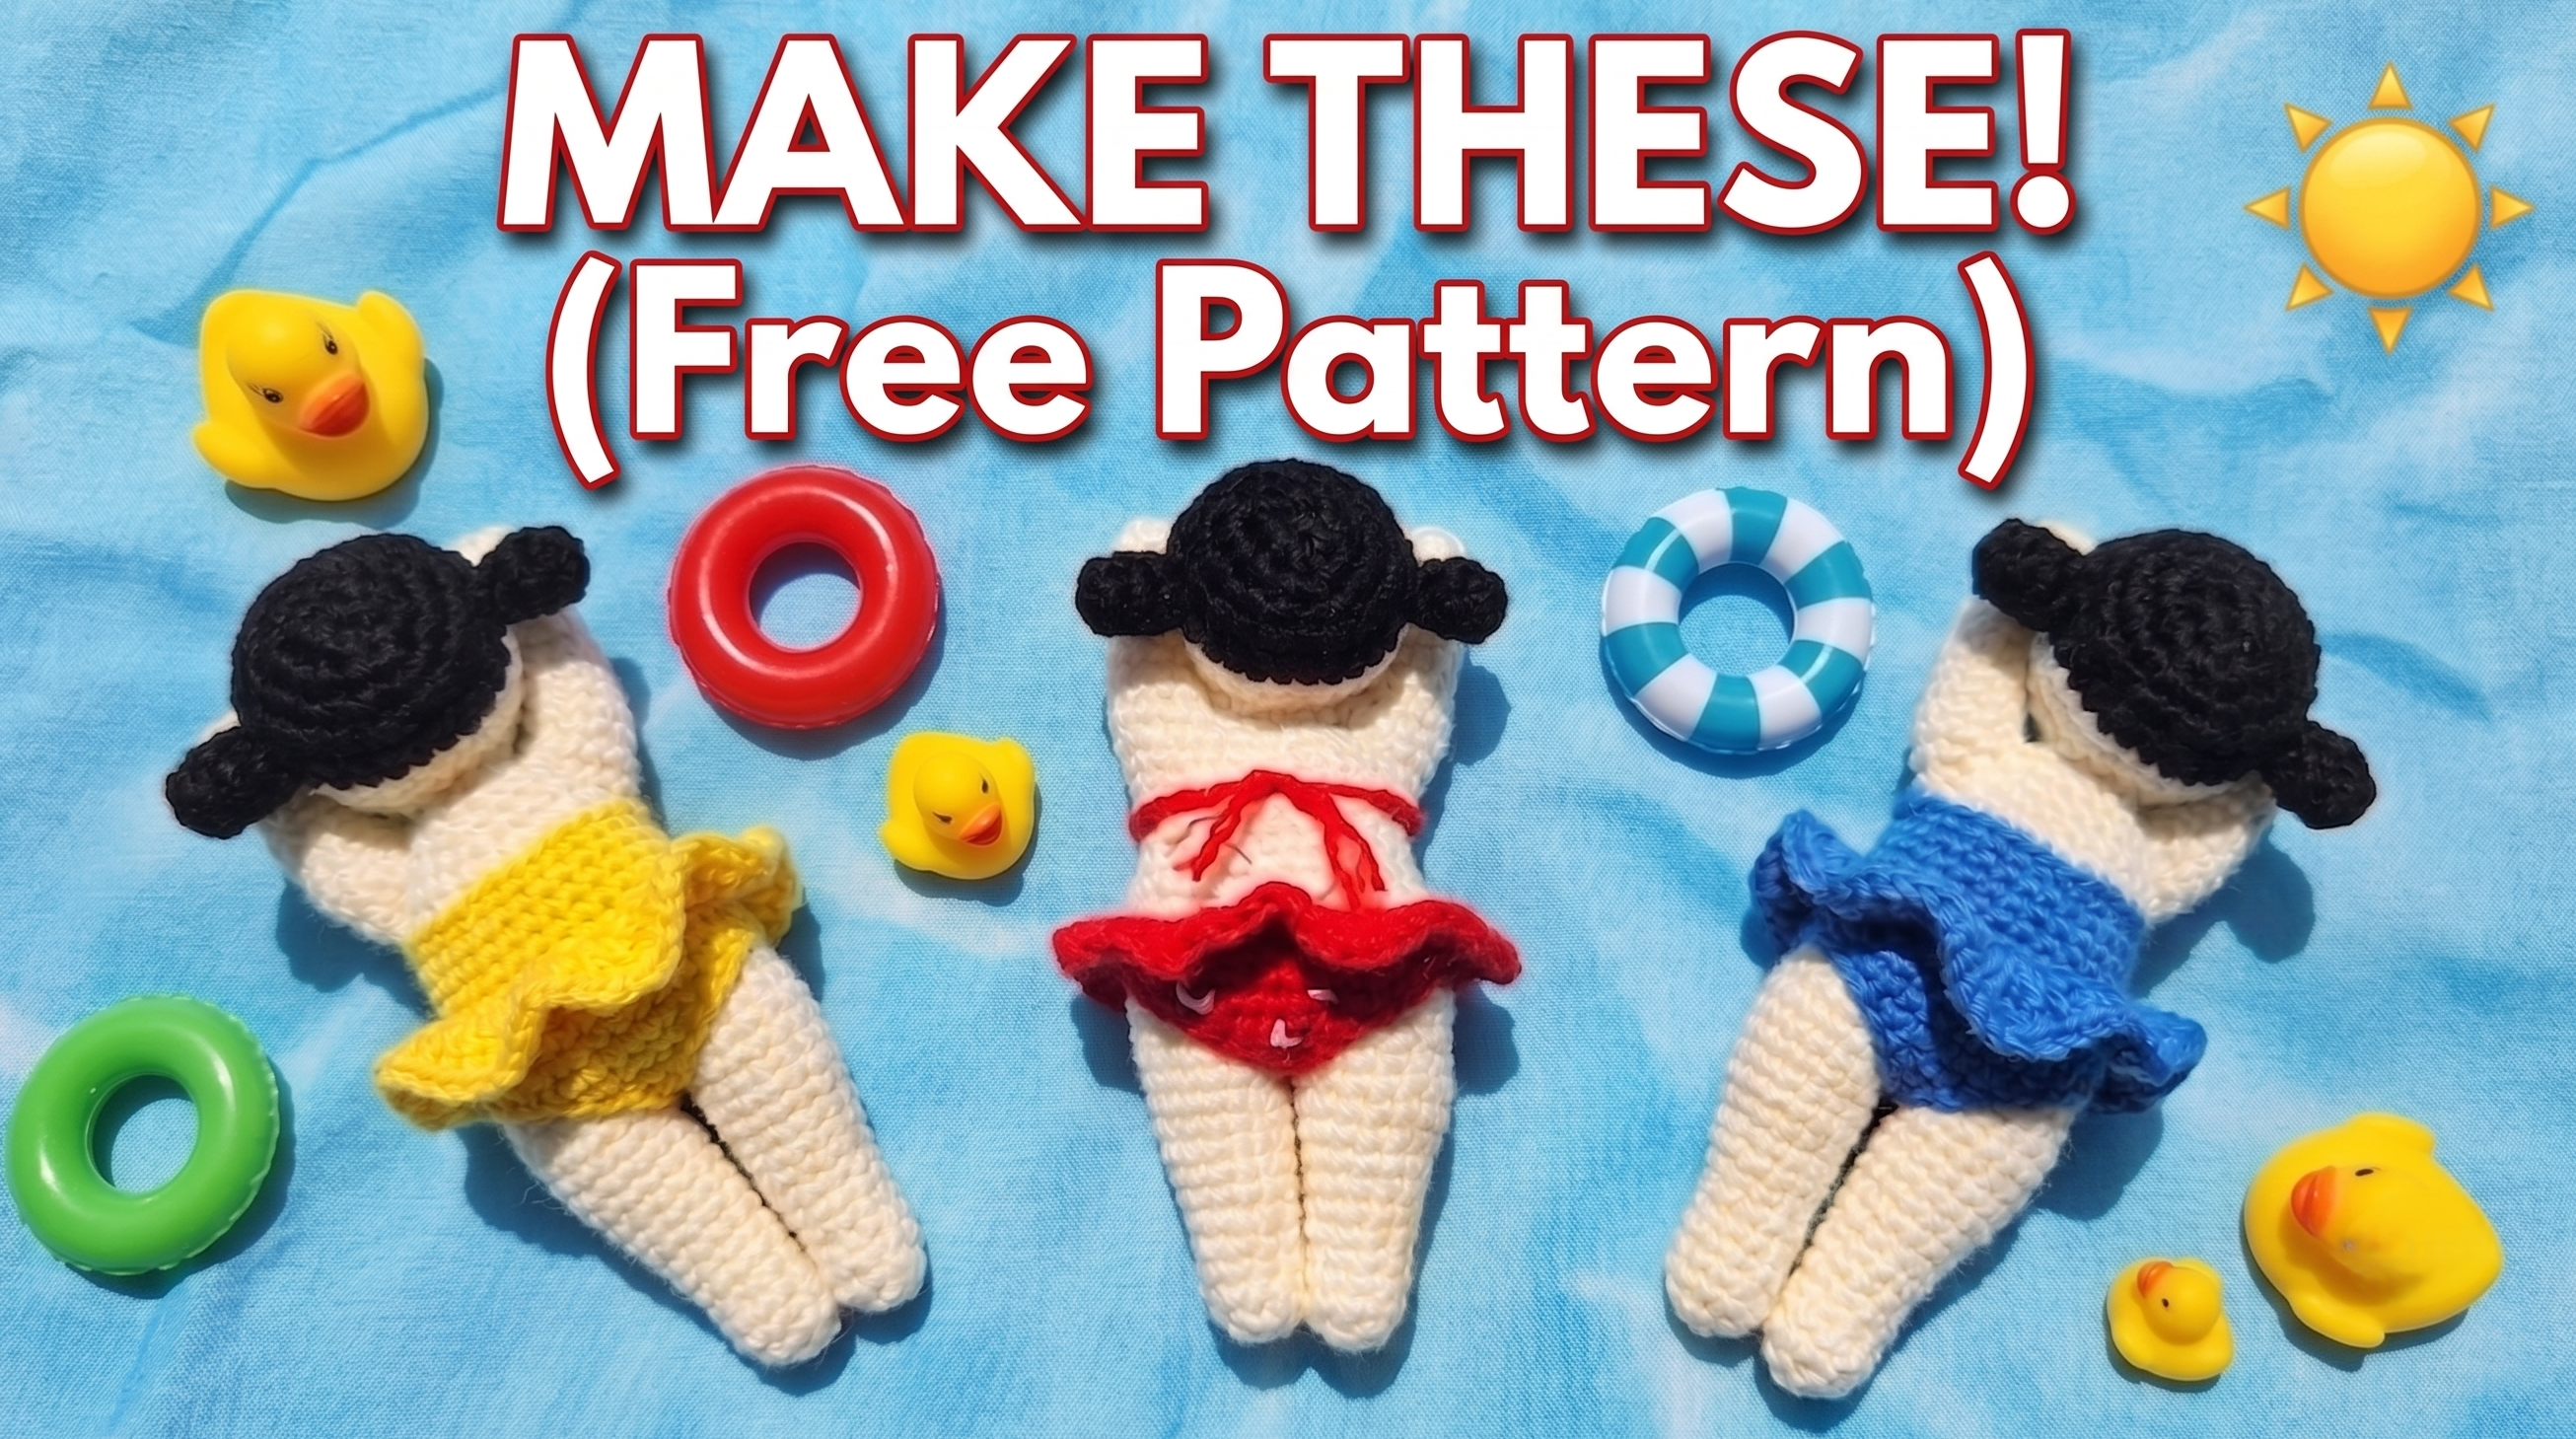
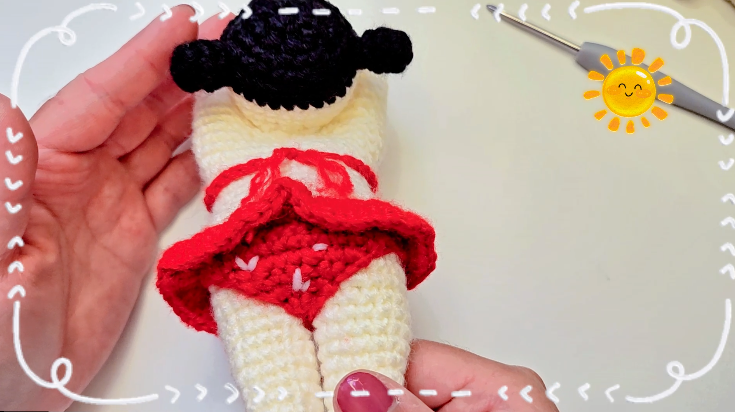
A rounded head, two little hair buns, and a bright swimsuit give this tiny crochet swimmer its summer character. The cream-and-black doll provides a simple background for the red outfit, while small white embroidered marks add a playful finishing detail.
The construction is more connected than it first appears. You make the two legs individually, join them to crochet the body, and later divide the upper body to form the arms. The head and hair buns are made separately and attached during assembly.
This guide brings the video’s written instructions together with explanations of the joins, shaping, and finishing. The swimsuit section includes a source clarification where the on-screen captions do not provide a consistent row-to-row stitch count.
Materials
The video’s materials screen lists a 2 mm hook, “medium yarn,” scissors, and a needle. The yarn description does not specify a standardized weight or brand, so choose a yarn that works comfortably with your hook and produces a close fabric.
You will also need:
- Yarn in your chosen skin color.
- Black or another hair color.
- Red or another swimsuit color.
- A small amount of white yarn for embroidery.
- Fiberfill.
- Stitch markers.
- A yarn needle.
A smooth yarn makes the small increases and decreases easier to identify. Use similar yarn thicknesses throughout the doll so the head, hair buns, and body remain in proportion.
No finished measurement or gauge is specified here. Changing the yarn or hook will change the doll’s size and the fit of its swimsuit.
Abbreviations and Pattern Notes
US crochet terminology is used.
Abbreviation Meaning
MR Magic ring
ch Chain
sc Single crochet
inc Work 2 single crochets in one stitch
dec Single crochet decrease
sl st Slip stitch
sk Skip
FO Fasten off
Instructions inside parentheses are repeated the stated number of times. For example, (sc, inc) × 6 means to repeat one single crochet followed by one increase six times.
Keep a marker at the beginning of each round. Move it as you work, particularly when joining the legs and dividing the upper body.
The head and hair buns use their own round numbering. The legs, body, and arms follow the continuing labels shown in the video.
1. Crochet the Head
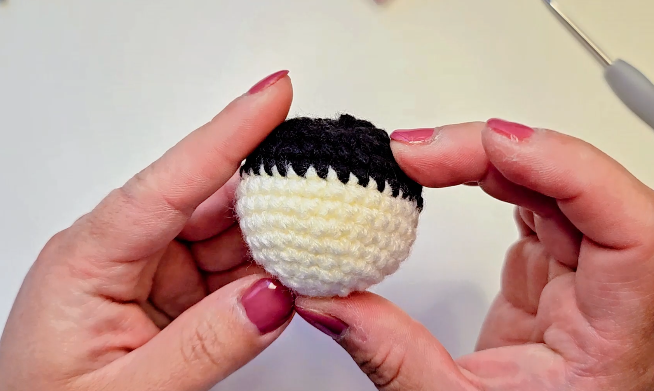
Begin with the skin-color yarn. The skin-colored section is followed by black rounds that form the hair directly within the head.
Round Instructions Stitches
R1 6 sc in MR 6
R2 6 inc 12
R3 (sc, inc) × 6 18
R4 (sc, inc, sc) × 6 24
R5 (3 sc, inc) × 6 30
R6–R8 30 sc in each round 30
R9–R10 Change to hair color; 30 sc in each round 30
R11 (3 sc, dec) × 6 24
R12 (sc, dec, sc) × 6 18
R13 (sc, dec) × 6 12
R14 6 dec 6
Add stuffing before the opening becomes too small. Distribute small amounts around the head rather than pushing one large piece into the center.
Fasten off, leaving the long tail shown in the tutorial. Close the remaining opening and secure the end.
Keep the hairline smooth
The color change at R9 creates the boundary between the face and hair. Keep the first black stitches at the same tension as the cream stitches. Pulling the new color too tightly can create a dent around the head.
The head begins with the skin-colored section, so the black closure belongs at the hair end. Check this orientation before attaching the head to the body.
2. Make the Hair Buns
Make two in the hair color.
Round Instructions Stitches
R1 6 sc in MR 6
R2–R3 6 sc in each round 6
Fasten off, leaving a long tail for sewing.
Compare both buns before attaching them. Their placement affects the hairstyle as much as their size. Hold them against the head and check the silhouette from the front, back, and above.
Leave them unattached until you have decided which side of the head will face forward.
3. Crochet the Legs
Make two legs in the skin color.
Round Instructions Stitches
R1 6 sc in MR 6
R2 (sc, inc) × 3 9
R3–R4 9 sc in each round 9
R5 (2 sc, inc) × 3 12
R6–R7 12 sc in each round 12
R8 (3 sc, inc) × 3 15
R9–R11 15 sc in each round 15
Leg 1: Fasten off.
Leg 2: Do not fasten off. Continue with this working yarn to join the legs and make the body.
Add filling gradually while the openings are accessible. Keep the two legs similar in firmness; an overfilled leg can look wider even when its stitch count is correct.
4. Join the Legs and Shape the Body
Position the legs beside each other as demonstrated. Continue from Leg 2.
R12: Join to Leg 1. Work 15 sc around Leg 1 and 15 sc around Leg 2. (30)
The legs connect directly in this round. Do not add an unlisted chain bridge between them.
Check that both legs point in the intended direction before continuing. Place a marker at the beginning of the combined round.
Round Instructions Stitches
R13 (sc, inc) × 3, 18 sc, (inc, sc) × 3 36
R14 (2 sc, inc) × 3, 18 sc, (inc, 2 sc) × 3 42
R15–R17 42 sc in each round 42
R18 (2 sc, dec) × 3, 18 sc, (dec, 2 sc) × 3 36
R19 (sc, dec) × 3, 18 sc, (dec, sc) × 3 30
R20–R24 30 sc in each round 30
R25 7 sc, inc, 14 sc, inc, 7 sc 32
R26 32 sc 32
R27 7 sc, 2 inc, 14 sc, 2 inc, 7 sc 36
R28 36 sc 36
The increases and decreases are placed in specific sections. Preserve their order rather than spreading them evenly around the body.
Stuffing the joined body
Ease small pieces of filling down into the legs before filling the torso. Then build up the body gradually, checking its shape from both sides.
The waist should remain visible after stuffing. If the body becomes a straight, firm cylinder, remove a little filling and redistribute it around the lower torso and shoulders.
Check the join between the legs for a small gap. If one remains, close it neatly with the available yarn tail without pulling the legs tightly together.
5. Form the Arms from the Upper Body
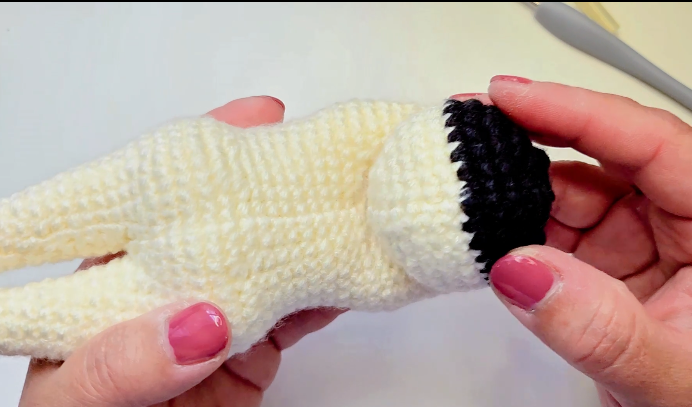
The arms are worked from the upper body rather than crocheted separately and sewn on afterward.
The video shows the following sequence:
Video label Instructions
R29 Sk 3, 12 sc, sl st into the first stitch
R30–R32 12 sc in each round
R33 (4 sc, dec) × 2
R34 10 sc
R35 (3 sc, dec) × 2
R36 8 sc
At R29, follow the demonstration to bring the 12-stitch section into a small round. Continue around that section to form the arm.
Work the second arm in the corresponding section on the other side, following the same shaping sequence. Keep the central area available for attaching the head.
The division at the shoulders is an important placement step. Before continuing several rounds, check that the two arm sections sit opposite one another and that the remaining opening is centered.
Add only enough filling to support the small arms without making them rigid. Finish the ends as demonstrated and secure the yarn inside.
6. Assemble the Doll
Place the head on the body before sewing. Check the direction of the hairline, the center of the face, and the position of the arms together.
Use removable markers or pins to hold the head temporarily. Look at the doll from the front and both sides before securing the join.
Sew through stable stitches around the connection, keeping the tension even. Pause partway around to check that the head has not shifted.
Attach the two hair buns within the black hair section. Compare their height from the back as well as the front, then secure their edges and weave the tails into the head.
The sample’s character comes largely from its rounded proportions and hairstyle. Keep additional details small so they do not overwhelm the face.
7. Crochet the Swimsuit
The red swimsuit is shaped in rows. Its back and front begin at the same magic-ring area, and chain sections connect the sides.
Source clarification: The back-panel captions do not provide a consistent stitch-count progression between the displayed rows. The instructions below preserve the visible formulas. Use the close-up demonstration for this section rather than treating the captions as a fully checked standalone pattern.
Back panel
The video displays:
Row Instructions shown
R1 3 sc in MR
R2 Turn; inc, sc, inc
R3 Turn; inc, sc, inc, sc, inc
R4 Turn; inc, 10 sc, inc
The R4 formula requires more stitches than the preceding displayed formula produces. No additional transition has been added here.
Keep the starting ring accessible: the front is worked from this same area.
Front panel
Return to the magic-ring area as demonstrated and work the front section.
Row Instructions
R1 3 sc in MR
R2 3 sc
R3 Turn; inc, sc, inc
R4 Turn; 5 sc
R5 Turn; inc, sc, inc, sc, inc
Spread the piece flat before connecting the sides. The front and back should extend in opposite directions from the shared starting area.
Connect the sides
The joining instruction shown in the video is:
Ch 4; work across the back with an increase at each end and single crochet between them; ch 4; single crochet across the front.
The two ch-4 sections connect the front and back at the sides. Check their placement against the demonstration so the leg openings remain separate.
Try the garment against the doll before securing the final ends. The side chains should sit comfortably around the body without pulling the front or back out of position.
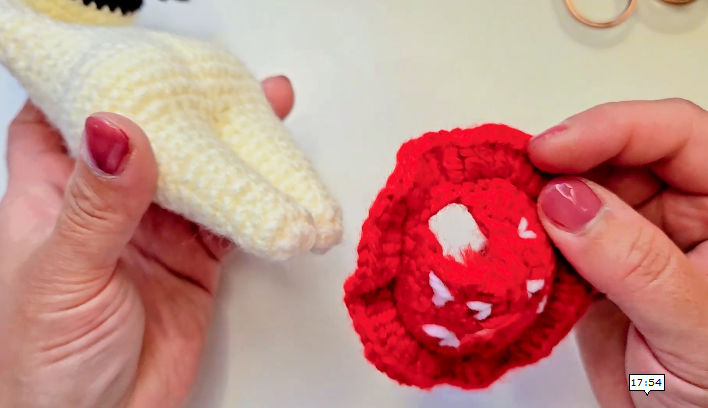
Add the white decoration and ties
Embroider the small white marks after checking the fit. Keep the stitches short and avoid carrying tight strands across the inside of the red fabric.
The final part of the tutorial also demonstrates the narrow red chain ties. Their exact chain count is not specified in the visible notes here. Follow the demonstrated placement and fit them to your finished doll rather than assuming a fixed length.
Secure the ends neatly and adjust both sides evenly.
Check the Finished Proportions
Before considering the doll complete, place it on a plain surface and inspect these areas:
- Head: Rounded evenly, with a smooth hairline.
- Hair buns: Similar in height and projection.
- Legs: Matching in length and fullness.
- Arms: Positioned evenly at the shoulders.
- Swimsuit: Sitting straight across the front and back.
Small adjustments can make a noticeable difference on a miniature doll. Repositioning one hair bun or loosening an overly tight garment tie may improve the overall balance without changing the crochet.
Troubleshooting
One leg looks larger
Compare the round counts first, then check the filling. The same crochet piece can look noticeably wider when packed more firmly.
The upper body twists
Check the starting marker and the placement of the shaping stitches. The increases and decreases are arranged around specific sections, so moving the beginning of the round can affect the doll’s orientation.
An arm begins in the wrong position
Return to the shoulder division and compare both sides before continuing. Correct the placement at the opening instead of trying to pull the finished arm into position.
The hairline has a dent
Check whether the black yarn was pulled too tightly at the color change. Keep the color-change tension similar to the surrounding stitches.
The swimsuit pulls at the sides
Check the side-chain tension and how much filling is in the torso. Do not force the garment into place; check its construction and fit before adding embroidery or finishing the ties.
Watch the Full Tutorial
Use the video for the shoulder division, head attachment, and swimsuit details that depend on placement.
Useful sections:
- 0:27 — Materials.
- 0:44 — Head and hair.
- 6:03 — Legs, body, and arms.
- 14:41 — Assembly.
- 15:05 — Swimsuit.
Finish Your Little Summer Swimmer
Weave in the remaining ends and give the swimsuit a final adjustment. Smooth the head gently, arrange the hair buns, and check that the joins feel secure.
For another version, keep the same doll construction and change the swimsuit color. Blue, coral, or yellow can give each swimmer a different personality while preserving the simple summer theme.
Display one on a craft shelf or make a small group with coordinated outfits. The rounded head, little buns, and carefully fitted swimsuit give each finished swimmer its relaxed, sunny character.
Watch every stitch up close
Pair these written notes with the complete video tutorial.
Made with yarn, shared with love. 🧶💗