
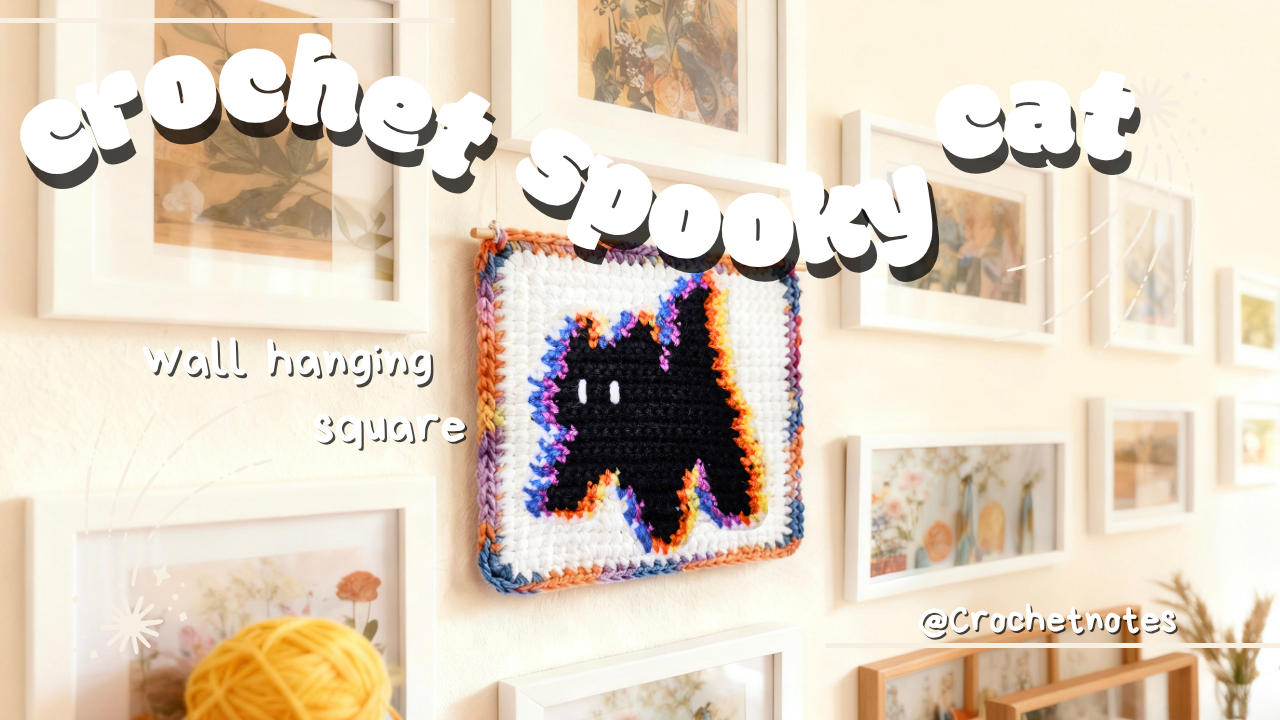
A Black Cat with a Colorful Outline
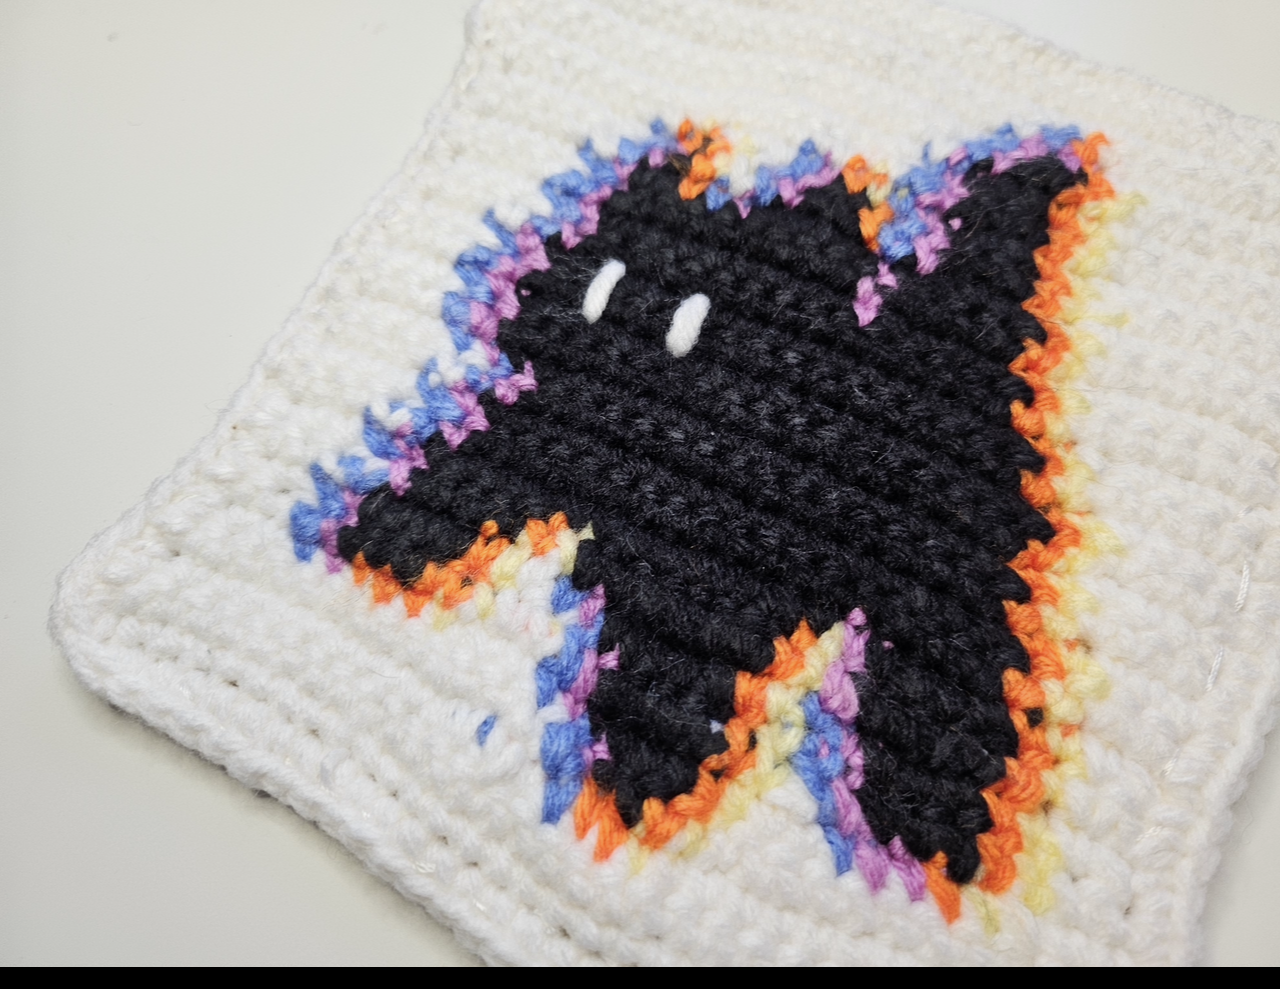
This crochet square places a black cat against a cream background. Pointed ears, projecting paws, and an upright tail give the central shape its playful Halloween character.
Two small white eye marks stand out against the dark face. Blue, pink, orange, and pale yellow accents follow parts of the cat’s outline, adding color between the black motif and the surrounding cream fabric.
The finished effect is graphic rather than realistic. The silhouette does most of the work, so preserving the ears, spaces between the limbs, and tail shape matters more than adding extra facial details.
Follow the video near the end for the crochet sequence and stitch placement. These notes focus on choosing contrasting yarns, checking the outline, and finishing a square that can be used in a larger project.
Choose Colors That Keep the Cat Visible
The cream background gives the black cat a clear boundary. The brighter accents add interest, but they should not compete with the main silhouette.
For the pictured arrangement, prepare:
- Black yarn for the cat.
- Cream yarn for the background and outer square.
- White yarn for the eyes.
- Small amounts of blue, pink, orange, and pale yellow yarn for the accents.
- A crochet hook suitable for the yarn.
- Scissors, a yarn needle, and stitch markers.
Check the tutorial for the demonstration materials. The project photograph and video description do not establish an exact hook size, yarn quantity, or finished measurement.
Compare the Yarn Thicknesses
Leftover yarn can work well for small accent sections, provided the thicknesses are compatible.
A much heavier accent yarn can create a bulky ridge around the cat. A finer background yarn may produce fabric that looks noticeably looser than the black section.
For your first version, choose smooth or lightly textured yarn. Very fluffy black yarn can hide the smaller shaping details and make the outline harder to check.
Follow the Silhouette Carefully
Work along with the tutorial at the transitions that form the ears, paws, and tail. Do not assume that the pattern can be replaced by a standard granny-square repeat.
Use a marker where needed and count at the shaping changes. A missed stitch near an ear or an extra stitch beside a limb can alter the cat’s outline.
Inspect the motif from a comfortable distance occasionally. This helps you judge whether the overall shape remains recognizable, rather than focusing only on the next stitch.
Make Dark Stitches Easier to See
Use good lighting and a pale work surface behind the black crochet when checking spaces and stitch tops.
If a section is unclear, pause the video and compare the demonstrated placement before continuing. Correcting an uncertain stitch early is easier than covering it with the background rounds.
Keep the Colored Accents Neat
The colors in the pictured square appear along different sections of the outline rather than as one uniform ring.
Follow the tutorial’s color sequence and construction method. The finished photo alone does not show every transition or how the colored stitches connect to the black motif.
Keep the tension consistent when changing yarn. Pulling a new color too tightly can narrow a section or gather the fabric beside it.
Hide Ends Without Crossing Visible Spaces
Secure the black and colored tails within matching areas where practical. Dark strands can show against the cream background, particularly through small openings.
Inspect the reverse side before trimming the ends. Check that no long loose strand crosses a gap or interferes with the area you will later join.
Place the White Eyes Within the Face
The two white eye marks give the cat its expression while keeping the face simple.
Follow the video for their placement and stitch method. Temporarily mark both positions before securing them so you can compare the spacing and angle.
Keep the white yarn gently tensioned. Pulling hard can dent the black fabric or make one eye noticeably shorter than the other.
View the square from a little distance after adding the features. The eyes should remain distinct without dominating the face.
Let the Cream Background Define the Square
The cream section fills around the irregular cat and creates the outer frame. Follow the shaping through the spaces beside the limbs and tail.
Check the four sides and corners as they develop. The background needs to sit comfortably around the motif rather than pull it out of shape.
If the square cups or ripples, review the stitch placement and counts before continuing. Blocking can settle correct fabric, but it cannot reliably fix a missing group or an extra increase.
Finish One Sample Before Planning a Set
Weave in the remaining ends and block the square using a method suitable for the yarn. Ease the corners into position without stretching the cat unevenly.
Measure the finished width and height, then record the yarn and hook combination.
For additional squares, compare the silhouette as well as the dimensions. Consistent ears, tail placement, and borders help a repeated design feel coordinated.
Check Compatibility with Other Motifs
If mixing the cat square with other Halloween designs, compare their edge stitches and finished sizes.
Make a test join before committing to a whole panel. Matching measurements do not always mean the edges will join comfortably.
Plan the Cat’s Direction Before Joining
A single square can become a wall-hanging panel, decorative pocket, or pouch front. Several can form a bag, cushion cover, or seasonal blanket.
Lay out the motifs before sewing. Decide whether all the cats will face the same way or whether you want varied orientations.
For a bag, check the arrangement in its intended folded shape. A cat that looks upright on a flat panel may turn sideways during assembly.
Plain cream squares can give the colored outlines more room to stand out across a larger project.
Watch the Spooky Cat Square Tutorial
The video demonstrates the cat square step by step. Follow it for the silhouette, contrasting sections, background shaping, and finishing.
Pause around the ears, paws, and tail to compare the outline before moving into the surrounding stitches.
Check the Finished Square
Inspect the corners, eye stitches, color transitions, and hidden ends. Confirm that the square lies comfortably before joining it to another piece.
The black silhouette and cream background give this motif its clarity. Carefully placed color accents add the playful detail that makes the finished square stand out.
Watch every stitch up close
Pair these written notes with the complete video tutorial.
Made with yarn, shared with love. 🧶💗