
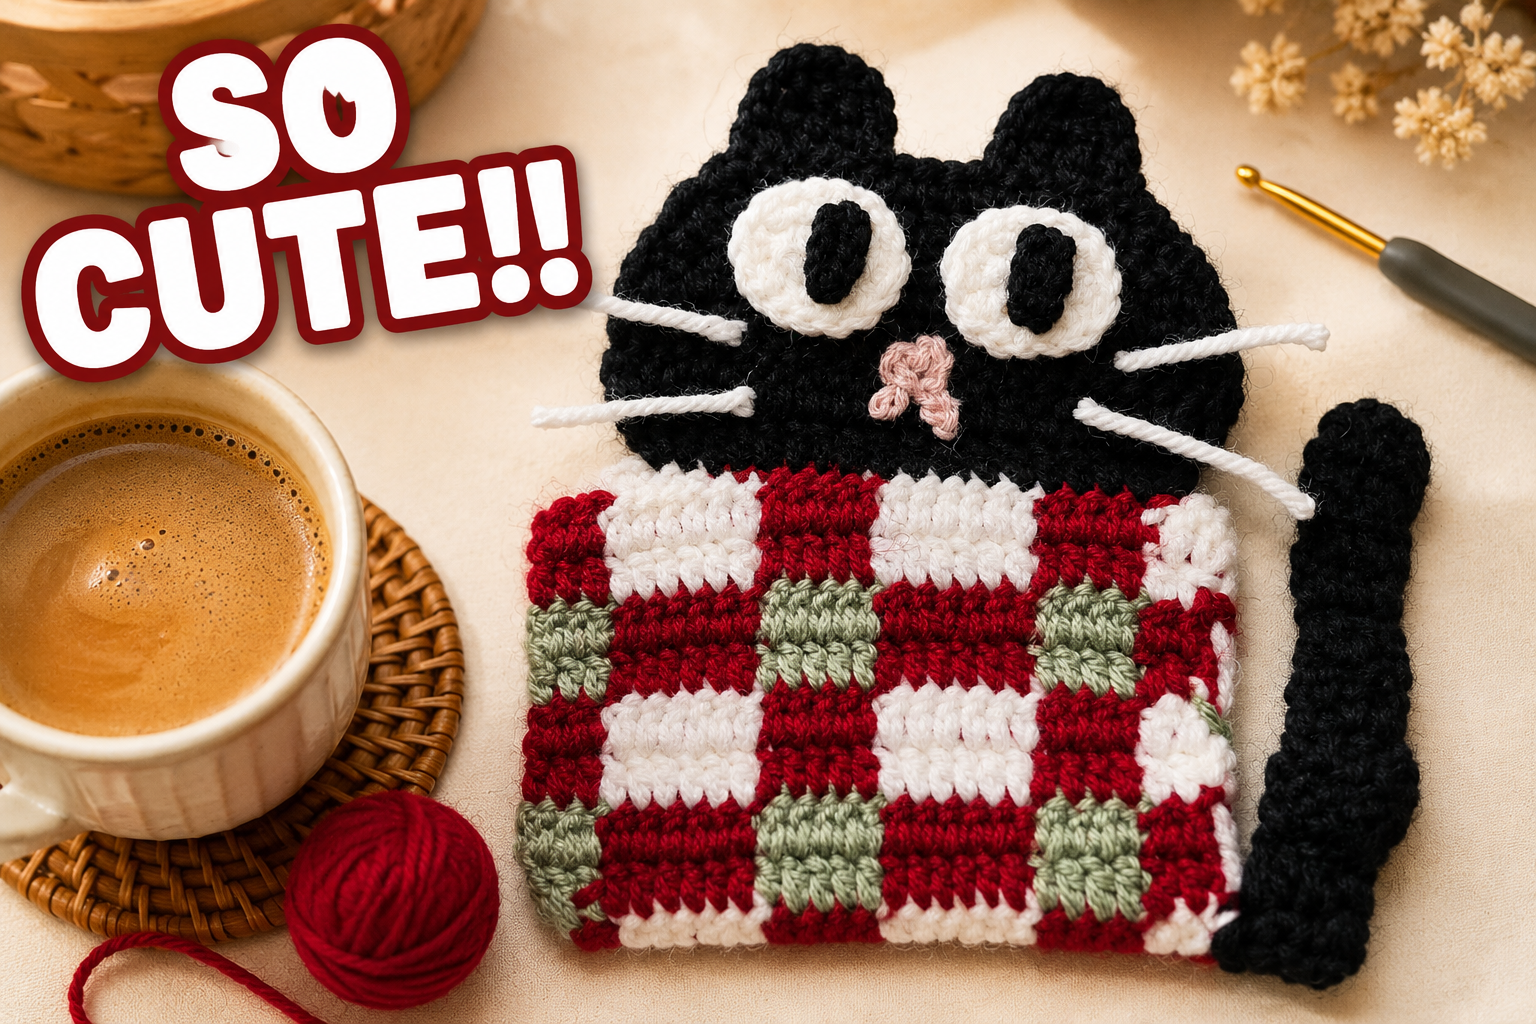
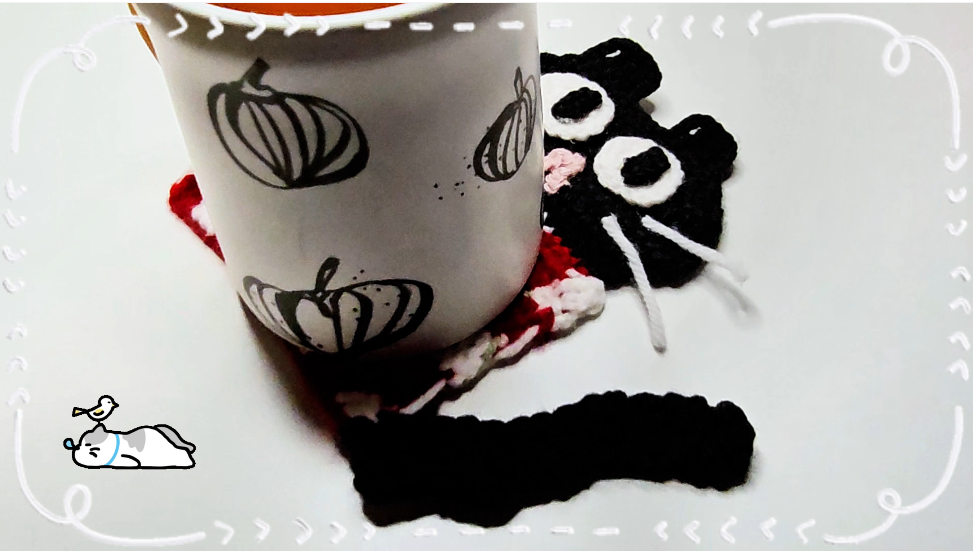
A mug resting on this coaster leaves a curious black cat peeking out beside it. Oversized white eyes, a pink nose, and white whiskers give the face its expression, while a long black tail completes the silhouette.
The main resting area is a rectangular plaid panel in red, white, and sage green. The cat head extends beyond it, so the decorative features can remain visible while the mug sits on the flatter body section.
This project combines colorwork with small crochet details and assembly. Use the Crochetnotes video below for the exact stitches and shaping, and these notes to plan the palette, arrange the face, and test the finished coaster.
Choose Yarn for the Whole Project
The tutorial lists medium-weight yarn, a crochet hook, a yarn needle, and scissors. It does not specify an exact hook size in the public description.
For a washable coaster, cotton or a suitable cotton blend is a practical starting point. Check the care instructions for every color you use.
Keep the main yarns similar in thickness. A heavier head yarn can create a bulky join against the plaid panel, while thick eye pieces may stand much farther above the surface.
Colors for the Pictured Version
- Black for the head, tail, and pupils.
- White for the eyes, whiskers, and part of the plaid.
- Red and sage green for the remaining plaid sections.
- Pink for the nose.
Choose the body palette before starting. The red connects the contrasting blocks in the pictured panel; white and sage keep the pattern easy to read.
Work the Plaid Body Carefully
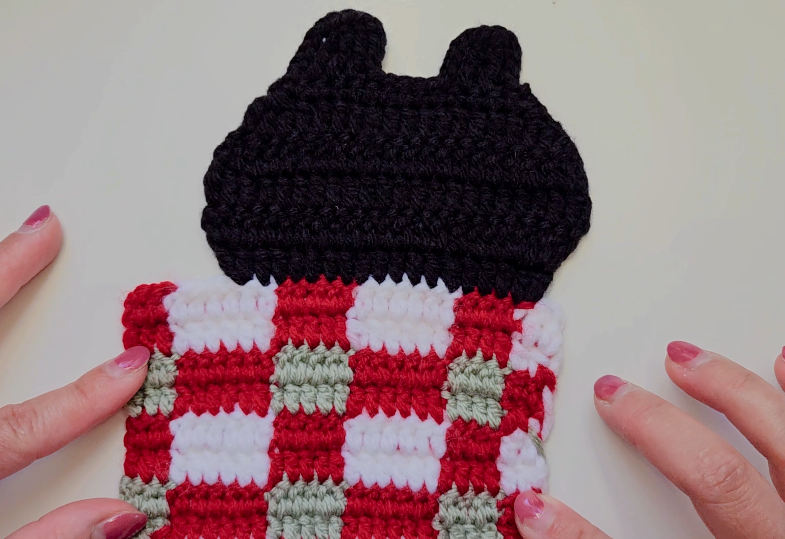
Follow the video’s color sequence and stitch placement. Count the stitches at the end of each row so the panel maintains its width.
At each color change, keep the yarn snug without pulling the neighboring block inward. Uneven tension can make the panel narrow at the joins even when the stitch count is correct.
Lay the work on a flat surface periodically. Check both side edges and compare the size of the color sections.
If the colorwork begins to ripple or bunch, inspect the tension at the changes before adding more rows.
Keep the Reverse Side Tidy
Follow the demonstrated method for managing the unused colors. Avoid loose strands that hang away from the back or catch when the coaster is moved.
Weave ends through matching-color stitches where possible. Check the front before trimming, particularly where dark yarn meets white.
The body is the practical part of the mug rug, so aim for an even surface rather than compensating for loose color changes with tight finishing stitches.
Shape the Cat Head and Ears
Follow the tutorial to form the head outline and ears. Check their placement before attaching the facial details.
The ears establish the cat silhouette, but they do not need to be stretched into sharp points. The pictured version has softly rounded ear shapes.
When joining the head to the plaid body, keep the seam even. Pulling it too tightly can gather the top edge of the panel or make the head curl upward.
Arrange the Oversized Eyes
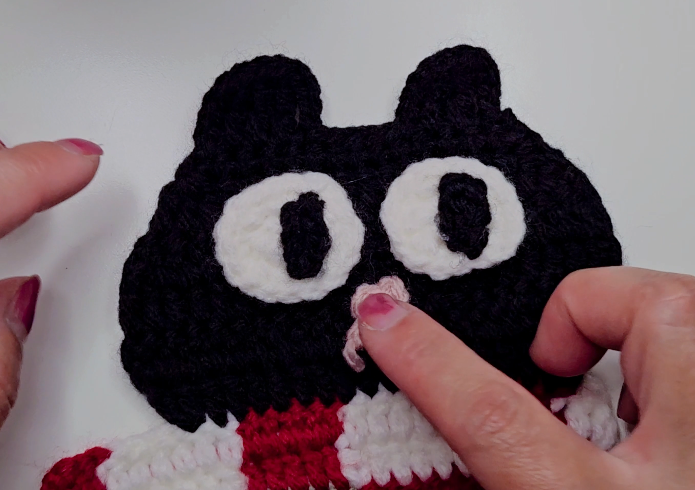
Make the white eye pieces and black pupils according to the video. Position both eyes before securing them.
Check the face from a little distance. Their spacing and pupil angles have a stronger effect on the expression than a tiny difference in stitch size.
Compare:
- The height of the two eyes.
- The space between them.
- Their distance from the ears.
- The room left below for the nose.
Attach the pieces without tightening the seams enough to cup the white circles. Keep the facial details on the head, clear of the mug’s intended resting area.
Add the Pink Nose and Whiskers
Test the nose position between and below the eyes before attaching it. A small shift can make the face look noticeably more balanced.
Follow the video for the whisker finish. Keep them clear of the central plaid area so they do not lie beneath the mug.
Inspect the attachments and yarn ends closely. Decorative strands should not loosen when the coaster is picked up or washed.
Attach the Tail
The black tail extends from the body and provides another recognizable cat detail. Follow the demonstrated construction and joining position.
Arrange it beside the panel rather than across the mug’s resting area. Check that the attachment holds without pulling the panel’s edge into a fold.
If it naturally curves, let that shape become part of the design. Avoid stretching it straight just to make the outline perfectly symmetrical.
Test the Coaster with Your Mug
Place the finished mug rug on a level surface and set an empty mug on the plaid panel.
Check that the base rests securely and stays clear of the raised eyes, head seam, and tail attachment. A wide mug may need more flat space than the pictured example.
If the mug rocks, inspect what is underneath it. A yarn knot, folded edge, or decorative strand may be the cause.
For a future version, follow any sizing guidance in the tutorial rather than adding stitches randomly to the colorwork repeat.
Watch the Complete Tutorial
The video demonstrates the plaid body, head, tail, eyes, nose, and assembly.
Useful chapter points:
- 0:20: Materials.
- 0:29: Plaid body.
- 4:20: Cat head.
- 8:47: Tail.
- 10:00: Eyes.
- 11:38: Nose.
- 12:17: Assembly.
Pause during the first color changes and before attaching the eyes. These are useful points to check the fabric and expression.
Choose a Coordinated Palette
Keep the black-and-white face and change the plaid colors to suit your space. Burgundy, cream, and olive create a quieter version, while pink, ivory, and sage give it a softer appearance.
You can also change the cat color, but retain enough contrast around the eyes and pupils for the expression to remain clear.
For a set, repeat the same head color and vary the plaid panels. Use the same yarn range and hook so the coasters remain similar in size.
Care and Gift Presentation
Follow the yarn care instructions. After cleaning, arrange the panel, ears, whiskers, and tail, then dry the piece flat.
Wash a new multicolored coaster separately at first and check for color transfer, particularly around the white sections.
For a gift, pair the coaster with a mug that fits comfortably on the panel. Include a care note and pack the piece flat so the eyes and tail are not crushed.
Watch every stitch up close
Pair these written notes with the complete video tutorial.
Made with yarn, shared with love. 🧶💗