
My First Crochet Cardigan: Planning a Color-Block Patchwork Garment
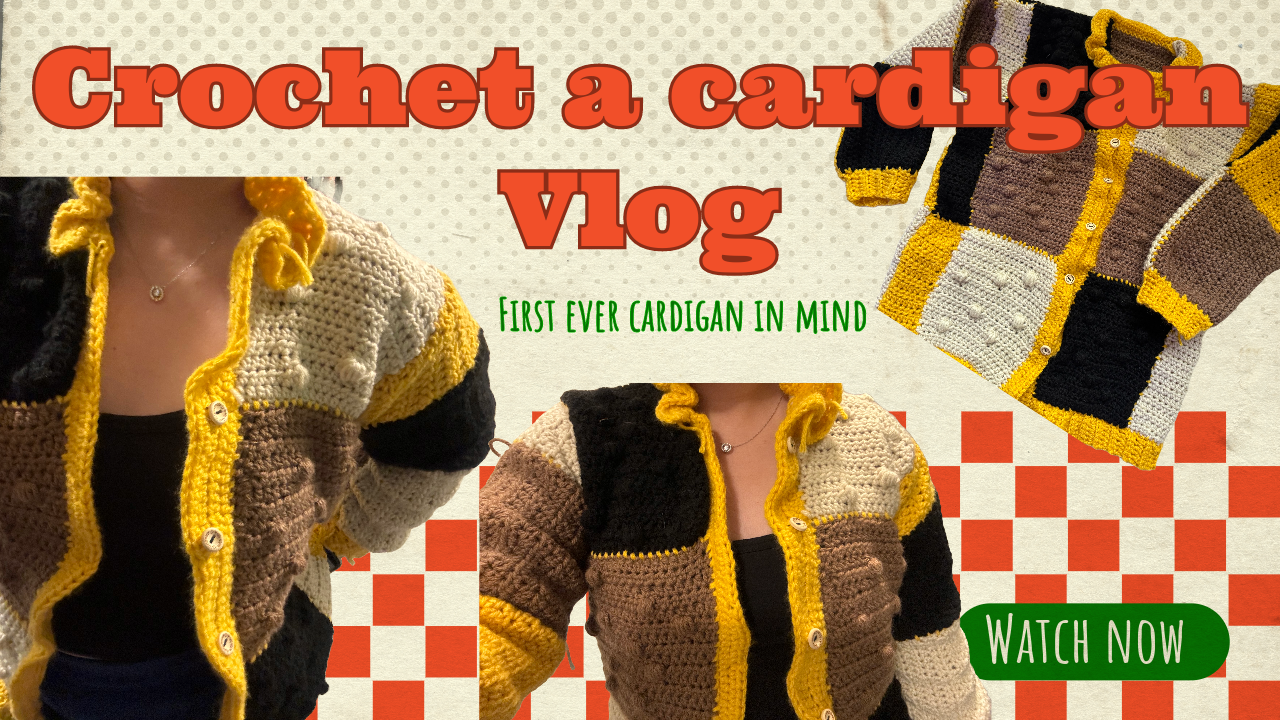
Large blocks of cream, brown, black, and golden yellow give this cardigan its patchwork character. Yellow joins and edging connect the contrasting pieces, while ribbed-looking cuffs, a soft ruffled neckline, and pale buttons finish the garment. It is an appealing example of how familiar stitches can become a substantial wearable through repetition and assembly.
The accompanying video is a short record of a first cardigan, from a drawn layout to crocheted pieces and finishing. It does not establish a graded, stitch-by-stitch pattern for multiple sizes. This article explains the visible construction and provides a measurement-led planning method, so you can make informed decisions without treating one person's garment as a guaranteed fit.
Read the layout before choosing stitch counts
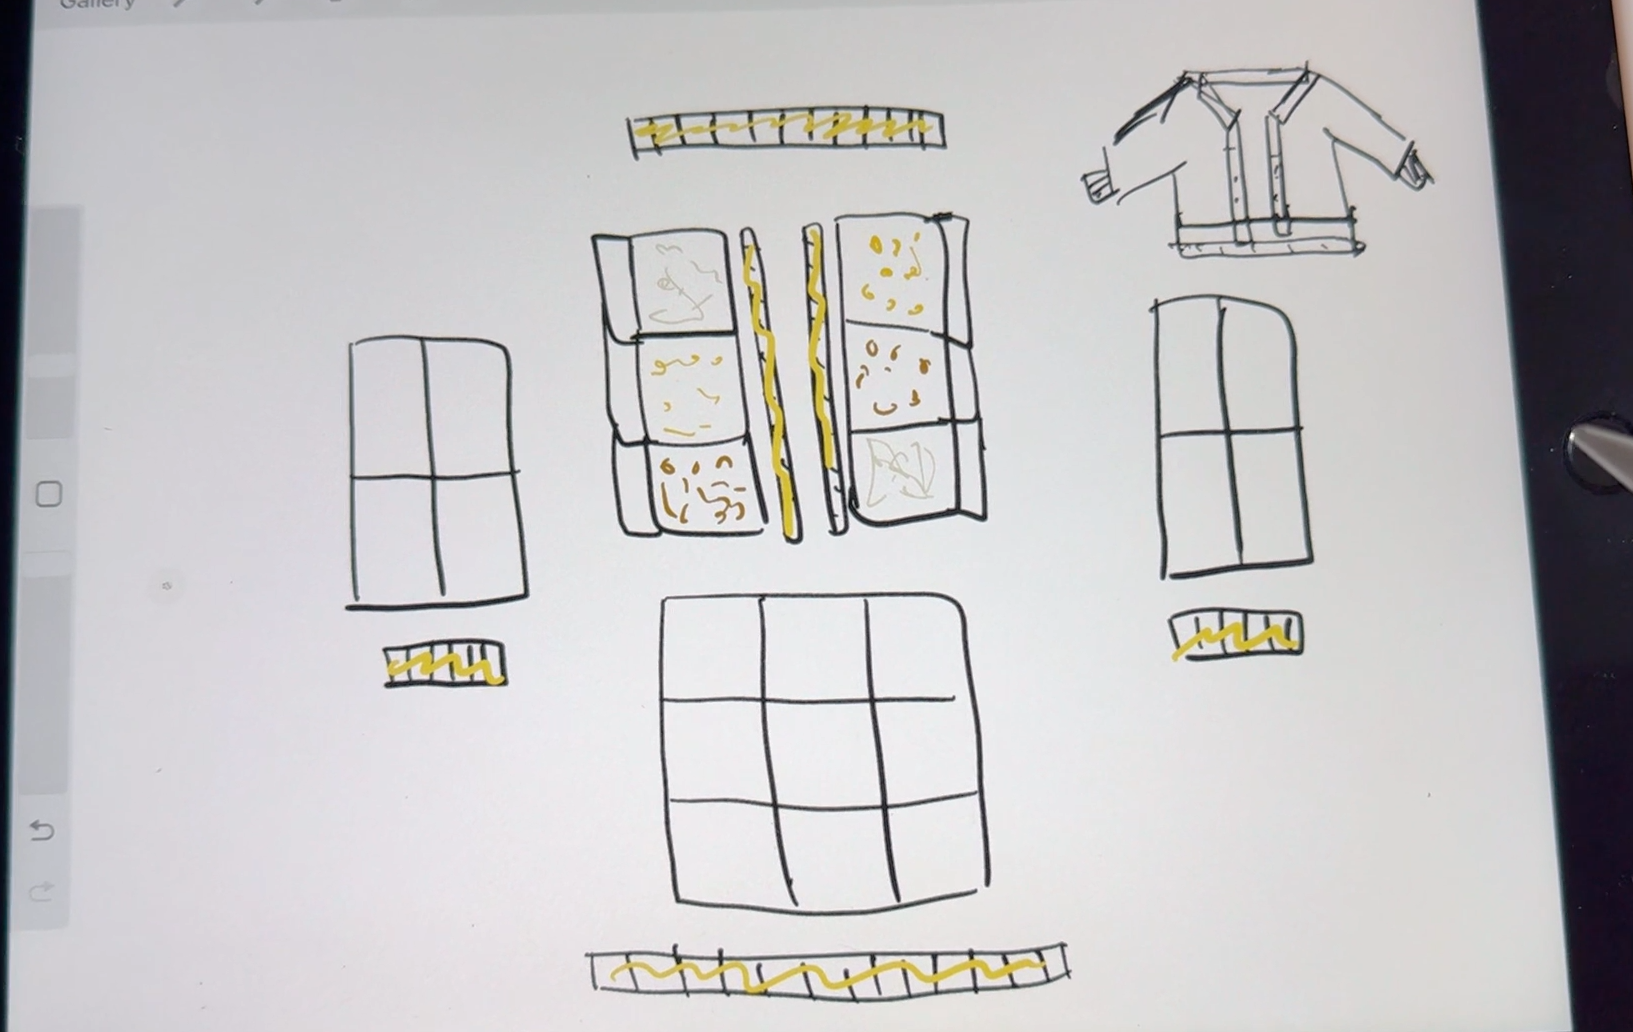
The design sketch divides the garment into body panels, two sleeves, and separate edging strips. The back is drawn as a three-by-three grid; each front has a vertical column of three main blocks; and each sleeve has a two-by-two block arrangement.
| Section | Main-block layout in the sketch | Planning implication | | --- | --- | --- | | Back | 3 across × 3 high | The block width and height affect the whole torso | | Two fronts | 1 across × 3 high for each front | Additional front-edge sections and bands affect coverage | | Two sleeves | 2 across × 2 high for each sleeve | Sleeve length includes the cuff and shoulder placement | | Edging | Separate narrow strips and worked borders | These add measurements beyond the block grid |
That drawing contains 23 main blocks: nine at the back, six across both fronts, and eight across both sleeves. Treat this as the demonstrated layout, not a rule that every size needs exactly 23 identically sized squares.
The front outlines include narrower sections beside the main blocks. Do not assume that the two single-column fronts alone provide the same combined width as a three-column back. The front opening, side coverage, and finished bands need to be considered together.
Materials and fabric choices
Prepare compatible yarns in the four colors, suitable hooks, scissors, a yarn needle, markers, a measuring tape, and buttons chosen before finishing the buttonholes. The video shows more than one hook during the process, but this guide does not assign an unverified diameter or yarn weight to the project.
Choose yarns by the fabric they produce together. A firm black square and a very elastic cream square may have the same unblocked dimensions yet behave differently after joining. Make and wash samples in each color if their fibers, thicknesses, or construction differ.
The main fabric uses half-double crochet. Some finished blocks also show texture, so an all-plain version should be treated as a simplified adaptation rather than a claim that every visible square follows one identical decorative chart.
1. Establish the fit with real measurements
Lay a cardigan you enjoy wearing on a flat surface. Record the back width, overall length, shoulder placement, upper-sleeve width, sleeve length, cuff opening, and armhole depth. Note whether you want similar ease or a different fit.
Measure sleeve length from the intended shoulder seam. A dropped shoulder already adds length along the arm; combining that with a full shoulder-to-wrist sleeve measurement can make the sleeves too long.
Also decide whether the fronts should meet comfortably when buttoned. Evaluate that with the layers you intend to wear underneath, rather than using an open-front photograph as proof of chest coverage.
2. Swatch the main stitch
For US half-double crochet: yarn over, insert the hook, draw up a loop, then yarn over and pull through all three loops. Work a sample large enough to measure its middle away from the edges. Use the same turning-chain treatment throughout.
Wash and dry the sample according to the yarn label before recording stitches and rows per centimeter. Check its drape as well as its gauge; a stiff swatch will produce a stiff garment even when the dimensions are correct.
Use these planning calculations:
`Approximate working stitches = desired block width × stitches per centimeter`
`Approximate rows = desired block height × rows per centimeter`
For example, a hypothetical gauge of 1.5 stitches per centimeter would require about 24 working stitches across a 16 cm block. This is an illustration, not a source stitch count. Lifting chains, decorative patterns, and borders still require their own treatment.
Make one complete sample block, including any planned border, before producing the full set. The finished block size is the number that matters for the layout.
3. Plan the colors and make the blocks
Draw the back, fronts, and sleeves separately, then label each block with a color. The video uses an asymmetric arrangement: repeated colors connect the garment without making both sides identical. The consistent yellow finishing gives that varied layout a common outline.
Before crocheting all the pieces, check the balance of light and dark areas in your drawing. A large black section at one shoulder will look different from the same section near the hem. Move paper color labels around until the arrangement feels intentional.
For a plain block, work the established number of half-double crochets each row, turn consistently, and continue to the settled height recorded from your sample. Mark both edge stitches if they are difficult to distinguish. Compare width after several rows rather than waiting until the block is finished.
Label finished pieces with their intended locations and top edges. Record the yarn, hook, working stitch count, and rows for each type. If you choose to add textured motifs, sample them separately: a raised pattern can change both gauge and weight.
4. Compare the panels before joining
Prepare the pieces as you prepared the swatch, then let them dry fully. Lay out the whole garment and compare adjoining edges without stretching them to fit.
The following checks prevent common assembly problems:
- Main blocks that share a seam should have compatible finished edge lengths.
- Both front sections should end at the same level when placed beside the back.
- Sleeve pairs should agree in finished dimensions, not merely in row count.
- The front-edge additions should provide the coverage planned during measurement.
Resolve an undersized block before adding several seams around it. Stretching one edge to match may transfer the distortion into the next panel.
5. Assemble with a centered, wearable shape
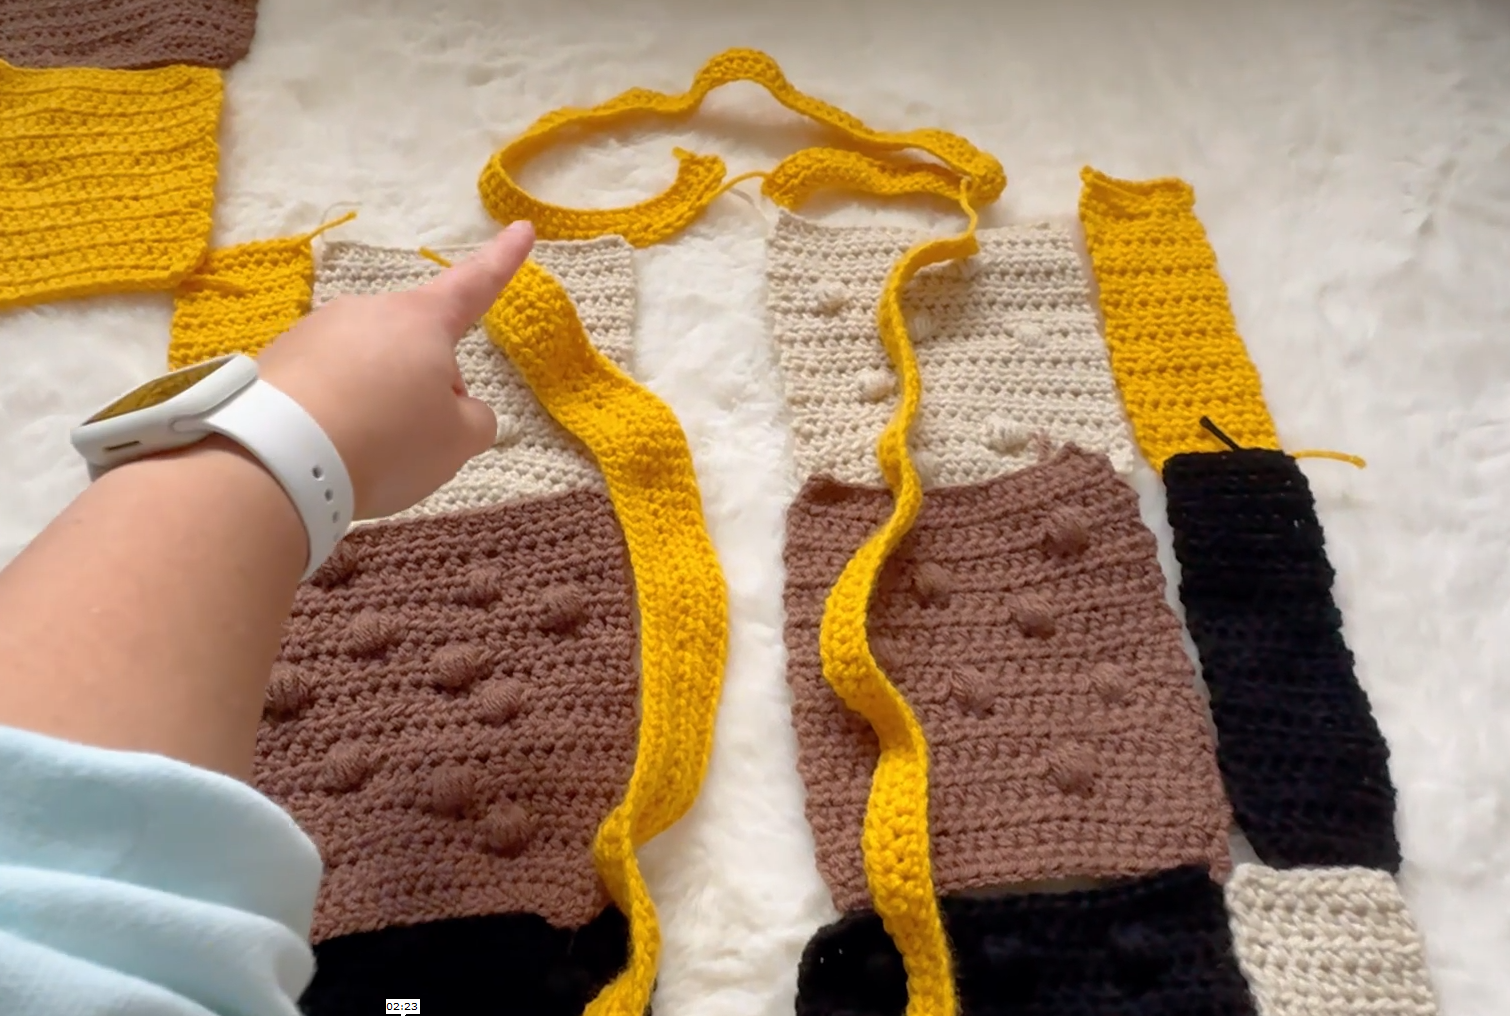
The project shows contrasting yellow connections between the pieces. If using a similar visible join, make a small seam sample first to see how its tension and thickness affect the finished block dimensions.
A practical assembly sequence is to join the blocks into the individual back, front, and sleeve sections, then align the shoulders. Position the sleeve center against its shoulder point before completing the sleeve and side connections. Use removable markers to distribute each seam rather than securing only the two ends and hoping the lengths match.
This sequence is construction guidance, not a claim that the short video specifies every seam in that order. Keep the work accessible for a trial fitting. Check the upper arms, underarms, shoulder placement, and overall length before permanently finishing every opening.
Take care where several block corners meet. A thick accumulation of knots can feel uncomfortable and prevent the fabric from hanging smoothly. Secure and weave the ends through their matching color sections, spreading them out where possible.
6. Add cuffs, hem, and front finishing
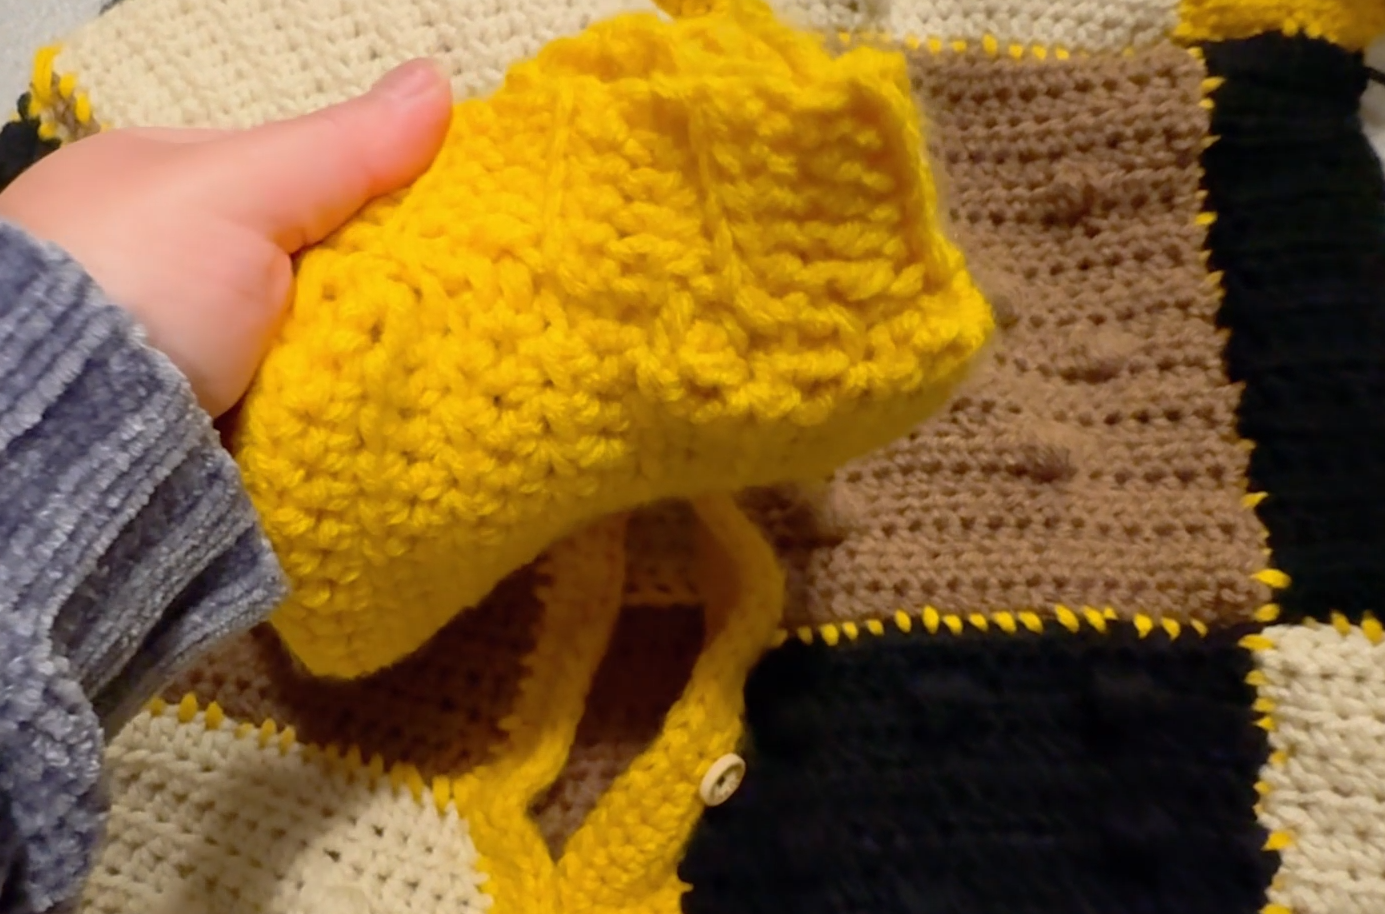
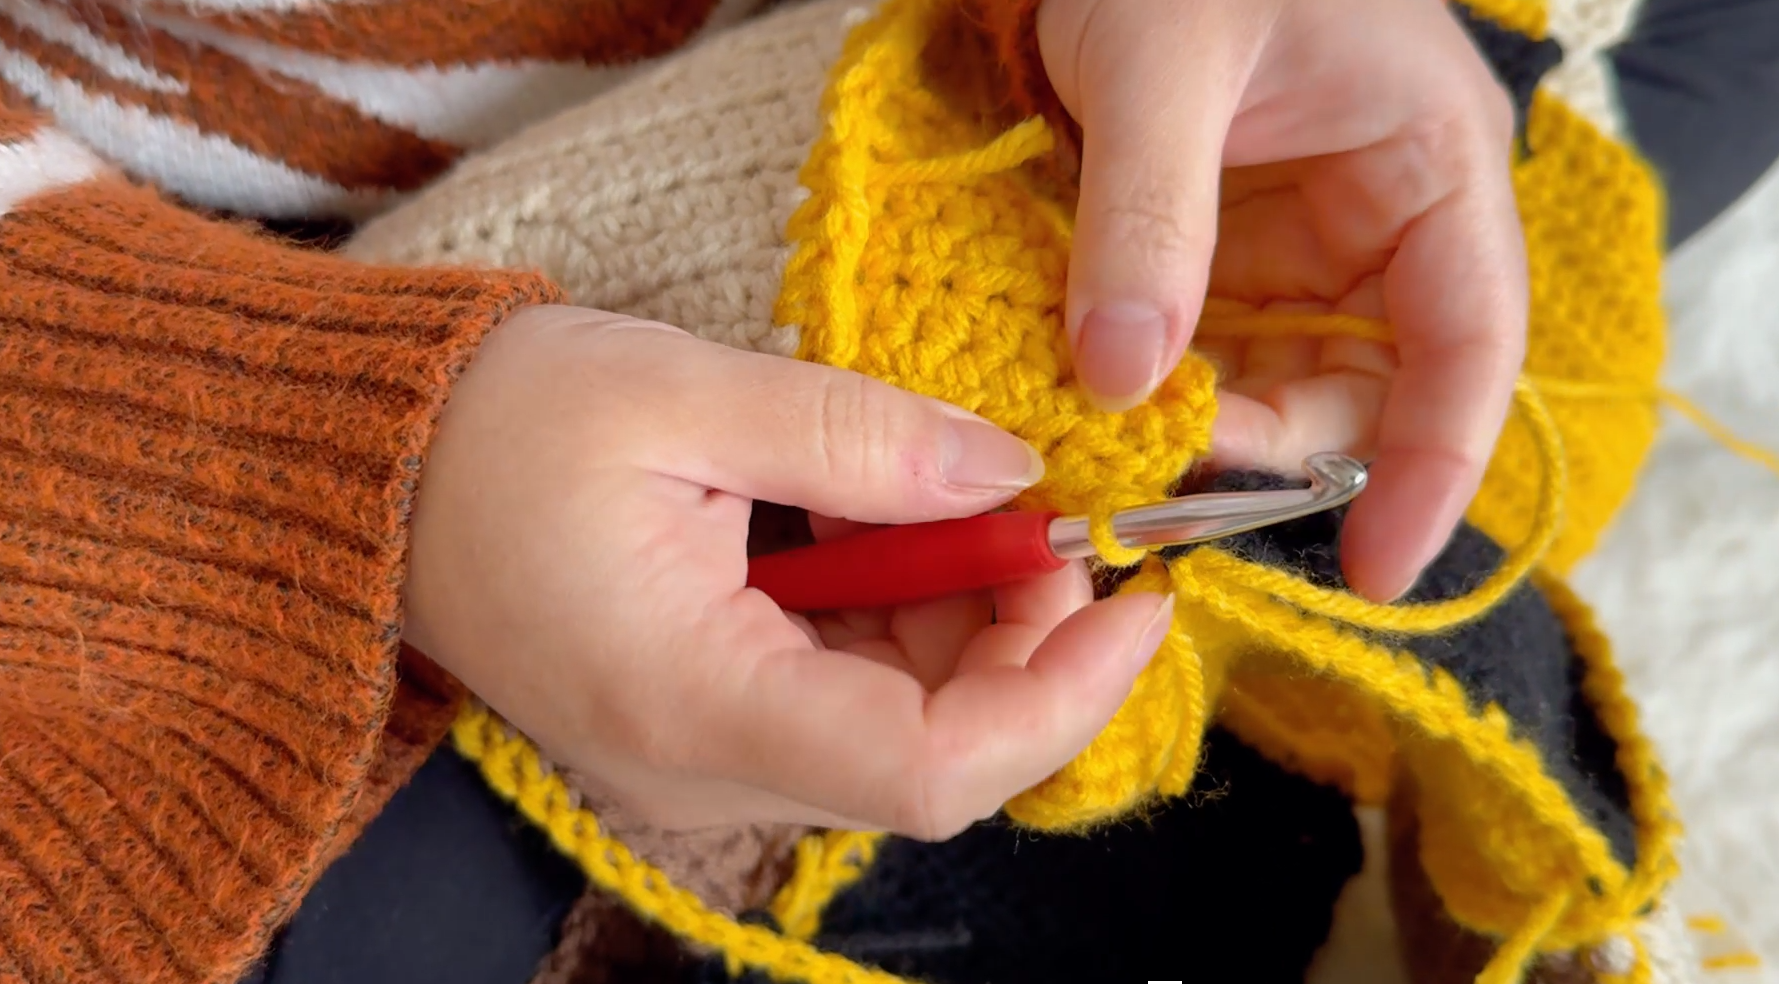
The video shows separate narrow yellow cuff pieces with a ridged appearance. Fit each cuff to the intended wrist opening before joining it to the wider sleeve. A cuff may gather the sleeve, but it should still pass comfortably over the hand.
Keep the hem and front bands relaxed. If stitches are picked up along a row-end edge, test their distribution over a short section before proceeding around the garment. Too many picked-up stitches cause waving; too few draw the edge inward. There is no universal pickup ratio established for this project, because the correct distribution depends on the actual fabric.
Treat the ruffled neckline as a separate decorative area. Intentional fullness around the neck should not be copied automatically into the straight front edges. Compare the developing ruffle with the video, then try the garment on to check how it falls.
7. Plan buttonholes with the actual buttons
Choose the buttons before finalizing their openings. Test a button through a sample in the band fabric: it should pass through without excessive stretching and stay in place when the sample relaxes.
With the cardigan lying flat, mark the top and bottom closures first, then distribute the remaining positions. Check that the opposite front edges align when fastened. A decorative button that works on an unstressed sample may still pull if the finished garment lacks enough chest room.
Sew the buttons securely without bunching the band. After fastening the fronts, check the garment while sitting and reaching forward as well as standing still.
Troubleshooting a first patchwork garment
The body is wide but the fronts do not meet
Revisit the panel layout and front-edge additions. Three back columns and two front columns are not equivalent widths. The solution may involve panel coverage rather than simply choosing a larger button band.
Equal row counts produced different block heights
Compare the yarns and your tension. Washed measurements matter more than matching a number of rows. Correct the block that differs before joining it between finished neighbors.
The sleeves are too long
Check whether the dropped shoulder and cuff were included in the planned length. Measure the complete path from shoulder placement to wrist instead of treating the sleeve panel in isolation.
The seams pull the fabric into ridges
Loosen the joining tension and check that matching markers remain aligned. A contrasting seam should connect the pieces without shortening their edges.
The neckline is full but the hem waves too
The neckline ruffle is intentional; the hem may have an excess of picked-up stitches. Evaluate these edges separately rather than accepting every wave as part of the design.
Watch the first-cardigan project
The 6-minute-49-second video shows the sketch, blocks, contrasting joins, yellow finishing, and completed garment. Use it as the visual reference for this construction guide.
Keep the notes that make the next cardigan easier
A first cardigan teaches more than repeating a stitch. Its fit depends on settled block measurements, coverage, seam tension, and finishing width. Keep the color map, swatch measurements, and adjustments with the finished project. Those notes turn the experience into a useful starting point for another garment with a different palette or fit.
Watch every stitch up close
Pair these written notes with the complete video tutorial.
Made with yarn, shared with love. 🧶💗