
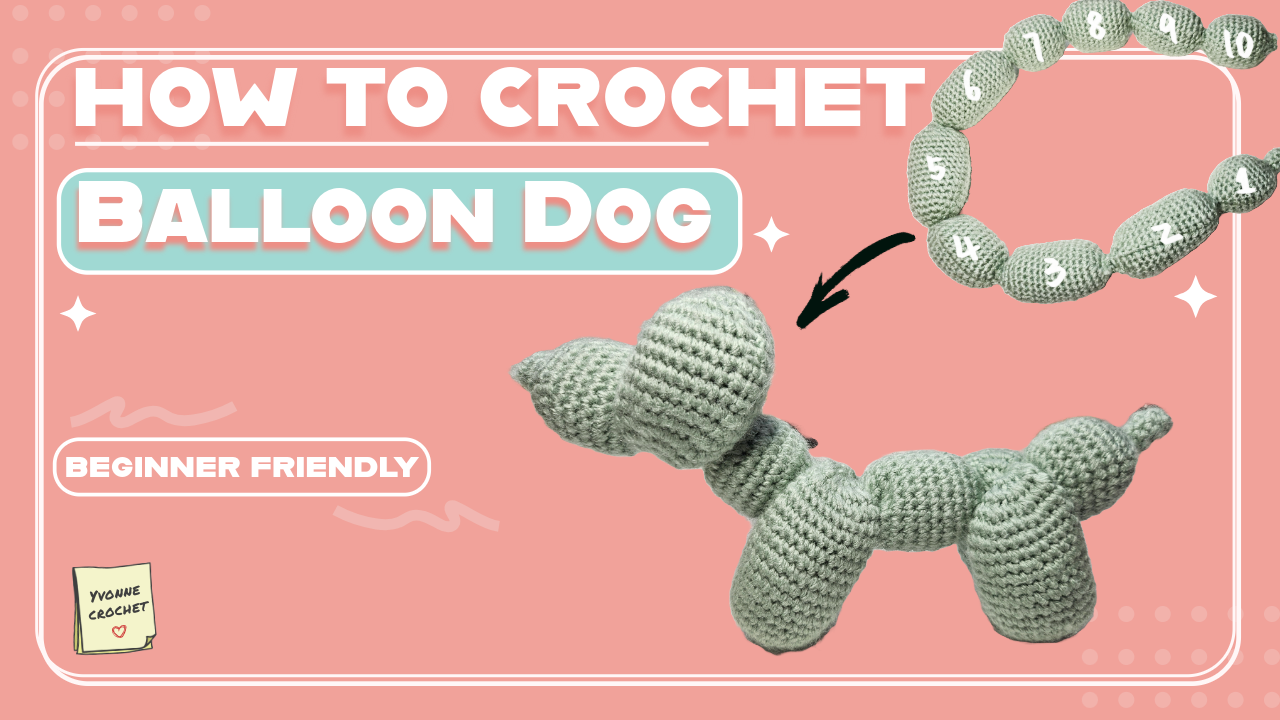
How to Crochet a Balloon Dog: Two Ways to Shape It
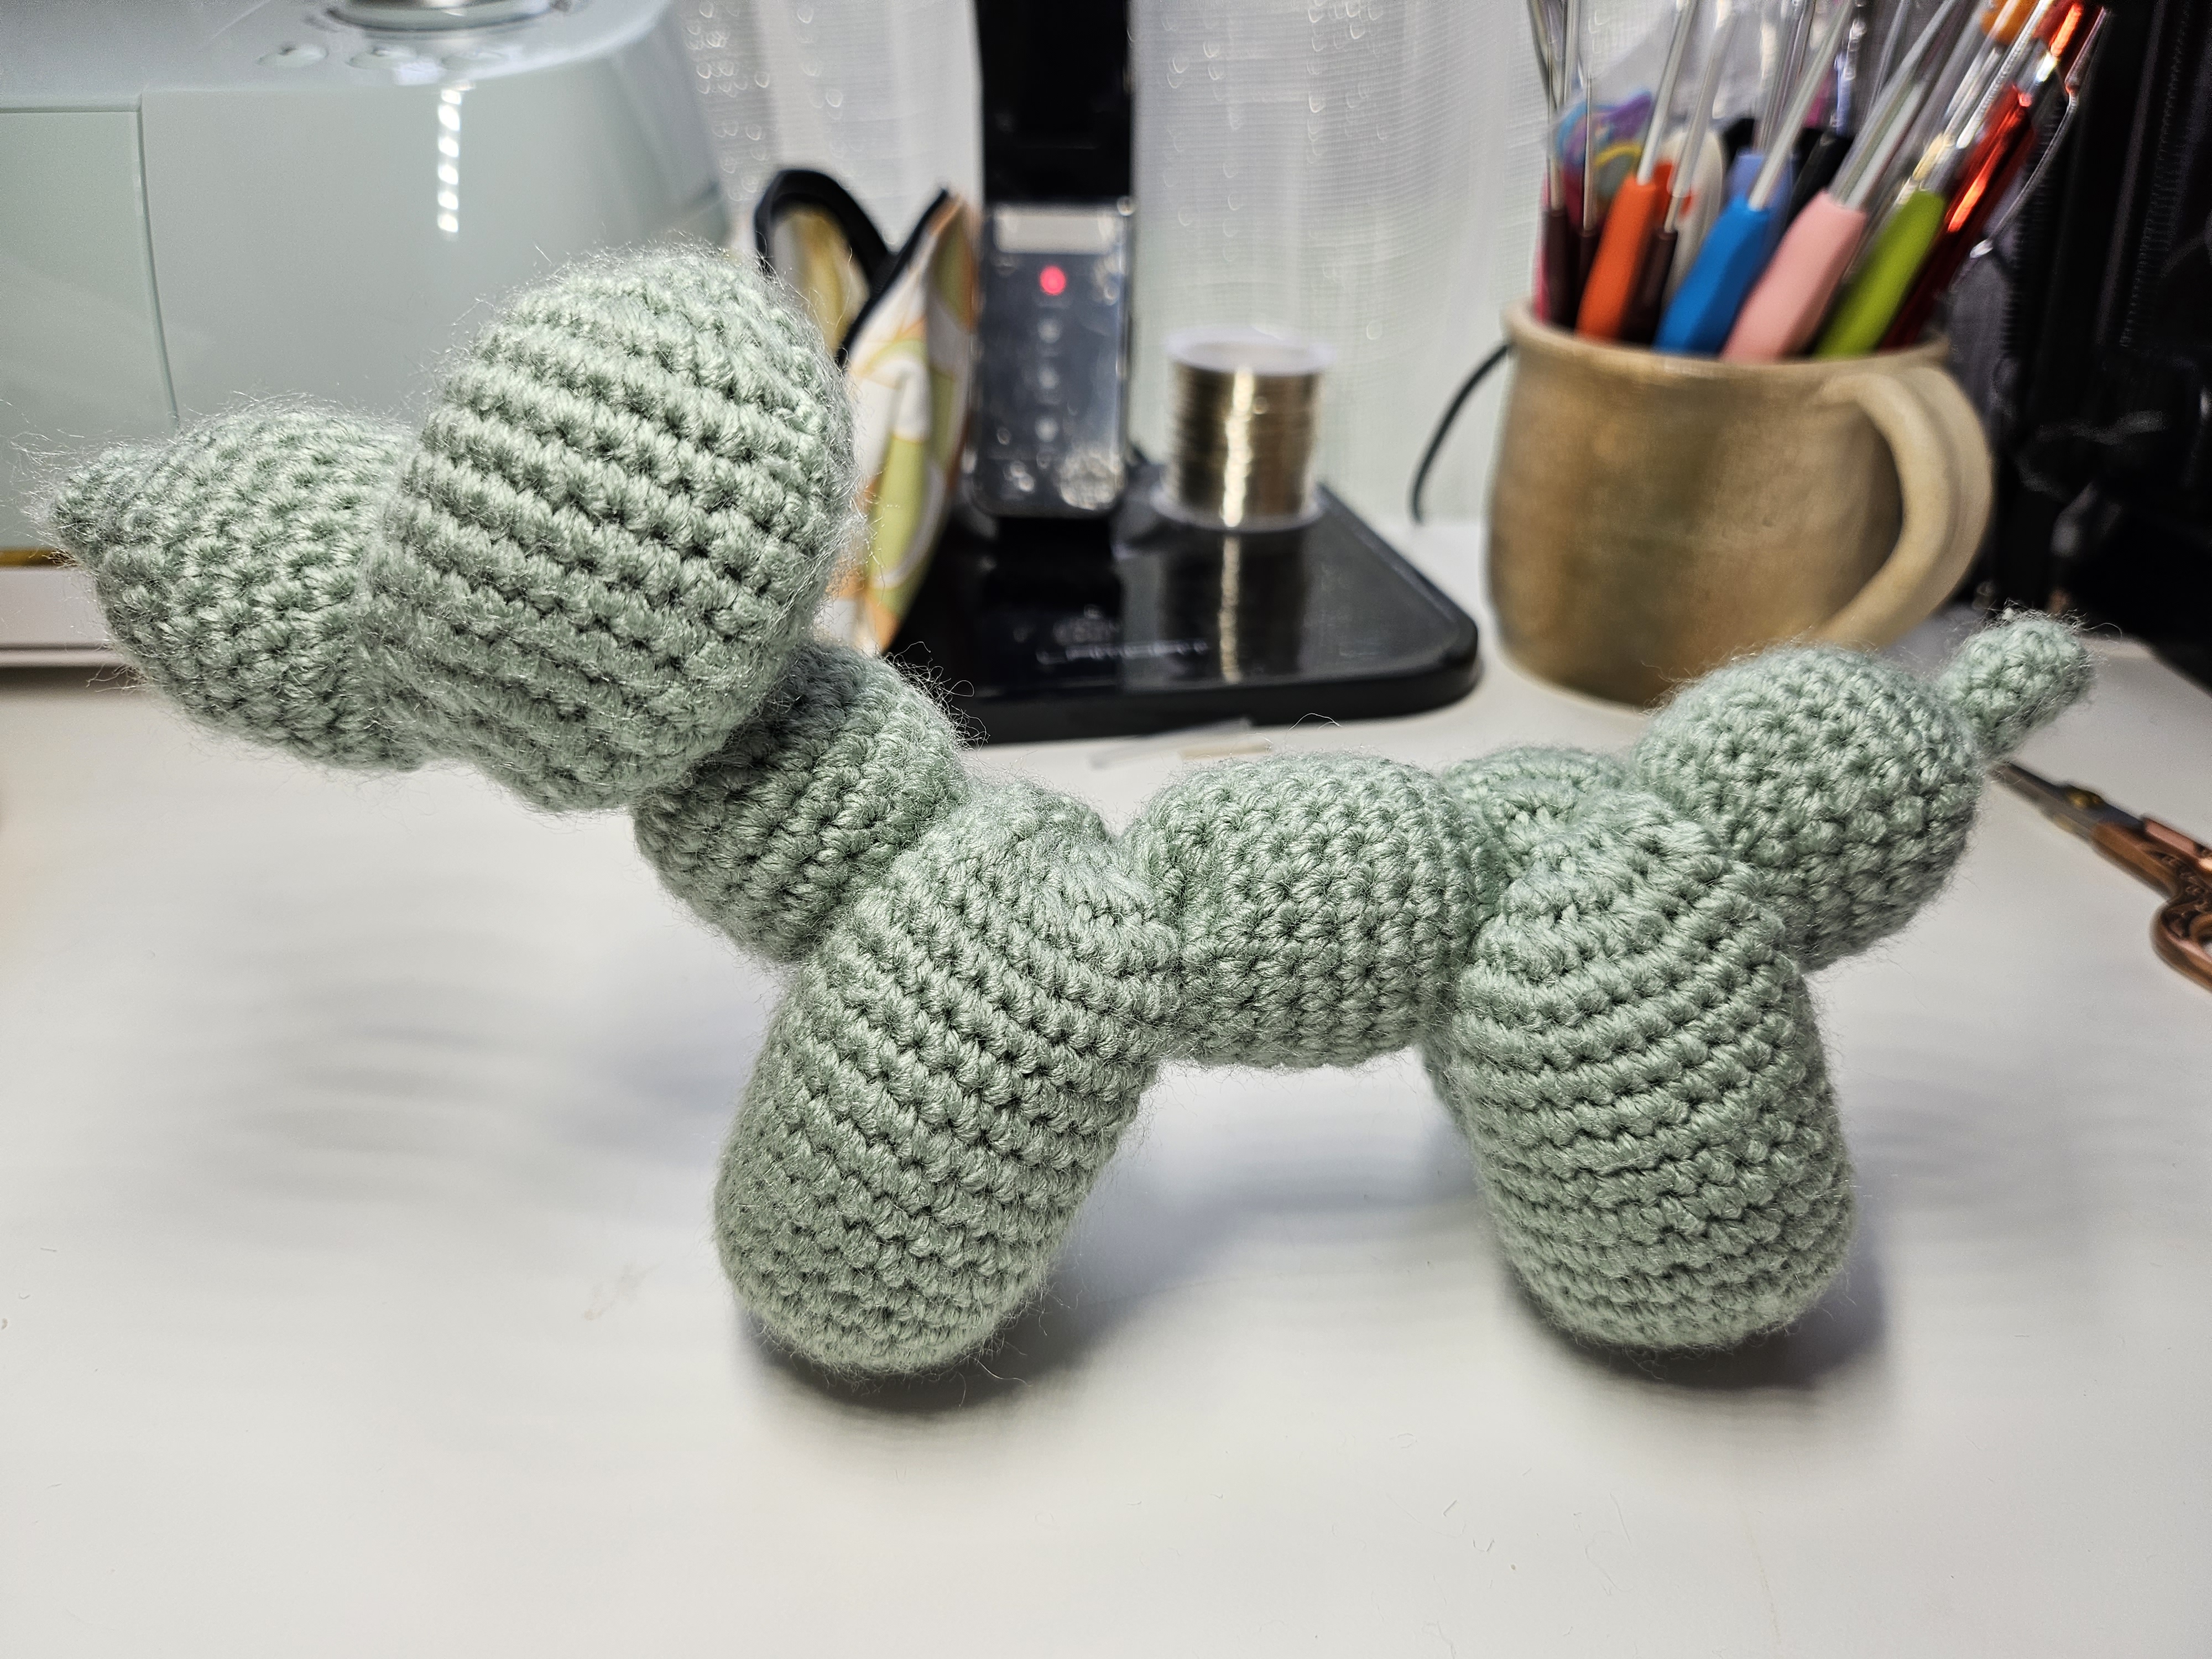
This crochet dog borrows the silhouette of a twisted balloon animal: rounded legs, paired ears, a small muzzle, and a raised tail. The interesting part is how it gets there. Before assembly, it is a long connected sequence of stuffed sections, with narrow transitions between them. Folding those sections into pairs creates the recognizable dog.
The shape therefore depends on more than making a long tube. The source uses increases, straight rounds, decreases, and narrow connections to establish different sections. Their lengths and order determine where the legs and ears sit.
This is a detailed video companion with a verified opening chart and later checkpoints, not a complete transcription of every round. The video continues beyond Round 160. The intermediate ranges not reproduced below must be followed in the source; they should not be replaced with an assumed identical repeat for every section.
Materials and fabric
Prepare smooth yarn in one main color, a hook that produces close single crochet, fiberfill, a yarn needle, scissors, and locking stitch markers. The source shows a sage-green yarn with a medium-weight 4 label. Exact project hook size, yardage, and finished dimensions are not established here.
The fabric needs enough firmness to hold rounded sections while remaining flexible at their connections. If your stitches are open enough for filling to show, adjust the yarn-and-hook combination before making a long piece.
Keep small scraps of contrasting yarn available to label the completed sections. Numbering them is much easier than trying to identify similar rounded pieces after the whole length is finished.
The ten sections and their final positions
The numbered comparison image near the end of the tutorial is the assembly map.
| Source section | Position in the finished dog | | --- | --- | | 1 | Tail, including its narrow starting end | | 2 and 3 | Paired hind legs | | 4 | Body | | 5 and 6 | Paired front legs | | 7 | Neck | | 8 and 9 | Paired ears | | 10 | Muzzle |
Keep this order while crocheting. Sections 2 and 3 need to sit beside one another after folding, as do 5 and 6, and 8 and 9. They are not ten unrelated pieces to sew together in an arbitrary arrangement.
Terms and counting
US terms: sc = single crochet, inc = 2 sc in one stitch, dec = single crochet two stitches together, and ss = slip stitch. Start with a magic ring. Parentheses followed by × 6 mean to repeat that sequence six times.
The source chart includes a joining slip stitch. Count actual single crochets separately from the join. Mark the start of every round and keep the global round numbering: Part 2 starts at Round 18, rather than restarting at Round 1.
The totals below are calculated from the displayed formulas. For example, `(sc, inc, sc) × 6` consumes eighteen base stitches and produces twenty-four stitches.
Verified opening chart: Part 1
| Round | On-screen instruction | Actual sc count | | --- | --- | --- | | 1 | 5 sc, ss | 5 | | 2 | 4 sc, sc inc, ss | 6 | | 3–5 | 6 sc, ss | 6 each round | | 6 | 6 sc inc, ss | 12 | | 7 | (sc, sc inc) × 6, ss | 18 | | 8 | (sc, sc inc, sc) × 6, ss | 24 | | 9–14 | 24 sc, ss | 24 each round | | 15 | (sc, sc dec, sc) × 6, ss | 18 | | 16 | (sc, sc dec) × 6, ss | 12 | | 17 | 6 sc dec, ss | 6 |
Notice the unusual beginning: Round 1 has five single crochets, and Round 2 increases only once to reach six. Do not replace it with a familiar six-stitch start. The narrow opening section forms the tail end before the wider rounded portion develops.
Work the short six-stitch section carefully, then expand through twelve and eighteen to twenty-four. Maintain twenty-four actual stitches through Rounds 9–14. Add filling while the opening is still accessible, as shown in the video, and shape it gently before finishing the decreases.
Round 15 has one decrease inside each four-base-stitch group; Round 16 has one inside each three-base-stitch group. Round 17 uses six decreases to return to a six-stitch connection. Continue into the next numbered part rather than fastening off after every rounded section.
Verified beginning of Part 2
| Round | On-screen instruction | Actual sc count | | --- | --- | --- | | 18 | 6 sc, ss | 6 | | 19 | 6 sc inc, ss | 12 | | 20 | (sc, sc inc) × 6, ss | 18 | | 21 | (sc, sc inc, sc) × 6, ss | 24 | | 22–33 | 24 sc, ss | 24 each round |
This establishes the first hind-leg section. Keep the narrow connection flexible and fill the rounded length progressively. Do not add extra straight rounds simply to make the piece look more cylindrical: the later fold depends on the intended section proportions.
The table stops at Round 33. Continue the remaining decreases and subsequent numbered sections from the on-screen chart. The following checkpoints help you recognize your position, but they do not supply the omitted ranges.
Later chart checkpoints
| Numbered part | Verified round and formula | Calculated result | | --- | --- | --- | | 3 | R54: (sc, sc dec) × 6, ss | 12 sc | | 4 | R69: (sc, sc dec) × 6, ss | 12 sc | | 5 | R89: 6 sc dec, ss | 6 sc | | 6 | R108: 6 sc dec, ss | 6 sc | | 8 | R122: 6 sc, ss | 6 sc | | 9 | R138: 6 sc inc, ss | 12 sc | | 10 | R154: (sc, sc inc) × 6, ss | 18 sc |
Use a row counter or a written checklist as you follow the intervening video instructions. If you stop, record both the part number and round number. “Second leg” is less reliable than a specific round when similar shapes occur several times.
Stuffing without losing the bend points
Add small wisps of fiberfill while each rounded section is open. Guide filling into its ends, then smooth the surface with your fingers. A tightly packed center with empty ends produces a lumpy result even when the stitch counts are correct.
Keep the narrow connections supple. These are the places that bend when the dog is shaped. Forcing dense filling through them can make the later fold-through movements difficult and stretch the stitches.
Before closing the final end as demonstrated, compare the full piece with the numbered source image. Identify the tail, all three pairs, the body, and the neck. Secure and conceal the final tail according to the closure shown in the tutorial.
Method 1: position and sew
The source presents sewing as one way to hold the dog shape. Use its numbered finished image to arrange the parts: bring 2 and 3 together as hind legs, 5 and 6 together as front legs, and 8 and 9 together as ears. Section 4 bridges the leg pairs; 7 rises toward the head; 10 projects as the muzzle.
Temporarily hold the arrangement with markers before sewing. Look from the front, side, and back to check that the leg pairs are balanced and the muzzle faces forward.
Use small securing stitches at the required contact points without pulling a long strand visibly across a rounded section. Check the outline after each attachment. This paragraph explains the assembly plan; the source does not provide a numbered written seam-stitch count, so choose placements by the demonstrated contact points rather than an invented seam formula.
Method 2: fold and pass through
The closing demonstration shows a fold-through method using the narrow connections. Work gently; these are soft stuffed shapes, and excessive pulling can open the fabric.
- Fold sections 2 and 3 together and pass section 1 through. This forms the paired hind legs with the tail emerging behind them.
- Fold sections 5 and 6 together and pass the remaining free length through, following the video's direction. This establishes the front-leg pair while leaving the neck and head sections available.
- Fold sections 8 and 9 together and pass section 10 through. The paired sections become the ears, with the muzzle projecting through the opening.
These steps reproduce the order stated on screen. Watch the hand positions for the direction of each pass; pulling the correct section through from the wrong side can reverse the orientation. Ease the connections into place and redistribute the filling gently afterward.
If a section will not pass without strong force, stop and check the fold, connection flexibility, and amount of stuffing. Do not use the narrow neck of the crochet as a handle for yanking a large stuffed part through.
Which method should you choose?
Sewing lets you position the parts and secure each contact gradually. The fold-through method is useful for understanding the balloon-animal construction and avoids adding those positioning seams. Both depend on correctly proportioned sections and flexible connections.
For a display piece that will be handled often, inspect the final arrangement and gently test whether it stays in position. If you choose to add securing stitches after shaping, treat them as an adaptation rather than part of the demonstrated fold-through sequence.
Troubleshooting
| Problem | Check | | --- | --- | | Filling shows through | Fabric density and stuffing pressure before changing any round counts. | | Paired legs differ | Their source round ranges, actual stitch counts, and amount of filling. | | The body twists | The orientation of each paired fold and the route of the passed-through section. | | Ears point in different directions | The 8–9 fold and the direction in which 10 passes through. | | Connections will not bend | Whether filling has been packed into the narrow transitions. | | Round totals drift upward | Whether joining slip stitches are being crocheted into as extra sc. |
Care and final checks
Conceal loose ends, check the closure, and smooth all rounded sections. Follow the yarn label for cleaning and let the filling dry completely. Reshape gently after washing instead of hanging the dog by a narrow connection.
Video tutorial
Follow the on-screen chart for all intermediate rounds. Near 1:04:00, the numbered comparison explains where the ten sections belong; the following demonstration shows the three fold-through steps. That numbered view is especially useful before final assembly.
From a long shape to a little dog
The transformation works because each section has a purpose. Keep the global round numbers, label the sections as you finish them, and preserve flexibility at their connections. With the pieces in the right order, the final folds turn an initially puzzling length of crochet into a clear, playful silhouette.
Watch every stitch up close
Pair these written notes with the complete video tutorial.
Made with yarn, shared with love. 🧶💗