

A Little Christmas Wreath for Your Table
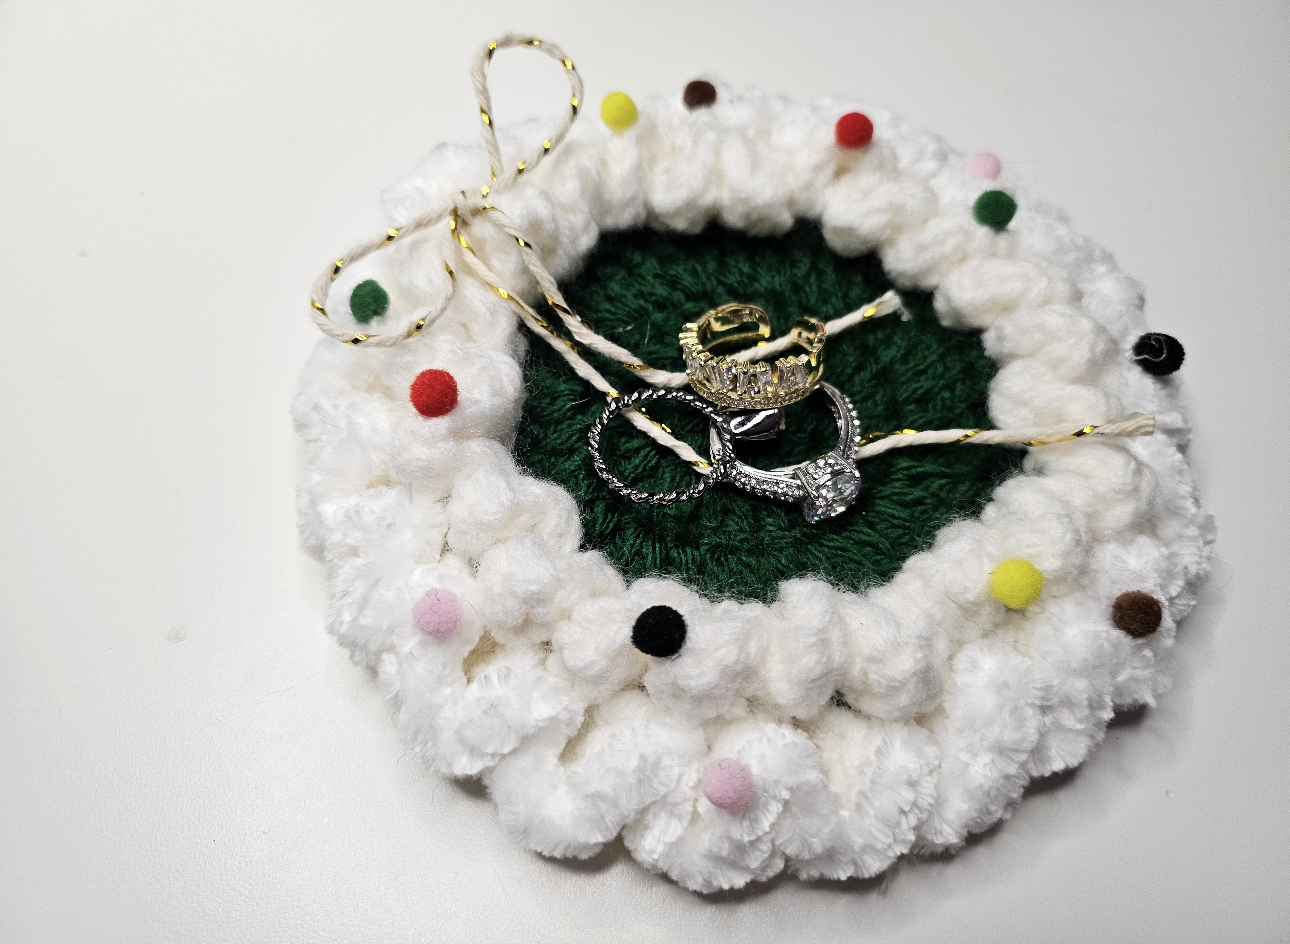
This crochet wreath has a deep green circular center surrounded by a thick, softly textured white edge. Small colored pom-pom details sit around the border, and a cream cord with gold accents forms a bow at one side.
The contrasting colors make the wreath shape clear. The green center provides a resting area, while the raised white border carries the festive decorations.
The finished photograph shows rings placed in the middle, suggesting another decorative use for the piece. If you want to use it beneath a mug, check that the cup base fits comfortably inside the raised edge.
Follow the video near the end for the crochet instructions and assembly. These notes focus on keeping the center flat, controlling the border tension, and positioning the decorations.
Choose Materials for Your Intended Use
For the pictured palette, prepare:
- Deep green yarn for the circular center.
- White yarn for the textured wreath edge.
- Small colored pom-poms or the decoration materials used in the tutorial.
- Cream-and-gold cord for the bow.
- A crochet hook suitable for your yarn.
- Scissors and a yarn needle.
- Attachment supplies specified in the demonstration.
Check the video for the exact yarn, hook, and decorative materials. The finished photograph does not establish those specifications or the coaster’s dimensions.
Consider the Difference Between the Center and Border
The white edging has a fuller appearance than the green center. Choose materials that reproduce the texture you want without making the rim so bulky that it crowds the usable area.
For a frequently used coaster, consider washable cotton for the base. Check the care requirements of the edging and decorations as well, since the assembled piece needs a compatible cleaning method.
A decorative version for holding rings gives you more flexibility in texture, but it still benefits from a flat center and secure attachments.
Keep the Green Center Flat
Follow the tutorial’s increases and round joins carefully. Use a marker if the starting point becomes difficult to identify.
Lay the circle on a table as it grows. It should rest naturally without forming a bowl or developing pronounced waves.
If it cups or ripples, review the stitch count and placement before adding the wreath edge. A decorative border will not reliably correct an uneven foundation.
Keep the round join at a similar tension to the surrounding stitches. Pulling it much tighter can create a visible dent in one section.
Build a Full Border Without Pulling the Base
The white edging creates the wreath’s dimensional outline. Follow the tutorial’s stitch placement and repeated sections rather than estimating the number of repeats from the photo.
Keep the working loops consistent so the textured sections have similar fullness.
Pause after completing part of the round and check the green center again. A tightly worked border can pull the base inward, while extra stitches can create waves around the perimeter.
Inspect the Inner and Outer Edges
Look at where the white section meets the green circle. The connection should sit neatly without covering substantially more of the center on one side.
Then check the outer outline. Small handmade variations are expected, but a noticeably crowded section may indicate a misplaced repeat.
Shape the texture gently with your fingers. Avoid flattening every raised section in an attempt to make the entire piece level; the central resting area is the part that needs to be stable.
Arrange the Colored Decorations First
The pictured wreath uses small accents in red, yellow, pink, green, brown, and black.
Position the decorations before attaching them. Spread the colors around the border and check the arrangement from above.
You do not need identical spacing everywhere, but leaving a few quieter sections can keep the border from looking crowded.
Follow the tutorial’s attachment method and inspect each connection. Keep any joining ends or adhesive residue hidden within the decorative area.
Place the Bow Away from the Cup Area
The cream-and-gold cord forms a small bow near the edge. Arrange it after the main border is complete so you can judge its scale.
For coaster use, keep the bow and its tails out of the area where the mug base will sit. The display photo has cord extending across the center, so adjust that placement for your intended use.
Secure the bow without pulling the white border into a tight gathered section.
Test the Finished Coaster with Your Mug
Place an empty mug on the green center before using the piece for a drink.
Check that the base rests on a stable area and does not straddle the raised white rim. Gently test for rocking.
If the mug is too wide, choose a smaller cup or make a suitably sized version. Do not rely on stretching the finished center to create additional room.
Use It as a Decorative Ring Rest
For the use shown in the photograph, place rings in the green center and keep them clear of the loose cord tails.
Choose a location where the piece will not be brushed off the table. Check that the yarn or decorative threads do not catch on delicate jewelry settings.
Watch the Christmas Wreath Coaster Tutorial
The step-by-step video demonstrates the coaster base, wreath section, and finishing details.
Pause before attaching the decorations to check the arrangement and keep the center suitable for the way you plan to use it.
Finish a Coordinated Holiday Set
Make one complete sample before preparing several. Compare the center diameter, border fullness, and usable mug area as you work.
Keeping the green and white crochet consistent while varying the small colored accents creates a related set.
Follow the care requirements of all the materials when cleaning. Let the piece dry fully and gently reshape the white edge before storing it.
A flat green center and neatly arranged white border give this little wreath its structure. Thoughtful decoration placement lets the festive details remain visible while preserving its everyday function.
Watch every stitch up close
Pair these written notes with the complete video tutorial.
Made with yarn, shared with love. 🧶💗