
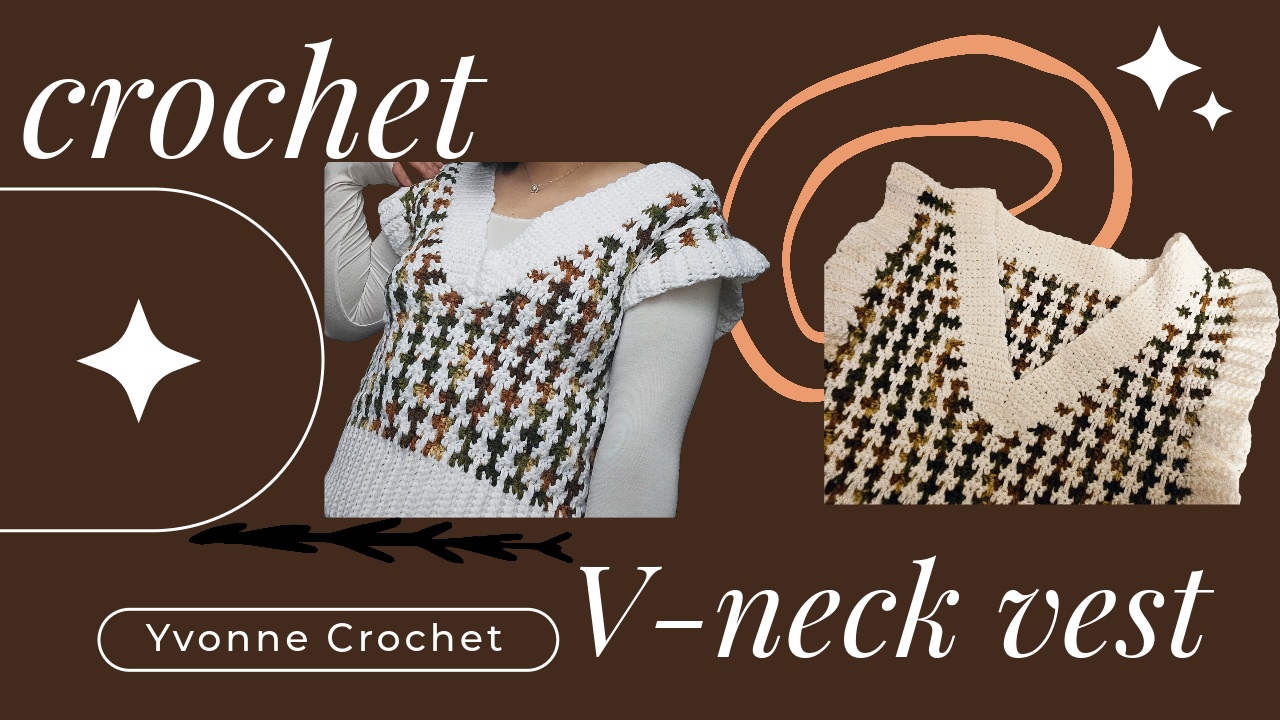
Crochet a Two-Color V-Neck Vest with an Afghan-Style Pattern
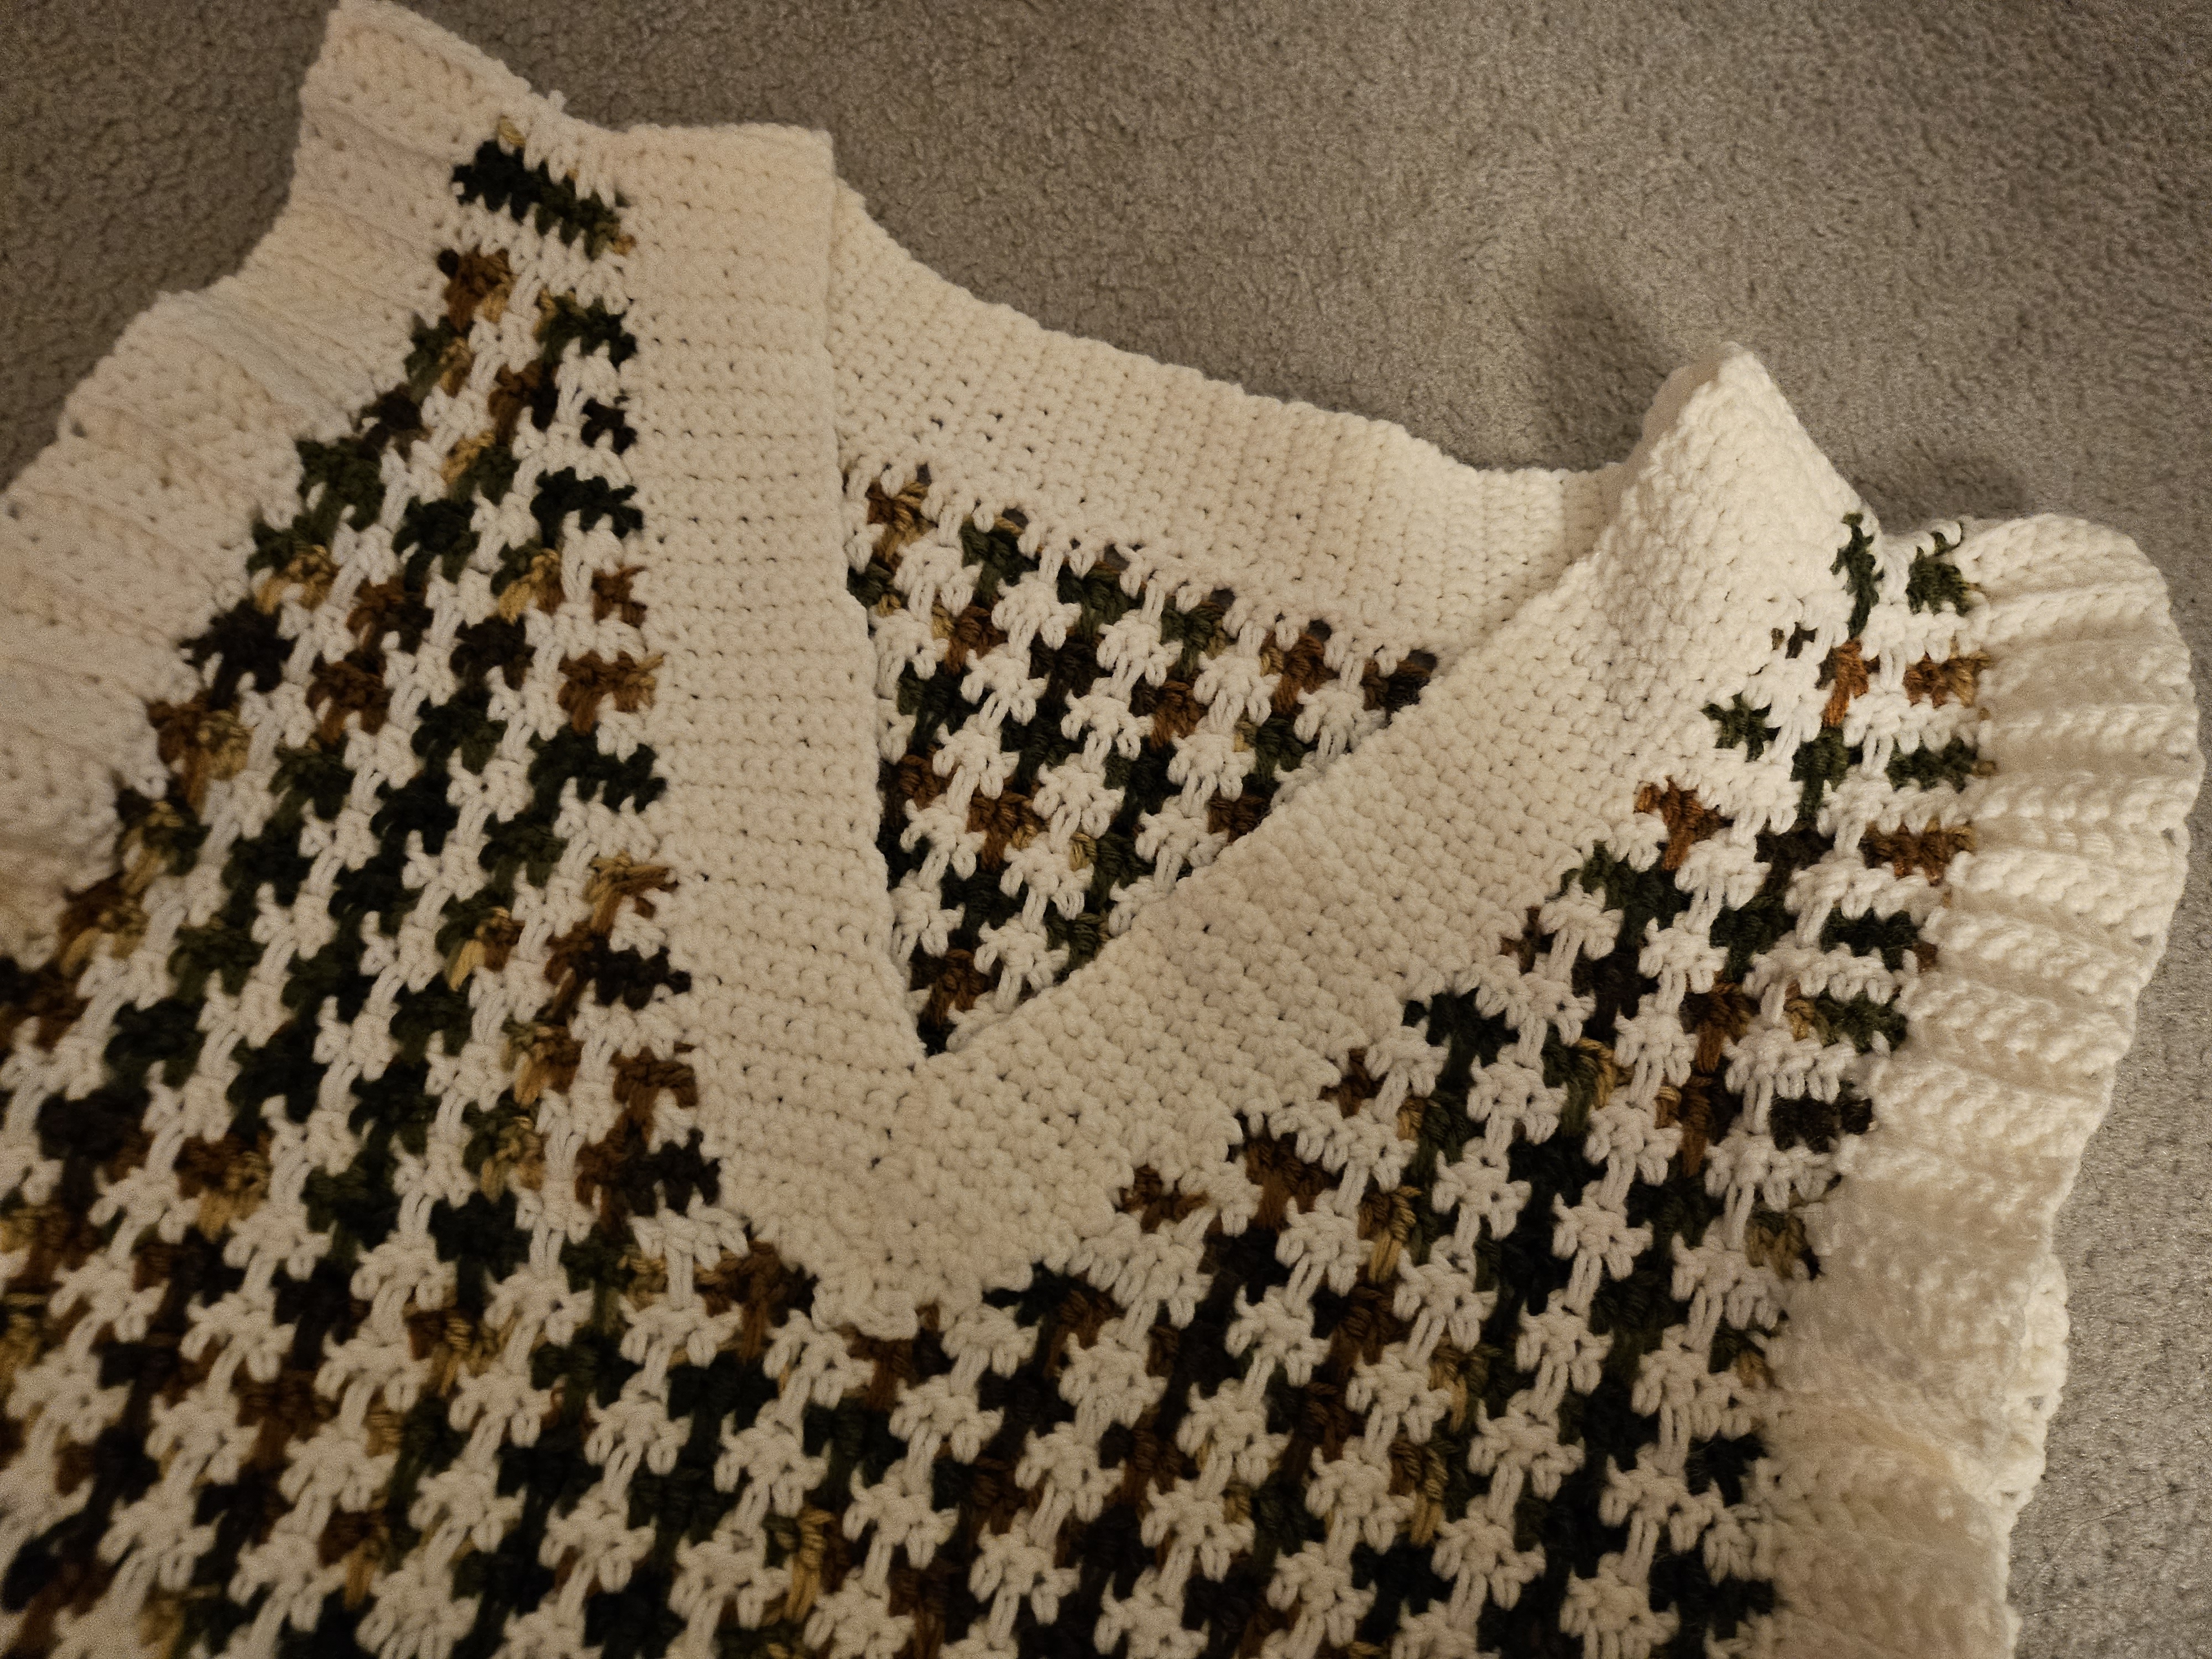
Cream yarn crossing a changing green-and-gold background gives this vest its distinctive surface. The texture has a strong vertical rhythm, while the wide neckline and soft armhole borders frame the patterned body. Over a plain shirt, the stitch work becomes the main detail of the outfit.
The project begins with ribbing, builds the front and back separately, and uses shaping to create the V neckline and armholes. The making video includes handwritten construction sketches and close-ups of the unusual stitch placement. Those are especially useful here: understanding where a long stitch enters the fabric matters as much as counting the stitches along the top.
This article records the specific instructions visible in the demonstration and explains how to use them. It is a companion to a single-garment making video, not a fully graded pattern. The source does not provide a verified finished chest measurement or a complete written row-by-row schedule for every size.
Materials and Color Choices
The video description specifies #4 medium-weight yarn in two colors and a 5 mm crochet hook. The sample pairs cream with a variegated yarn containing green, gold, and brown, so two working yarns produce more than two visible shades.
Also prepare a yarn needle, scissors, measuring tape, and removable markers. Keep a notebook for your row count, color changes, and shaping decisions. No verified yarn quantity is supplied here; yardage depends on garment size, yarn, gauge, and border depth.
When substituting yarn, compare both thickness and behavior. A soft cream yarn combined with a much firmer contrasting yarn can make the two-color fabric uneven. Choose compatible care instructions so the finished vest can be washed as one garment.
Stitch Key
| Abbreviation | US meaning | | --- | --- | | ch | Chain | | sc | Single crochet | | hdc | Half double crochet | | dc | Double crochet | | tr | Treble crochet | | BLO | Back loop only | | ss | Slip stitch | | inc / dec | Increase / decrease; identify the stitch type from the demonstrated step | | * | Continue the indicated repeat |
The captions are compact reminders. They do not always state an insertion point, turning-chain rule, or complete end-of-row instruction. The notes below preserve that distinction instead of filling the gaps with an unrelated stitch pattern.
Plan the Fit Before Starting
Choose the shirt or top you intend to wear underneath. Measure a comfortable vest laid flat, recording body width, length, shoulder width, armhole depth, and neckline depth. Keep the finishing bands in mind: a broad band changes the size of the opening.
Make a swatch in the actual two-color pattern, including the cross-row treble stitches. Wash and dry it according to the yarn instructions, then measure its settled width and height. A plain double-crochet sample will not accurately represent this fabric.
For your own planning, divide the desired panel width by the width of a complete pattern repeat to estimate how many repeats you need. Include the demonstrated edge stitches separately. This is a fitting calculation, not a substitute for establishing the repeat from the video.
- Make the Ribbed Hem
At approximately 1:40, the caption reads:
“15ch, sc blo rept for 71 rows.”
The hem is worked sideways. Begin with 15 chains, work the demonstrated single-crochet ribbing in back loops, turn, and continue until the strip reaches the source’s 71-row count.
The caption does not explicitly say whether the first chain serves as a turning chain. Check the first worked row in the close-up rather than calling this a 15-stitch rib. A chain count and a worked stitch count are not automatically the same.
Count the narrow rows along the strip carefully. The long edge becomes the foundation for the body. Keep both turning edges even so one side of the finished hem does not flare more than the other.
Fit checkpoint: lay the hem flat without stretching. The source’s 71 rows describe its sample, not a universal body measurement. If your gauge differs, confirm the required panel width and body repeat before committing to that count.
2. Establish the Grouped Double Crochets
The early body captions read:
“3ch, (3dc, ch)*.”
This establishes a three-chain start followed by groups of three double crochets separated by a chain. The demonstration shows the cream row and then the contrasting row. Follow the close-up for where each group sits along the hem and in relation to the preceding row.
After the first patterned rows, compare three things:
- The number of complete groups across the panel.
- The position of the chain spaces.
- The treatment of the first and last stitches.
Do not judge the pattern only by the top-edge count. A group placed in the wrong opening can leave the count unchanged while shifting the visible design.
3. Build the Interlocking Texture
At approximately 6:00, the video displays these instructions:
- Begin with 3 ch.
- Work a tr at the previous ch position in the row ahead.
- Put a ch in the middle of the continuous group of three stitches.
- Work the other stitches as dc.
The cross-row treble is the feature that links the colors visually. Watch which lower chain position receives the stitch; working every stitch only into the immediately preceding top loops will produce a different fabric.
Keep the treble long enough to reach its insertion point without gathering the panel. After several repeats, lay the work down. If the lower fabric is pulled upward, check the length of those reaching stitches before changing the overall stitch count.
The video title calls this an Afghan pattern. Here the term refers to the demonstrated textured design; these notes do not replace the shown technique with Tunisian crochet instructions.
4. Mark the Front Neckline and Armholes
The handwritten front sketch shows 71 positions across the panel, with 35 on each side of a central position marked 36. This is a useful reference for locating the center of the sample. It is not a chest measurement in centimeters.
The sketch also marks the transition after the lower body section. Before shaping, place removable markers at the center and the intended armhole boundaries. Lay the panel flat and confirm both halves contain corresponding repeats.
At approximately 12:00, the front-shaping caption reads:
“row13: (6th st) sc, hdc, 2dc, tr, dc, ch…dec.”
At approximately 14:00, the next caption reads:
“row14: dec, dc, ch, dc, tr, dc…”
These captions show a graduated beginning and a decrease as the upper panel narrows. They are abbreviated, so use the demonstration for exactly where the decrease occurs and how the repeat finishes. An ellipsis does not establish a complete remaining row.
Work the two front sides as corresponding shapes. Keep separate notes for their row counts and neckline decreases. Mirror the positions where needed rather than assuming an identical instruction can be worked in the same direction on both sides.
5. Work the Back and Compare the Shoulders
The back has its own shaping sketch and a shallower neck opening. Near 17:00, the caption reads:
“back row34: dec …dec (6st total).”
The six-stitch total belongs to that demonstrated back shaping section. Do not apply it across the entire back panel. Compare the sketch and the worked shoulder section before fastening off.
Before joining, place the front and back on a flat surface. Their shoulder joining edges need to correspond. Check the height of each shoulder, the position of both armholes, and the amount of fabric left around the neck.
If you are adapting the size, the source’s row numbers cannot guarantee the same armhole depth at a different gauge. Measure your actual pieces as well as counting rows.
6. Join and Check the Openings
Match the shoulders first, then mark the side seams and the lower ends of the armholes. Keep the joining tension relaxed enough that it does not shorten the edge.
Try the assembled vest over the intended layer before completing every border. Reach forward, sit down, and raise your arms gently. Note whether the neckline shifts, the underarm binds, or one shoulder pulls backward. These are fitting checks added to help you evaluate your own version.
The finished armhole edging has fullness. Assess the opening itself before judging that decorative flare; adding a border cannot correct an opening that is already too small.
7. Follow the Cream Border Demonstration
The finishing close-ups show the following compact sequence:
| Row | Displayed instruction | | --- | --- | | 1 | sc, ss, turn | | 2 | 1 ch, sc inc, turn | | 3 | 1 ch, sc inc, sc, ss, turn | | 4 | 1 ch, sc inc, sc*, turn | | 5 | 1 ch, sc inc, sc*, ss, turn | | 6 | 1 ch, sc inc, sc*, turn |
The caption then says to repeat with six stitches in each row until the end. This is an attached border worked back and forth in the demonstration. The slip stitches attach the strip to the garment at the shown intervals; they are not an instruction to work six ordinary rounds around the whole neckline.
Follow the close-up for the attachment spacing, the V point, and where the initial increases stop. Those details are not fully encoded in the short caption. Check the border against the garment every few rows: it should sit in the intended shape without pulling the neckline inward or forming an unintended fold.
Common Questions While Working
Why does the panel pucker after a color change? Check whether the reaching treble stitches or the unused yarn are too tight. Compare the panel with the same section before the color change.
Why does one front side look wider? Count complete repeats and edge stitches separately. Then compare the decrease rows and their orientation.
Can I make a different size by adding a few chains? Establish the full repeat and edge requirements first. The sideways hem, panel repeat, armhole shaping, and neckline all need to work together.
Should I block the garment? Follow the yarn’s care instructions. If appropriate, settle the fabric before assembly so the joins match its finished dimensions. Record the measurements before and after washing your swatch.
Watch the Vest Making Video
The 20-minute video shows the handwritten plans, cross-row stitch placement, front and back shaping, and attached finishing border. Use it alongside the transcribed checkpoints above.
Finish with a Wearable Record
Weave in the ends through matching-color sections, keeping bulky joins away from the underarms. Make a final fit check over your chosen shirt, then record the measurements, gauge, repeat count, and any adjustments. Those notes turn this one-garment demonstration into a useful starting point for your next vest, while preserving the details that made this version fit you.
Watch every stitch up close
Pair these written notes with the complete video tutorial.
Made with yarn, shared with love. 🧶💗