
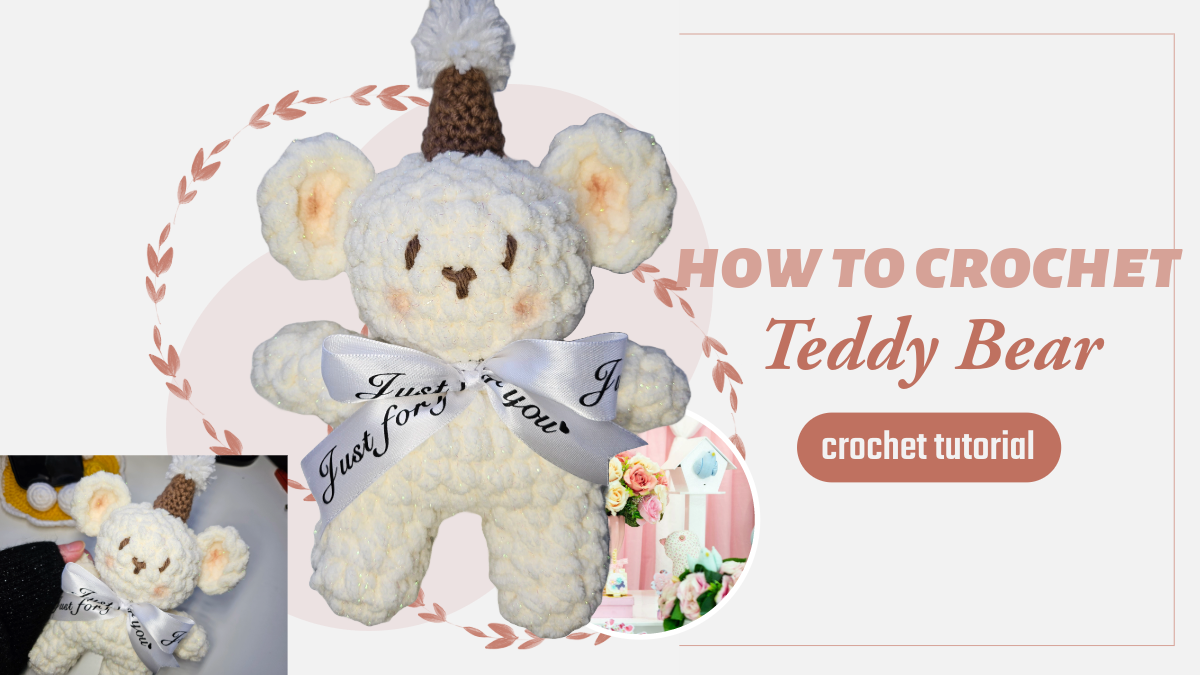
Crochet Teddy Bear with Baby Blanket Yarn: A Soft Handmade Gift
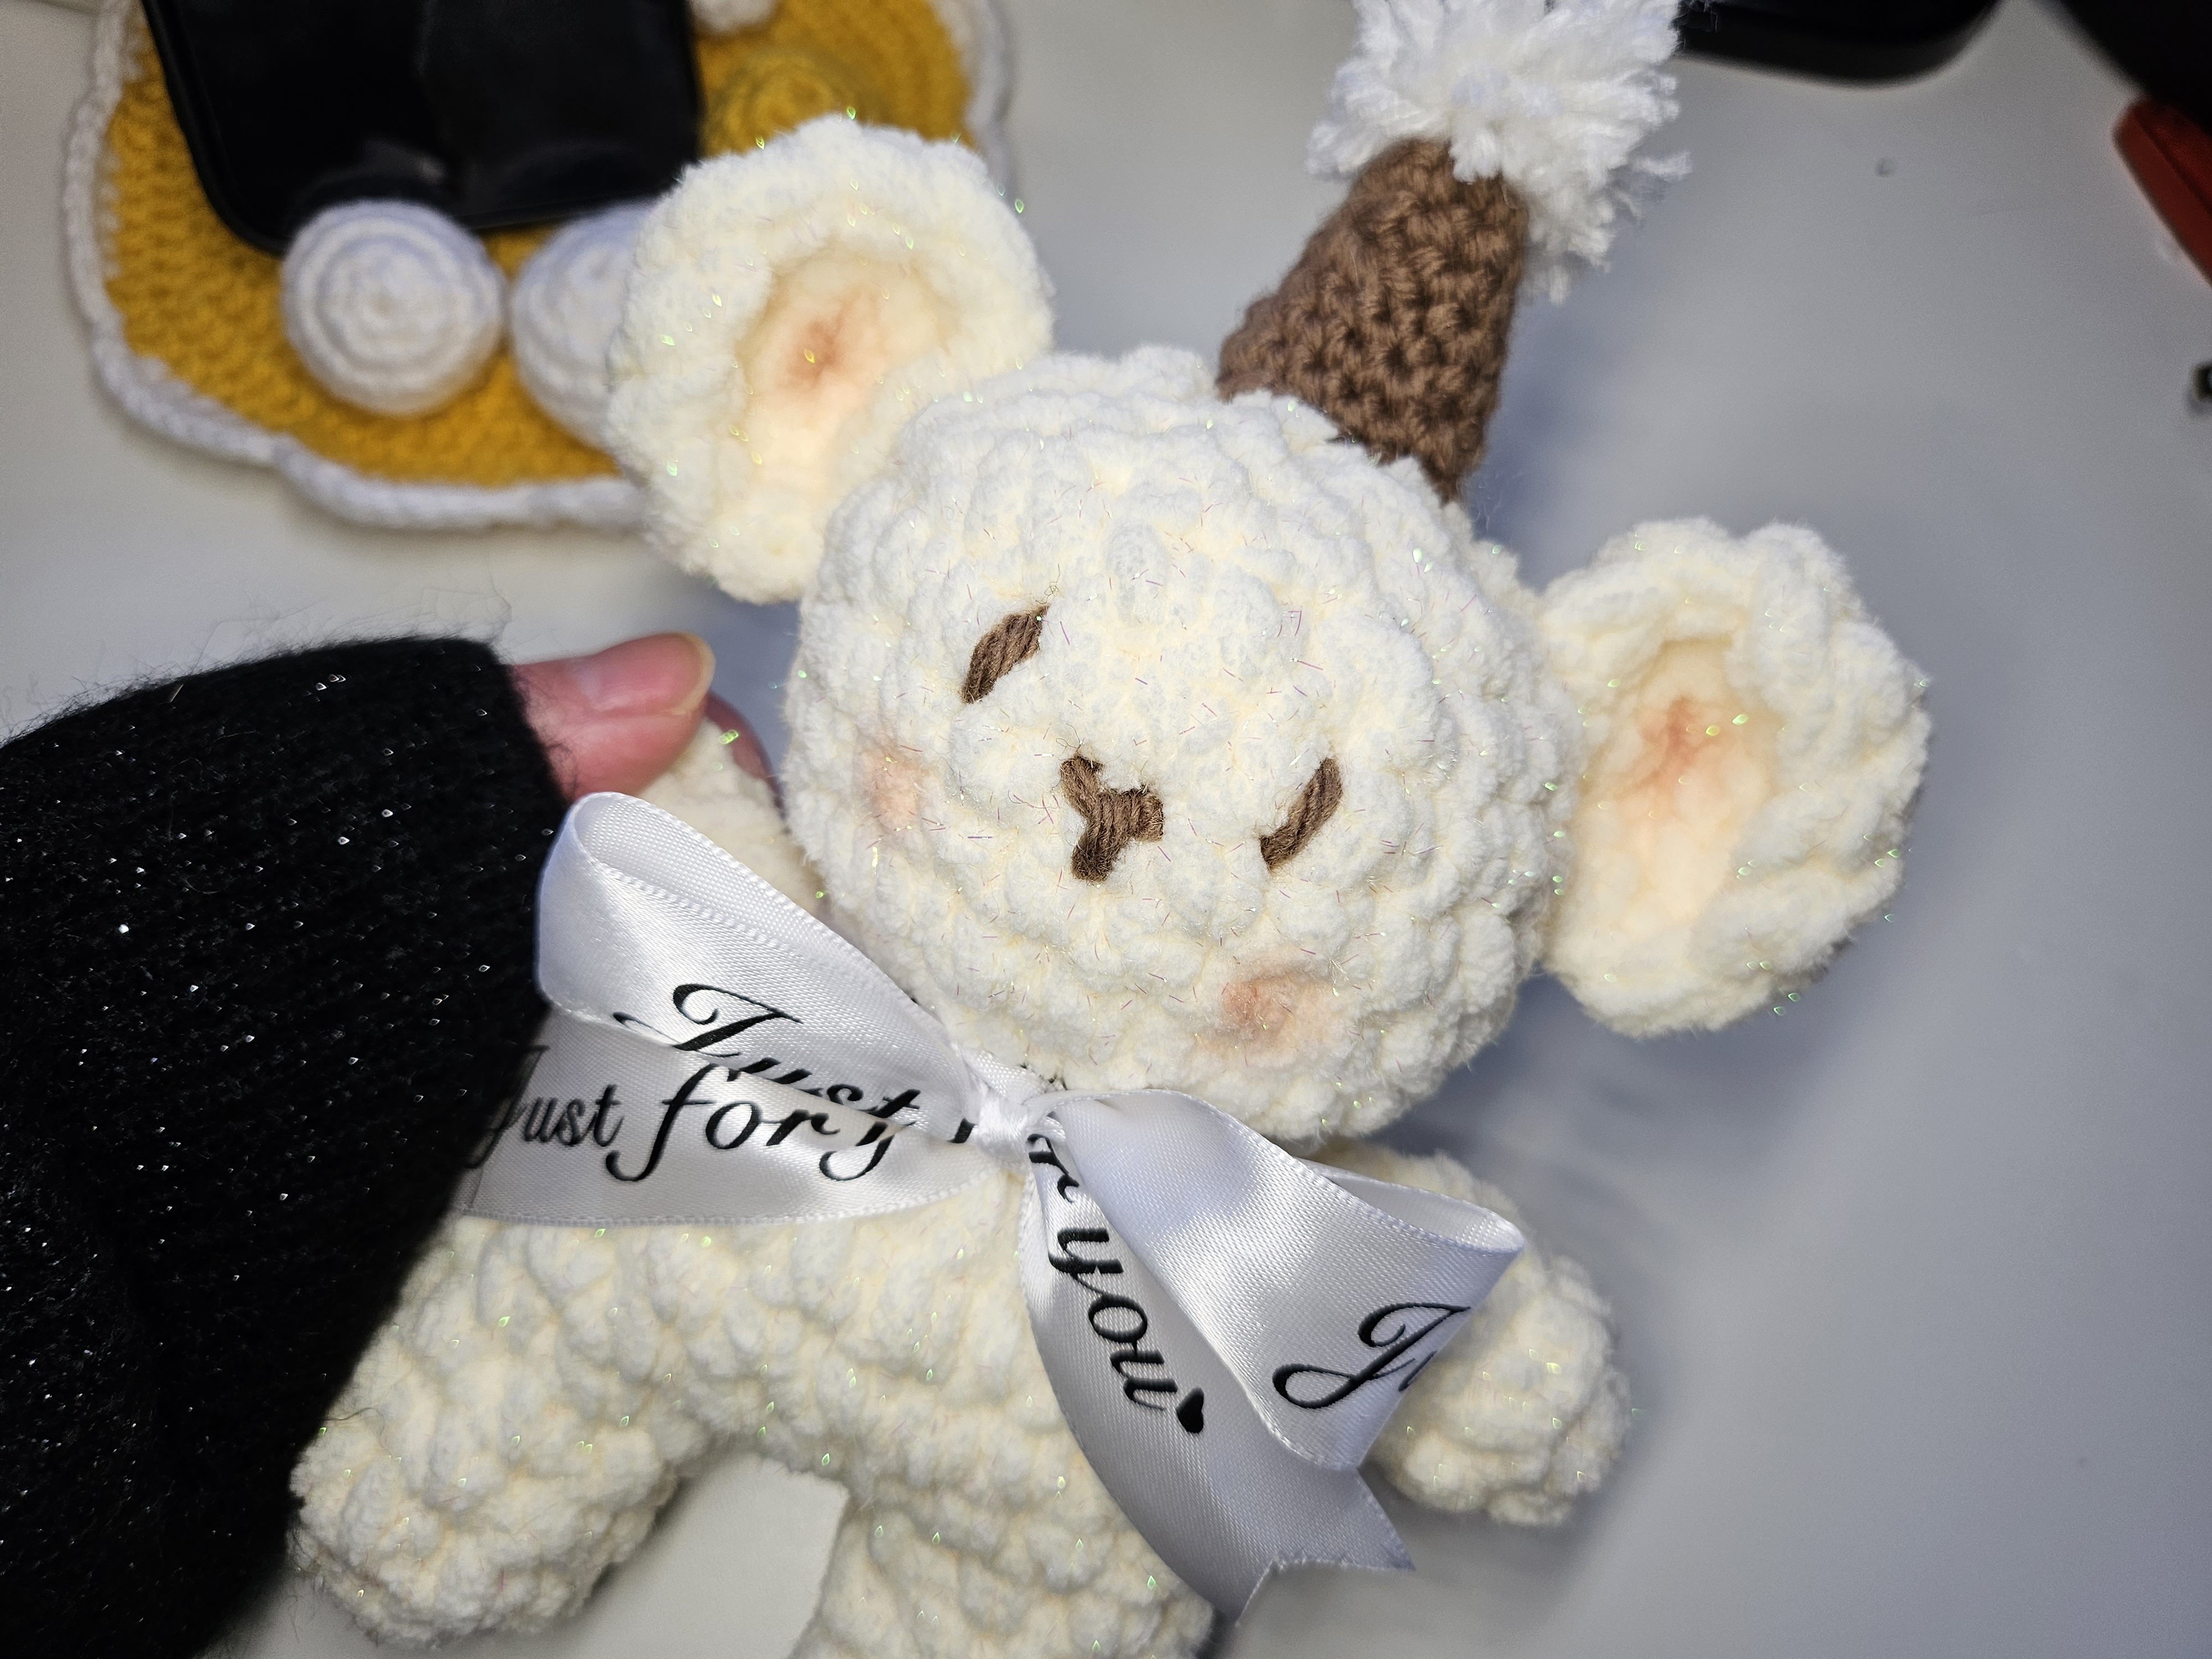
A little bear does not need many details to have a gentle expression. Cream blanket yarn gives this teddy its soft outline, while small brown facial stitches and rounded ears define the face. The pictured version adds a printed ribbon and a brown party hat with a white tuft.
The construction begins with two short legs and continues into the body and head. The ears and arms are separate pieces. A small hat made in smoother brown yarn provides a useful contrast to the fluffy bear.
Blanket yarn makes the stitches larger, but its pile can hide the loops you need to count. This project rewards careful marking and gradual stuffing more than speed. Read the body-chart note below before starting: the source contains a short section whose repeat counts are not fully specified.
Materials and choosing the fabric
The video shows Bernat Baby Blanket yarn in a pale cream shade for the bear, with smoother brown yarn for the little hat and facial details. Prepare a hook suited to each yarn, stuffing, scissors, stitch markers, and a yarn needle. White yarn is also used for the hat’s tuft, and a ribbon is added to the finished display version.
No exact hook size, finished bear measurement, or per-bear yarn quantity is established in these written notes. Blanket yarns vary substantially, so substituting another product may change both size and firmness.
Make a few test stitches before the first leg. You should be able to insert the hook without forcing it, while the fabric should be close enough that stuffing is not readily visible. Do not tighten a plush strand so aggressively that its pile strips away when you pull it through a stitch.
Abbreviations and source conventions
These notes use US terms: sc means single crochet, inc means two single crochets in one stitch, dec means a single crochet decrease over two stitches, and sl st means slip stitch. The video writes the last term as `ss`.
Move a marker to the first actual stitch of every round. Joining slip stitches are not included in the stitch totals below. Where the video supplies only a compact sequence without a repeat number, that limitation is retained instead of inventing a complete repeat count.
1. Make two legs
Start each leg with a magic ring in the cream blanket yarn.
| Round | Instruction | Stitches | | --- | --- | --- | | 1 | 8 sc in the ring; sl st | 8 | | 2–4 | 8 sc each round; sl st | 8 |
Add stuffing to both legs. Keep it evenly distributed so one leg does not become much firmer than the other.
Finish the first leg, but do not cut the yarn from the second leg. The second leg’s working yarn continues into the joined construction. Position the legs with their openings aligned before following the connection shown in the video.
The next printed formula uses an 18-stitch working path. Two untouched eight-stitch openings provide only 16 stitches, so the connecting section matters. Match the bridge and its insertion points to the close-up rather than simply joining the tops and starting a 16-stitch round.
2. Continue through the body and head
The source keeps its numbering from the legs and begins the joined section at Round 5. These are the displayed instructions, with `ss` expanded to slip stitch.
| Round | On-screen sequence | Counting note | | --- | --- | --- | | 5 | (8 sc, inc) × 2; sl st | Produces 20 stitches from an 18-stitch working path | | 6–7 | 20 sc; sl st | 20 stitches each round | | 8 | 3 sc, dec, 8 sc, dec, 5 sc; sl st | Consumes 20 and produces 18 | | 9 | `sc, sc dec, ss` | Repeat count not printed | | 10 | `sc, sc dec, ss` | Repeat count not printed | | 11 | `2sc, sc inc, ss` | Repeat count and full-round total not printed | | 12 | 12 sc increases; sl st | Requires 12 starting stitches and produces 24 | | 13–16 | 24 sc; sl st | 24 stitches each round | | 17 | `2sc, sc dec, ss` | If repeated around 24 stitches, produces 18 | | 18 | `sc, sc dec, ss` | If repeated around 18 stitches, produces 12 | | 19 | `sc dec, ss` | Decreasing around 12 stitches produces 6 |
Read this before working Rounds 9–12
The body chart has a genuine counting ambiguity. If Round 9 is interpreted as repeating `(sc, dec)` all the way around 18 stitches, it gives 12. Repeating the same sequence in Round 10 gives 8. The next printed `(2 sc, inc)` sequence does not then repeat evenly around those eight stitches to produce the 12 stitches needed for Round 12.
Those three short lines are therefore shown as source text, not presented as a fully validated repeat pattern. Use the video’s demonstration for that transition and check the working count before the twelve increases. This article does not supply an invented extra round, a hidden increase, or a replacement neck formula to conceal the discrepancy.
The later 24-stitch head section and the 24 → 18 → 12 → 6 closure are arithmetically consistent under the repeats explained in the table.
Stuff while the opening is accessible
Distribute filling into the lower body before narrowing the neck. Add small pieces at a time, reaching the sides as well as the middle. A large clump can create a firm lump while leaving the surrounding fabric empty.
Build up the head gradually during its straight rounds and before the final decreases. Look at it from the front and side. The face needs a smooth surface for the embroidery, while the back should remain rounded rather than flattened by uneven filling.
Close the final opening with the yarn needle, then hide the tail securely. Inspect the leg connection and close any remaining gap without gathering the whole lower body into a pucker.
3. Crochet two rounded ears
Make two ears in the cream yarn.
| Round | Instruction | Stitches | | --- | --- | --- | | 1 | 5 sc in a magic ring; sl st | 5 | | 2 | Inc in each of the five stitches; sl st | 10 | | 3 | 10 sc | 10 |
Leave enough yarn for attaching the ear. Shape the piece gently rather than stretching its outer edge.
Position both ears before sewing either one permanently. Compare their height, angle, and distance from the center of the face. The short attachment edges should sit at similar angles so one ear does not point much farther forward than the other.
Secure the ears across their bases, spreading the sewing stitches through the connection. Pulling all the attachment yarn tightly at one point can dent the plush head.
4. Make two arms
The arm overlay reads Rounds 1–5: 6 sc, sl st.
Begin each arm with six single crochets in a magic ring, then continue with six stitches in every round through Round 5. Make two pieces and leave attachment tails.
Compare the pair before sewing. Matching round counts are the first check; similar stuffing and seam tension also affect how the arms sit.
Position the arms at the sides of the upper body. Check the bear from the front with both pieces temporarily held in place, then attach them securely. Keep the arm joins clear of the facial embroidery area and any decorative ribbon.
5. Add the optional party hat
Use the smoother brown yarn and a suitable smaller hook. Start with a magic ring and join each round as shown.
| Round | Instruction | Stitches | | --- | --- | --- | | 1 | 6 sc in the ring; sl st | 6 | | 2 | (Sc, inc) × 3; sl st | 9 | | 3 | 9 sc; sl st | 9 | | 4 | (2 sc, inc) × 3; sl st | 12 | | 5 | 12 sc; sl st | 12 | | 6 | (3 sc, inc) × 3; sl st | 15 | | 7 | 15 sc; sl st | 15 |
Leave a long tail for sewing and add the filling shown in the demonstration. The small cone is finished at the 15-stitch opening; do not extend it with extra increase rounds unless you are deliberately changing its size.
The white tuft is made by wrapping yarn, tying the bundle, cutting the loops, and trimming it. Work over a tray or scrap paper to collect the short offcuts. Attach the tuft securely to the top of the hat, then position the hat before sewing it to the head.
Give the bear its expression
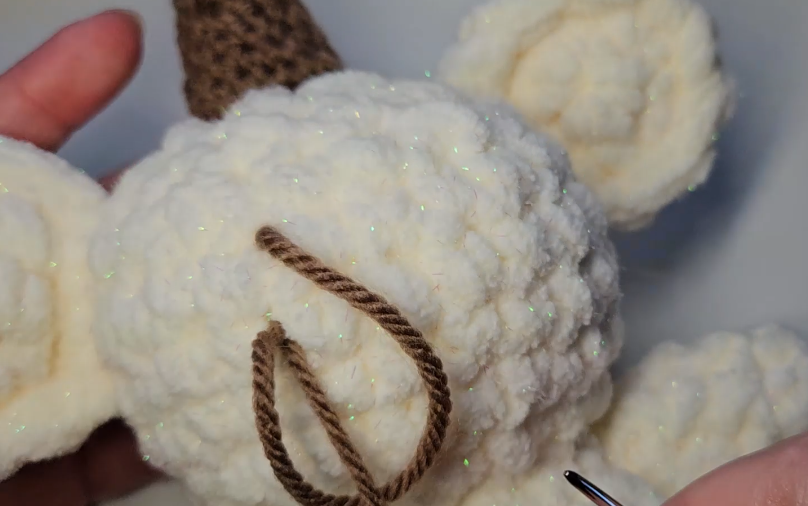
Use brown yarn for the small eyes and central nose-and-mouth detail. Mark the intended positions first, with the bear facing straight toward you. On a round head, judging one feature at a time can make the pair look uneven.
Make short, controlled stitches and inspect the whole face between passes. Keep the yarn snug enough to stay in place without pulling deep dents into the stuffing.
The pictured bear also has pale warm accents in the inner ears and cheeks. Treat those as optional decoration. Test any coloring material on spare yarn first, and consider whether it will transfer or change during cleaning.
For a display gift, a ribbon can finish the neckline. For a bear intended for a young child, leave off loose ribbons and detachable decorations, secure every seam and embroidered end, and choose materials appropriate to the intended use. A soft yarn name alone does not establish the suitability of the finished toy.
Working comfortably with blanket yarn
| Difficulty | Helpful check | | --- | --- | | You cannot see the next stitch | Separate the pile gently and feel for the top loops | | A piece becomes unexpectedly narrow | Count immediately for a missed increase or skipped stitch | | Filling shows between stitches | Check hook size, fabric tension, and overstuffing | | Yarn loses its pile while undoing | Release stitches slowly rather than pulling through a tight knot | | The face looks crooked | Check feature placement on the stuffed head before adding more embroidery |
Take a count at the end of each round. It is much easier to find a missed stitch immediately than to search through several layers of fluffy fabric.
Watch the teddy bear tutorial
Use the demonstration for the leg connection, body-to-head transition, ear and arm placement, facial stitches, and the small yarn tuft. Keep the counting note above beside you when working the abbreviated body-chart section.
A balanced head, matching little limbs, and a simple face give this bear its character. Finish by checking the attachments and closures, then include care information for the actual yarn, filling, and decorations you used when giving it as a gift.
Watch every stitch up close
Pair these written notes with the complete video tutorial.
Made with yarn, shared with love. 🧶💗