
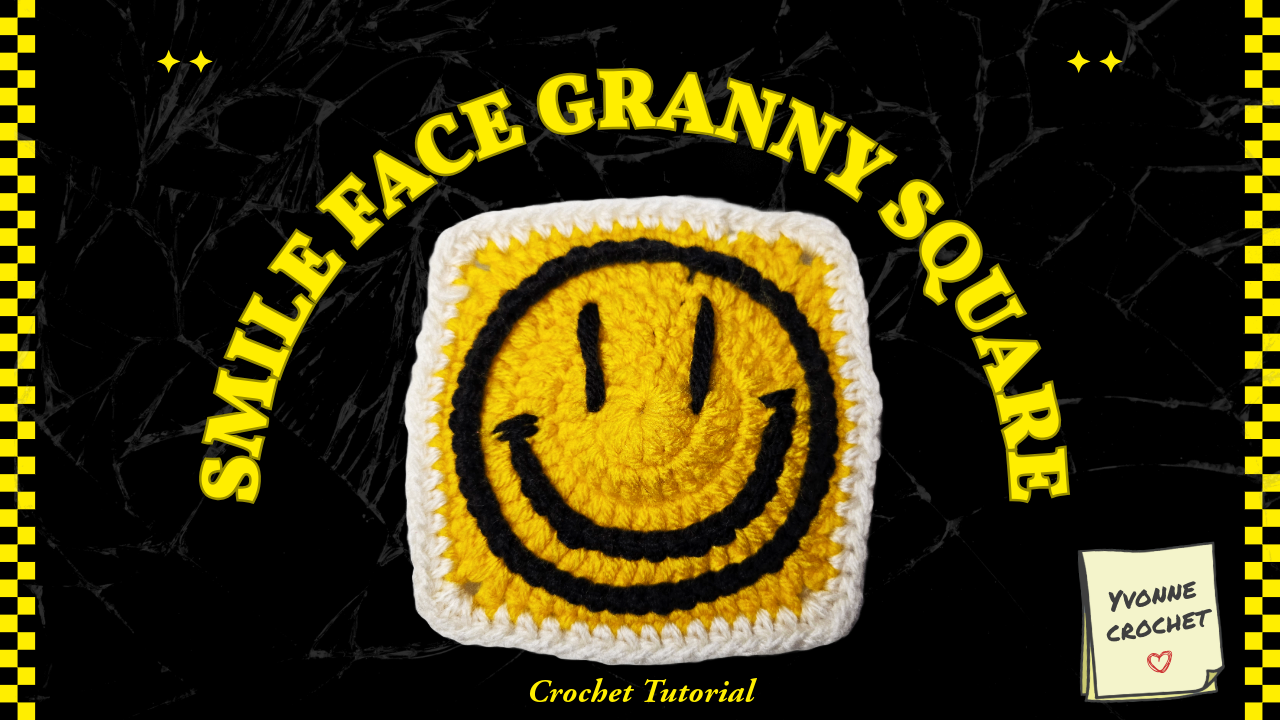
Crochet Smiley Face Granny Square: Beginner-Friendly Tutorial
A smiley square is a simple idea with a surprisingly expressive finish. The yellow center provides the face, a black ring defines its boundary, and two long eyes sit above a broad curved smile. A light border gives the motif an edge that can join to other squares or attach to a larger piece.
The character comes from the relationship between those details. If the eyes sit too close to the ring, they compete with it; if the smile is pulled tight, it changes both the expression and the shape of the crochet underneath.
This guide follows the construction visible in the Crochetnotes video. It explains the yellow foundation, transition to a square, pale edging, and the two different ways the facial details are worked. Use the demonstration for the complete round-by-round counts and exact squaring sequence; confirmed local instructions are recorded below without supplying invented totals for the remaining rounds.
Materials for the sample
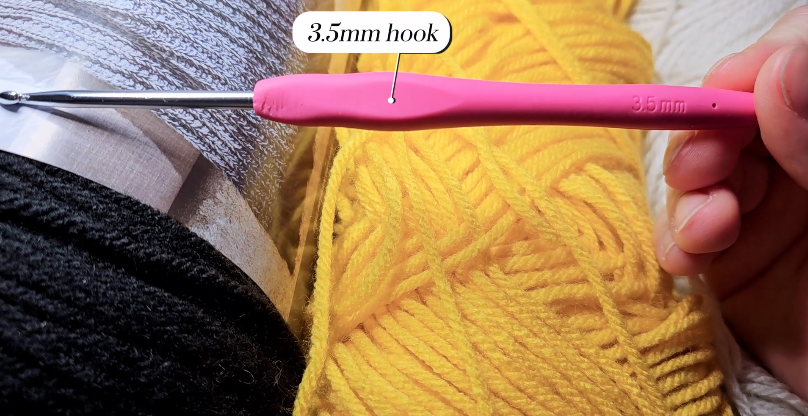
The original materials image shows a 3.5 mm hook with yellow, black, and light-colored yarn. Use that hook as a reference for the demonstrated yarn, and check the fabric if you substitute different materials.
Prepare scissors, a yarn needle, and removable markers as well. Black yarn is used for both crochet surface work and needle-finished details, so leave practical tails for securing each section.
Choose yellow and border yarns with similar thicknesses. The black should make a clear line without becoming so bulky that it overwhelms the face. A short test line on a sample can help you judge the effect before finishing the whole motif.
No fixed finished size or exact yardage is assigned here. Complete and measure one square before planning a bag, cushion, or blanket around it.
Understand the sequence
| Stage | Purpose | Main check | | --- | --- | --- | | Yellow center | Provides the face’s flat foundation | Starting chain, joins, and increases | | Yellow squaring section | Builds four sides around the face | Corner placement and stitch heights | | Pale border | Frames the motif | Even side stitches and corners | | Black circular line | Defines the face | Smooth surface-crochet tension | | Smile and eyes | Creates the expression | Spacing, curve, and secure ends |
Finish the underlying fabric before deciding the final face placement. Surface work cannot correct an extra increase or a missing corner underneath it.
1. Start the yellow center
Begin with the magic-ring method shown in the video. The demonstration uses a chain-3 rise, marks the starting reference for a later slip stitch, and displays the instruction “12 dc on the ring.”
Keep those instructions distinct when taking notes. The subtitle names twelve double crochet stitches; the starting-chain and joining convention must be read from the demonstration rather than casually adding another stitch to a calculated round total.
Arrange the stitches around the ring, tighten the center, and join at the indicated marker. Keep the first actual worked stitch distinguishable from the starting chain and joining slip stitch.
2. Expand the yellow circle
The later yellow rounds use double crochet and increases. A double crochet increase means two double crochet stitches into the same base stitch; it is different from two double crochet stitches worked one into each of two neighboring stitches.
The video shows a chain-3 rise and a double crochet at the first stitch of a new round. Later subtitles specify 2 double crochet in the next stitch as the increase repeat develops.
Follow the source’s spacing between increases. Do not assume that the same repeat continues unchanged in every yellow round. Count each round using the starting-chain convention shown, then check the join before beginning another round.
Keep the circle relaxed
Lay the crochet down between rounds. It should rest comfortably without being stretched flat by your fingers.
A bowl-shaped center can come from missing increases or tight tension; a rippled edge can come from extra stitches. Check the instructions first. Adding the face or pulling the outer border tighter is not a reliable way to repair either problem.
3. Turn the yellow center into a square
The surrounding yellow section establishes the four corners. Follow the changes in stitch height and corner placement in the video instead of continuing a circular increase formula indefinitely.
Mark the four corner locations as they appear. Keep the marker at the round start separate from the corner markers so that you know which reference each one represents.
Compare opposite sides before joining the round. If one side has a noticeably different curve or a corner is missing, locate the stitch-placement error before adding the pale edging.
The circular black line is added later on the surface. It does not determine the outer corners of the square, so the face boundary and square boundary should remain separate in your planning.
4. Add the light border
Join the pale yarn at the point shown and follow the demonstrated side and corner sequence. One visible border instruction specifies half double crochet in each stitch, for a local section totaling 7 hdc.
That seven-stitch instruction belongs to its section of the border, not to every side regardless of the surrounding stitches. Follow the complete corner treatment and adjacent stitch changes in the video.
Keep the border tension close to the yellow fabric. After a short section, lay it down and check that the edge is not drawing the square inward or flaring away from it.
Finish the join and secure the yarn ends. Inspect the corners and the reverse before beginning the black work.
5. Map the face before making permanent stitches
Lay the finished foundation flat. Identify the center and decide which edge will be the top. Use removable yarn markers to indicate the eyes and the ends of the mouth.
Place the circular face boundary inside the square so that there is room for a visible yellow margin and the pale frame. The ring should be related to the face’s center, not forced to follow every variation in the square’s outer edge.
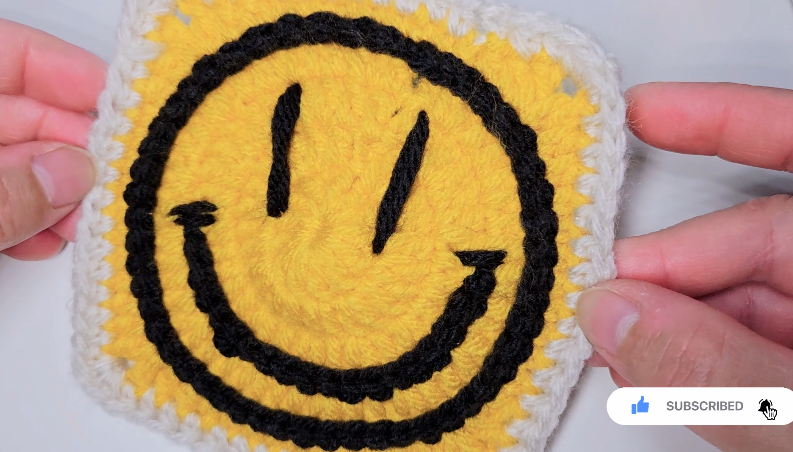
The sample has long, narrow eyes and a broad U-shaped smile. Compare their spacing together. Moving an eye a little can be easier than changing the whole mouth after it has been worked.
6. Work the black circular outline
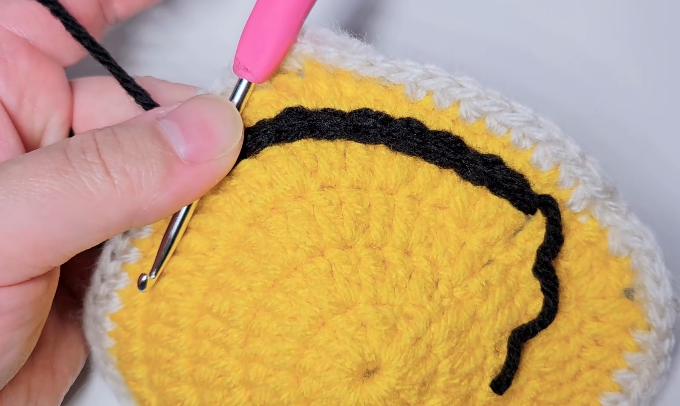
The tutorial uses the hook to work the dark line onto the yellow surface. Keep the working yarn and the line on the intended sides of the fabric, and follow the demonstrated hook entry points.
Form a smooth curve in small steps. Avoid jumping across a large distance with one tight stitch, which can pull the yellow fabric inward and make the circle look angular.
Check the tension frequently by laying the square flat. The black line should rest on the surface without gathering the underlying stitches.
Join the line neatly where it meets its beginning. Secure the ends on the reverse without drawing them into a hard knot or leaving long strands across open areas.
7. Form the smile and finish the eyes
Follow the demonstrated method for the curved mouth. Keep it inside the circular outline and leave a clear gap between the two black lines.
Work the curve gradually rather than pulling one long strand tightly across the face. At the mouth corners, add the small finishing marks only after the main smile is positioned. The later video shows a needle being used to refine these black details.
Use the needle work shown for the elongated eyes and finishing. Compare the eyes for height, width, angle, and spacing before securing the ends.
The features do not need to be mechanically identical, but they should look deliberate together. Step back from the work after each detail; the overall expression is easier to judge from a normal viewing distance than while staring at one stitch.
Finish the reverse and shape the motif
Turn the square over and inspect the black yarn paths. Secure each end through a useful length of fabric without pulling it tight enough to make the front dimple.
Block with a method suitable for the chosen yarn. Ease the corners into position while preserving the round face and curved smile. Stretching the square strongly in one direction can turn the face into an oval even if the outer dimensions become square.
Measure the completed motif and record the materials. If making a set, use the finished sample as a reference for the face placement as well as the size.
Use the face where it will remain upright
One motif can become a patch pocket or pouch panel. Several can form a cheerful cushion front, bag, or blanket with plain squares between the faces.
Lay out the whole arrangement before joining. For a bag, fold the proposed panel into shape and check which squares become the base or sides. A face that is upright on a flat layout may finish sideways after folding.
Compare edge stitches before joining this design to another motif. Similar measurements do not automatically produce compatible seams. Make a short test join and keep the sewing or crochet tension relaxed enough for the edges to meet naturally.
Video navigation checkpoints
These are approximate construction stages rather than exact round boundaries:
| Around | Visible stage | | --- | --- | | 1 minute | Magic-ring center and the twelve-double-crochet subtitle | | 2–6 minutes | Expanding yellow rounds and double crochet increases | | 8–10 minutes | Later yellow fabric and transition toward the square | | 11–13 minutes | Light-colored border | | 15–18 minutes | Black surface details and needle finishing |
Troubleshooting
The black ring puckers. Ease the surface stitches and check for an overly long jump between entry points.
The face seems crowded. Reconsider the eye and mouth placement inside the ring before adding another detail.
The pale edge pulls inward. Check the complete border sequence and corner placement before tightening or stretching the fabric.
The squares match in size but the faces look inconsistent. Compare the ring position, eye spacing, and smile height against the finished sample.
Watch the smiley-face tutorial
Use the full demonstration for the yellow-round repeats, exact squaring sequence, pale border corners, and the distinction between hooked surface lines and needle-finished features.
Finish the expression as carefully as the crochet
A flat foundation gives the smile somewhere to sit, but thoughtful placement brings the motif to life. Check the ring, eyes, and mouth together, secure the reverse, and compare the finished square with your sample before joining it to another piece. A few clear black details are enough to make the yellow face feel cheerful.
Watch every stitch up close
Pair these written notes with the complete video tutorial.
Made with yarn, shared with love. 🧶💗