
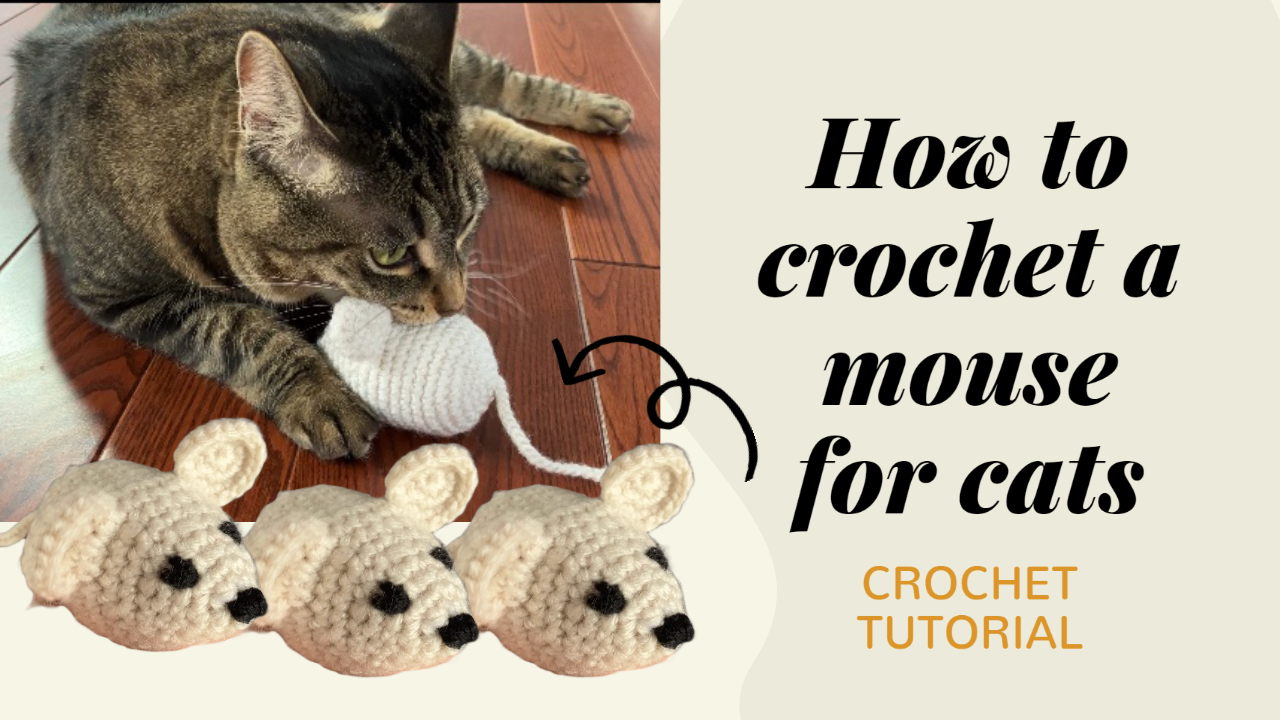
Crochet Mouse Cat Toy: A Tiny Handmade Playtime Project
A rounded body, two little ears, and a slender tail are enough to turn a small amount of yarn into a recognizable mouse. This project keeps the construction simple: crochet the body in one piece, make the ears separately, then add the tail and embroidered face.
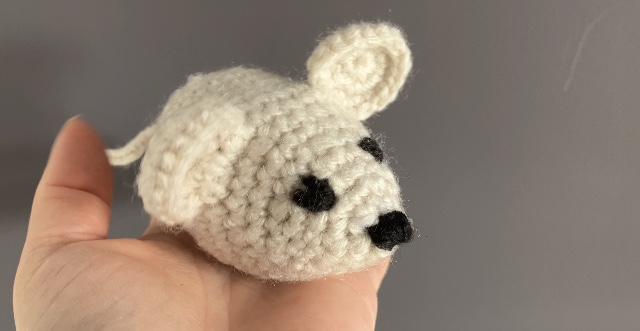
The shaping gives the mouse its character. A wider back gradually narrows into a pointed snout, while the ears sit near the front of the body. Before sewing anything permanently, take a moment to adjust their position—a small change can make the finished mouse look quite different.
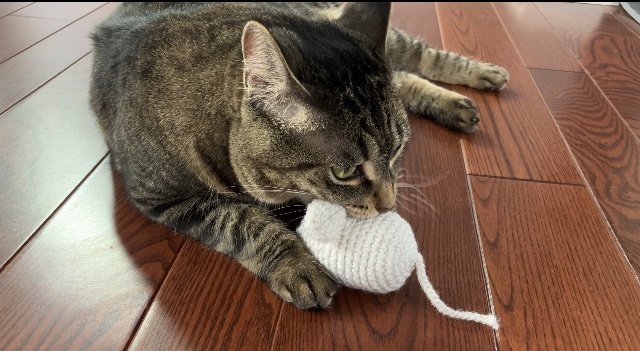
The accompanying video shows the making process from the body through the final details, followed by a look at the finished mouse during playtime. The written notes below help you track the rounds and understand how the pieces fit together.
Materials and Preparation
Gather the following before you begin:
- Main-color yarn for the body, ears, and tail.
- A small amount of black yarn for embroidered facial features.
- A crochet hook that produces a firm fabric with your chosen yarn.
- Toy stuffing.
- A stitch marker.
- A yarn needle and scissors.
A smooth, light-colored yarn makes the stitches easier to see while counting. Cream, light gray, or another pale shade also gives the embroidered features a clear contrast.
The video notes do not establish a verified yarn weight, hook size, or finished measurement, so those details are not specified here. Choose your yarn and hook together, checking that the fabric holds the stuffing without large gaps.
Stitch Abbreviations
These instructions use US crochet terminology.
Abbreviation Meaning
ch Chain
sc Single crochet
inc Work 2 single crochets into one stitch
dec Single crochet decrease
sl st Slip stitch
× Repeat the preceding sequence
For example, (3 sc, dec) × 6 means to work three single crochets followed by one decrease, repeating that sequence six times.
The body captions include a beginning ch 1 and an ending sl st. Treat these as the round setup and join; the stitch totals below refer to the single crochets and shaping stitches.
Crochet the Mouse Body
The body begins at the broader rear and gradually tapers toward the snout. The straight section between the increases and decreases gives the mouse its length.
Begin with a starting ring containing 6 sc, following the setup demonstrated in the video.
Round Instructions Stitch count
1 6 sc into the starting ring 6
2 Inc × 6 12
3 (Sc, inc) × 6 18
4 (Sc, inc, sc) × 6 24
5 Increase from 24 to 30 stitches; see the source note below 30
6–13 Sc in every stitch for 8 rounds 30 each
14 (3 sc, dec) × 6 24
15 Sc in every stitch 24
16 (Sc, dec, sc) × 6 18
17 Sc in every stitch 18
18 (Sc, dec) × 6 12
19 Sc in every stitch 12
20 Dec × 6 6
Work the beginning chain and slip-stitch join for the rounds as demonstrated.
Round 5 source note: The video moves from the Round 4 caption to the instruction for Rounds 6–13 without a separately legible Round 5 formula. The surrounding stitch counts establish a transition from 24 to 30 stitches, requiring six increases. The precise placement of those increases is not presented here as a verified transcription.
Keep the Straight Section Even
Rounds 6–13 contain eight rounds of 30 stitches. Keep a written tally or move a marker after each completed round so that this section does not become shorter or longer accidentally.
If the body starts to widen during these rounds, count the stitches before continuing. A misplaced stitch at the join can gradually change the shape.
Stuff Before Closing the Snout
Add stuffing while the opening is still large enough to work through comfortably. Distribute it through the wider rear first, then shape the narrower front.
Use small amounts at a time. The body should hold its shape without stretching the stitches apart. Check both sides as you work so that the mouse does not develop a lumpy back or an uneven snout.
After Round 20, fasten off with enough yarn to close the remaining opening. Thread the yarn through the final stitches, draw the opening closed, and secure the end inside the body.
Make Two Ears
The ears are small circular pieces made in the same main color.
The video demonstrates a ch 6, sl st starting ring. Work the first round into that ring, then continue as follows.
Round Instructions Stitch count
1 6 sc into the ring 6
2 Ch 1, inc × 6, sl st 12
3 Ch 1, (sc, inc) × 6, sl st 18
Fasten off, leaving a sewing tail. Make a second ear to match.
Lay the ears beside each other before attaching them. If one is noticeably larger, check its stitch count and tension; a difference is easier to correct now than after sewing.
Make the Tail
The tail instruction shown in the video is:
Ch 40, or adjust the length as desired.
Fasten off, leaving yarn for attachment. The demonstrated instruction is a chain tail; no additional return row is included in these written notes.
Attach the tail securely to the broad rear of the mouse. Check the position from above and from the side before finishing the attachment.
Position and Sew the Ears
The video places the ears at approximately Round 18 of the body, near the tapered front.
Set both ears in position before sewing either one completely. Look at the mouse from the front, above, and each side. Check that the ears sit at a similar height and are balanced around the snout.
A slight pinch at the base can help an ear sit with a gentle curve. Adjust this while positioning the pieces rather than pulling the sewing yarn tightly enough to distort the body.
Sew through the ear base and the body fabric with several secure stitches. Weave the remaining yarn into the body, then repeat for the second ear.
Embroider the Face
Use black yarn to add the small eyes and nose or mouth details shown in the video. For a mouse intended for a cat to play with, embroidered features avoid adding separate plastic facial pieces.
Begin with small stitches. Check the face after each feature so that you can adjust the spacing before securing the yarn.
The narrowing end of the body already creates the snout, so the embroidery can remain simple. Position the eyes in relation to the ears and keep the nose centered at the front. Avoid tightening the yarn so much that it creates unwanted dents.
Secure and bury the ends inside the body.
Check the Finished Shape
Before considering the mouse finished, place it on a flat surface and inspect the overall shape.
The wider rear should lead smoothly into the narrower front. The ears should remain firmly attached when handled, and the tail attachment should feel secure. Check the closed snout and the round joins for any opening through which stuffing could escape.
If the mouse looks uneven, gently redistribute the stuffing with your fingers. If a seam or attachment feels loose, reinforce it before use.
Common Problems and Adjustments
What you notice What to check
The body becomes wider during the straight rounds Count the stitches and check whether an extra stitch was worked at the join.
Stuffing shows through the fabric Check the yarn-and-hook combination and whether the body is overfilled.
The snout looks blunt or uneven Recheck the decrease rounds and distribute the front stuffing more evenly.
One ear appears higher Compare both attachment positions before securing the final sewing stitches.
The face has deep dents Loosen embroidery that has been pulled too tightly.
Using the Mouse as a Cat Toy
Introduce the finished mouse during supervised play and inspect it regularly. Pay particular attention to the chain tail, ear attachments, and embroidered details.
Remove it from play if the yarn frays, a piece loosens, or stuffing becomes exposed. If your cat tends to chew or swallow string, keep the mouse as a decorative crochet piece instead.
Watch the Crochet Mouse Tutorial
Use the video alongside the round table, particularly for the starting setup, the transition into the straight body section, and the placement of the ears.
Finishing Your Little Mouse
This mouse gets its expression from a few carefully placed details. Balanced ears, a neatly closed snout, and small embroidered features give the simple body a clear character without requiring many separate pieces.
Take your time with the final positioning and sewing. Those finishing steps help the rounded body, tapered face, and chain tail come together as one tidy little project.
Watch every stitch up close
Pair these written notes with the complete video tutorial.
Made with yarn, shared with love. 🧶💗