
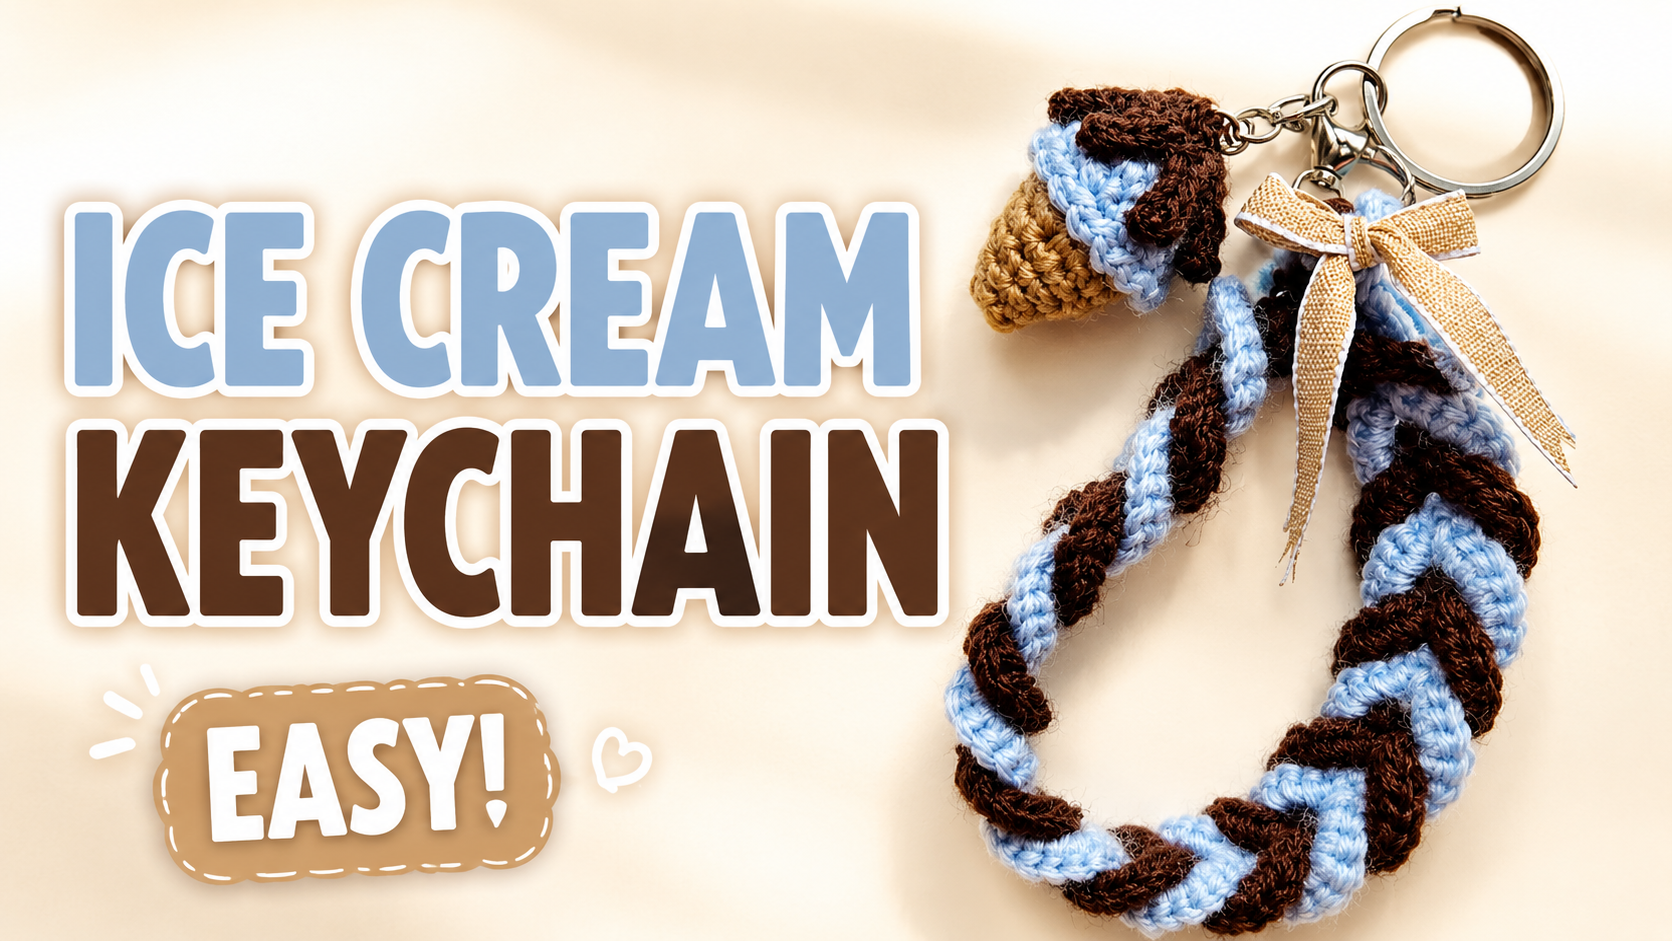
A tiny ice cream cone and a chunky braided strap make this crochet keychain more than a simple hanging miniature. The dessert provides the focal point, while the two-color strap repeats its colors and adds a different texture.
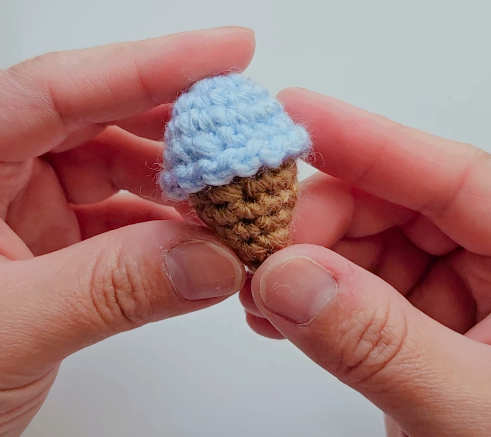
The project photograph shows a pale-blue scoop sitting over a brown cone. The scoop’s lower edge extends slightly beyond the cone, creating a recognizable ice cream silhouette without needing many extra details.
The tutorial also includes chocolate drizzle and a tiny cherry, followed by two crochet loop strands that interlock into the strap.
Use the video near the end for the exact stitches and assembly. This guide focuses on the fit between the pieces, the arrangement of the decorative details, and the braid’s finishing.
Plan the Colors Together
Choose the scoop, cone, drizzle, and strap colors before starting. Repeating the scoop color in one braid strand connects the miniature to the longer accessory.
Pale blue and brown recreate the combination shown in the photographs. Pink and cream suggest strawberry ice cream, while mint and dark brown create another dessert-inspired palette.
Keep enough contrast between the two braid strands that their interlocking structure remains visible.
Materials
- Medium-weight yarn for the scoop and cone.
- Contrasting yarn for the drizzle.
- A small amount of yarn for an optional cherry.
- Two coordinating yarn colors for the strap.
- A crochet hook suited to your yarn.
- Filling as required by the demonstration.
- A yarn needle, scissors, and a stitch marker.
- Your chosen key ring or clasp.
The public video description does not specify an exact hook size. Check the materials shown at the beginning and choose a combination that produces neat miniature stitches.
Use yarns of similar thickness for the two braid strands. A substantial difference can make one strand crowd or distort the other.
Crochet the Scoop and Cone
Follow the video’s construction for each piece. Check the cone’s tapered outline and the scoop’s rounded shape before completing the join.
Where filling is used, add it gradually. The cone needs to retain its point, while the scoop should remain rounded without becoming rigid.
Test the pieces together before securing them. The scoop should sit centrally, with its lower edge projecting beyond the cone in a balanced way.
If the fit differs noticeably from the demonstration, check stitch counts, yarn thickness, and tension. Pulling the smaller piece to fit can distort the final shape.
Arrange the Drizzle and Cherry
Follow the tutorial for the chocolate detail, then test its position against the scoop.
Leave some of the scoop color visible so the two sections remain distinct. Keep attachment tension gentle enough that the decorative layer does not compress the rounded top.
If adding the cherry, check its scale before securing it. A very large topper can overwhelm a miniature cone or interfere with the hanging connection.
Complete the decoration before finishing the strap attachment so you can see how all the details sit together.
Make Two Matching Loop Strands
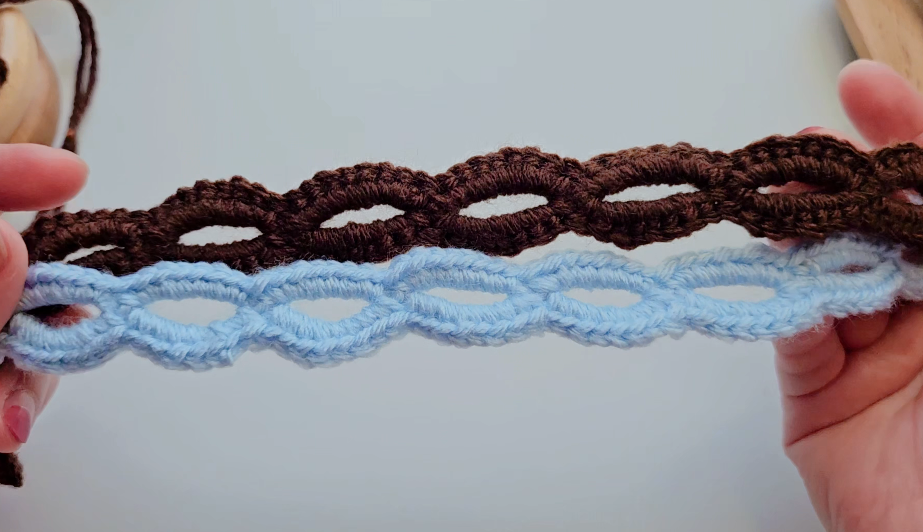
The strap begins as two separate crochet strands with repeated oval openings. The step photograph shows one brown strand and one pale-blue strand laid beside each other.
Follow the video for the loops and connecting sections. Compare the strands as you work, checking both the number of openings and their approximate size.
Keep the openings large enough for the interlocking step, without deliberately loosening the stitches around them.
If one strand is noticeably shorter, check the repeat count before trying to stretch it. Matching repeats and consistent tension make the braid easier to assemble.
Interlock the Loops Carefully
Watch the demonstration before weaving the strands together. This construction depends on passing the loops through one another in the correct sequence.
Work one repeat at a time and check that the strands have not twisted unintentionally. Keep the two colors identifiable as the braid forms.
If a section looks pinched or the colors stop alternating as demonstrated, undo that section while it is still accessible. Pulling harder usually tightens the mistake rather than correcting it.
Before finishing the ends, lay the braid flat and inspect its full length. The texture should remain consistent without one strand bunching along the side.
Finish the Keychain Attachment
Follow the video’s final assembly method, checking the relationship between the strap, hardware, and ice cream.
Anchor the connection to secure crochet stitches. Avoid relying only on the cherry, a decorative drizzle edge, or a loose yarn loop to support the miniature.
Hold the finished accessory by its intended attachment point and inspect how the cone hangs. Check that the strap does not press against the decoration or pull the scoop away from the cone.
Secure and hide every finishing end before trimming. Gently test each connection without yanking on the small pieces.
Watch the Complete Tutorial
The video demonstrates the scoop, cone, drizzle, loop strands, interlocking braid, and keychain assembly.
Useful chapter points:
- 0:15: Materials.
- 0:30: Ice cream scoop.
- 2:34: Cone.
- 5:10: Chocolate detail.
- 6:51: Strap construction.
- 8:45: Interlocking the braid.
- 9:14: Keychain assembly.
- 9:27: Finished project.
Watch the interlocking section before fastening off the strap ends. It helps you understand how the two separate strands become one accessory.
Check the Finished Length
Test the keychain against the bag or keys you intend to use. A long braid may suit a bag handle, while a shorter arrangement may be more convenient beside keys.
Adjust only where the tutorial’s construction allows. Removing an arbitrary loop can affect the interlocking sequence and the end finish.
For several gifts, complete one accessory first and record the yarn, hook, loop count, and attachment choices. Those notes help keep the next versions consistent.
Package and Care for the Charm
A simple backing card or small box gives the ice cream room to show. Support the cone without pressing the scoop or topper flat.
Include a care note based on the yarn and filling used. Remove detachable hardware before cleaning when practical, and let the crochet dry completely afterward.
Check the strap ends and miniature attachment occasionally if the keychain is handled often. Repair a loose connection before it pulls open the surrounding fabric.
Project and video tutorial by Crochetnotes.
Watch every stitch up close
Pair these written notes with the complete video tutorial.
Made with yarn, shared with love. 🧶💗