
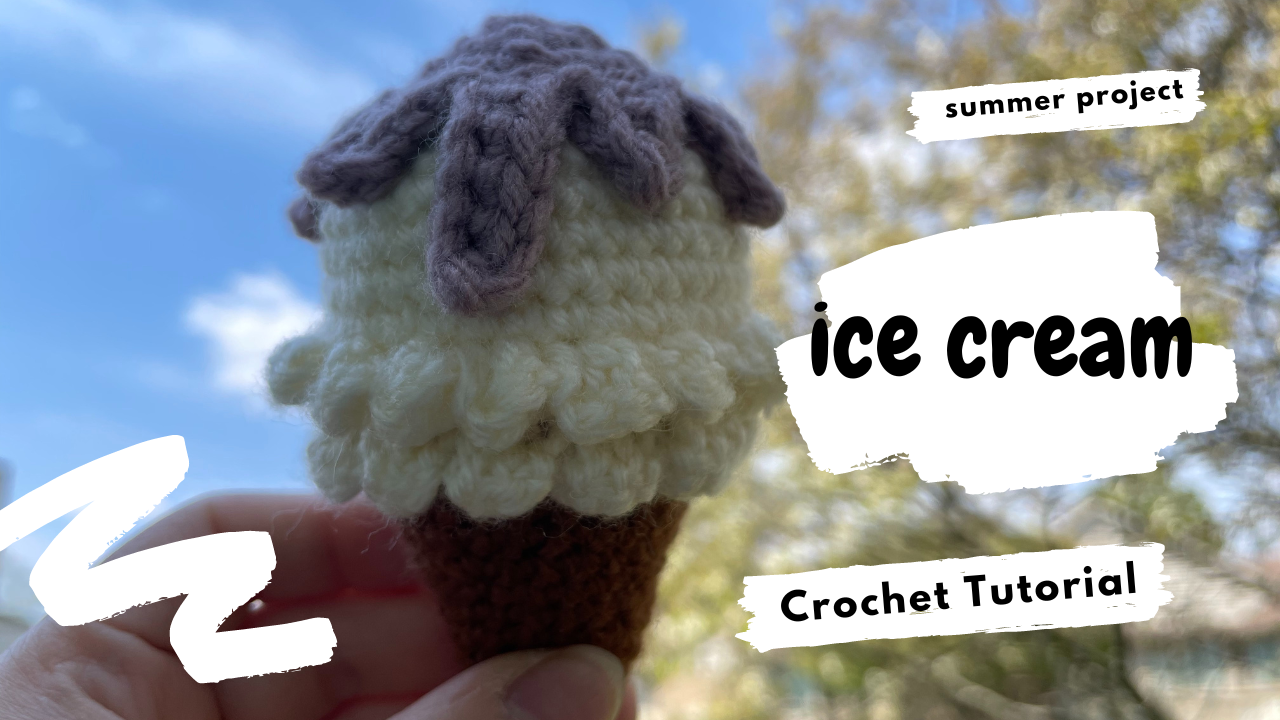
Crochet Ice Cream Cone Tutorial: A Sweet Summer Keychain or Ornament
A little crochet ice cream cone brings together three satisfying details: a tapered brown base, a rounded cream scoop, and a purple topping with uneven drips. The cream ruffle around the lower edge makes the scoop look generous without hiding the cone beneath it.
The cone and scoop are worked as one continuous structure with a color change. After filling and closing that main shape, the cream decorative edge is added. The purple topping is made separately and sewn onto the scoop.
This guide follows the video’s round sequence and adds stitch totals for checking your work. Keep the video available for the decorative edge and the topping’s attachment points, where the on-screen instructions are abbreviated.
Materials and Color Planning
Prepare:
- Brown yarn for the cone.
- Cream yarn for the scoop and ruffle.
- Purple yarn for the topping.
- A crochet hook suitable for your yarn.
- Toy stuffing.
- A yarn needle and scissors.
- A removable stitch marker.
- Optional hanging cord or keychain hardware.
Choose yarns of similar thickness so the topping fits the scoop and the cream section remains proportional to the cone.
The pictured colors suggest a pale scoop with a berry-colored sauce. You can change the flavor palette while keeping the construction: pink and deep rose, cream and chocolate brown, or pale green with a contrasting topping.
A fixed yarn weight, hook size, gauge, or finished measurement is not specified here. Complete one version before planning several matching charms.
Abbreviations and Pattern Notes
These instructions use US terminology.
Abbreviation Meaning
ch Chain
sc Single crochet
dc Double crochet
inc Work 2 sc into one stitch
dec Single crochet 2 stitches together
sl st Slip stitch
FLO Front loop only
sk Skip
R Round
The main structure uses joined rounds. After Round 1, begin each round with ch 1 and finish with a slip-stitch join.
Beginning chains and joining slip stitches are not included in the stitch totals. Mark the first single crochet so an extra stitch does not creep into the join.
1. Crochet the Brown Cone
Begin with brown yarn and a magic ring.
Round Instructions Total
1 6 sc into the magic ring; join 6
2 (Sc, inc) × 3 9
3 (Sc, inc, sc) × 3 12
4 (3 sc, inc) × 3 15
5 15 sc 15
6 (2 sc, inc, 2 sc) × 3 18
7 18 sc 18
8 (5 sc, inc) × 3 21
9 21 sc 21
10 (3 sc, inc, 3 sc) × 3 24
11 24 sc 24
12 (7 sc, inc) × 3 27
13 27 sc 27
Rounds 12 and 13 are supplied as written captions in the video, which states that their working footage was not filmed.
Preserve the Taper
Each increase round adds three stitches. The intervening straight rounds help the cone gain height without widening too quickly.
Check the cone upright after several rounds. If one side bulges unexpectedly, recount before trying to reshape it.
Do not add extra increases to make the opening wider. The cream section is designed to expand from the cone’s 27-stitch rim.
2. Change to Cream for the Scoop
The scoop begins directly on the cone.
Round 14
The video specifies:
Ch 1, (2 FLO sc, sc inc) × 9, sl st.
Total: 36 stitches.
The pattern explicitly identifies front-loop work at this transition. Follow the close-up for the hook placement throughout the repeat, including the increase, rather than substituting a conventional both-loop round.
Round 15
Ch 1, 36 sc FLO, sl st.
Total: 36 stitches.
These loop-specific rounds are important to the construction and the later decorative edge. Keep their visible loop lines accessible when checking your work.
Rounds 16–20
Work 36 sc in each round, beginning with ch 1 and ending with a slip-stitch join.
These five rounds build the scoop’s height. Count them separately so the upper section does not become taller on one version than another.
3. Shape the Rounded Top
Continue in cream.
Round Instructions Total
21 (2 sc, dec, 2 sc) × 6 30
22 (3 sc, dec) × 6 24
23 (Sc, dec, sc) × 6 18
24 (Sc, dec) × 6 12
25 Dec × 6 6
Begin each round with ch 1 and finish with a slip-stitch join.
The decreases gradually round the scoop. Keep them firm enough to avoid conspicuous holes without pulling the surrounding stitches into sharp dents.
4. Stuff and Close the Main Shape
Add stuffing before the opening becomes too small.
Support the cone first, guiding small amounts toward its narrow end. Keep that section tapered rather than packing it into a rounded lump.
Fill the scoop gradually, spreading the stuffing toward the sides. It should extend beyond the cone while remaining centered above it.
Before the final closure, check:
- The cone keeps its narrow lower outline.
- The scoop has even fullness around the circumference.
- The color transition is not being stretched open.
- No hard lump sits directly beneath the top.
Complete the final decrease round, fasten off, and gather the remaining opening closed with a yarn needle. Secure and hide the end.
5. Add the Cream Ruffled Edge
The decorative cream edge is worked after the main scoop is closed.
The video gives the compact sequence:
Ch 2, (2 dc, ch 2), sl st.
Work around the lower scoop using the attachment positions demonstrated in the close-up. The earlier loop-specific rounds provide the visible structure used at this stage.
The caption does not fully specify every insertion and slip-stitch placement. Check those movements in the video before repeating the first decorative section around the edge.
Keep the Ruffle Full and Even
Use a consistent double crochet height and relaxed chain tension. Tight chains can draw the decorative groups against the scoop, while overly loose chains can leave projecting loops.
Rotate the ice cream as you work. Make sure the cream edge remains visible around the whole cone and has not folded underneath itself.
Finish and secure the yarn without pulling the ruffle flat.
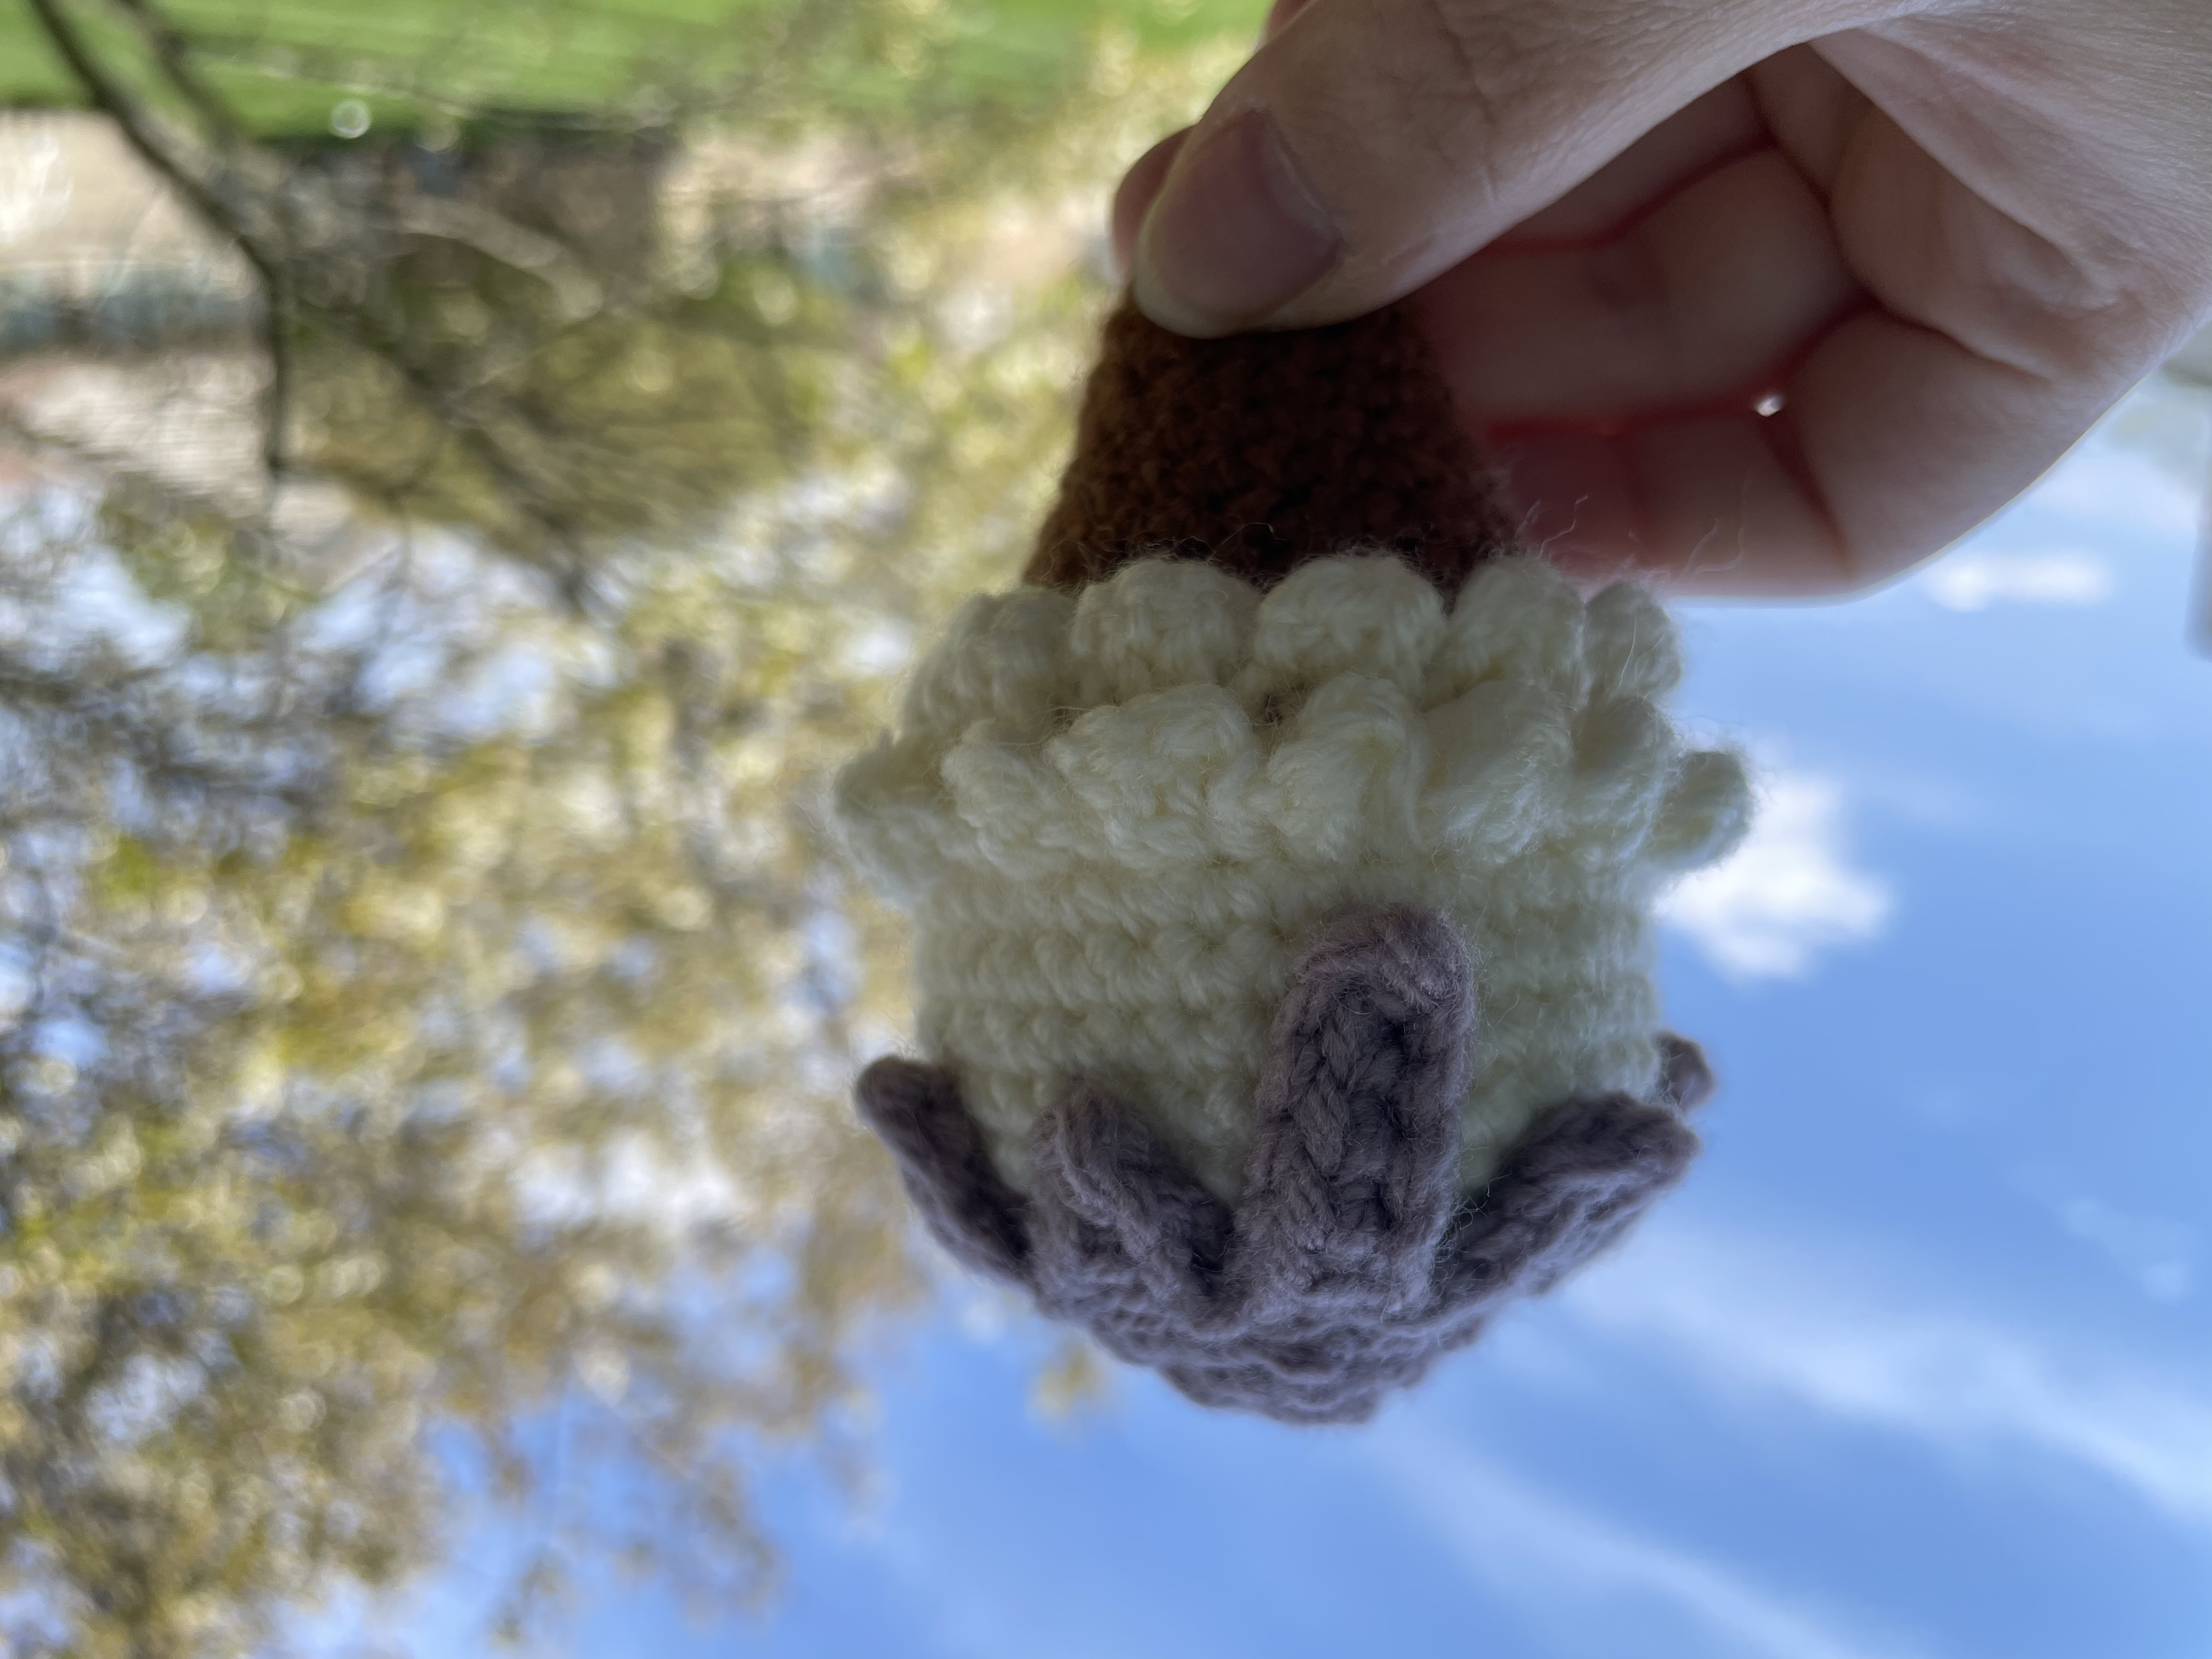
6. Crochet the Purple Topping
The topping is a separate piece. Begin with purple yarn and a magic ring.
Round Instructions Total
1 6 sc into the magic ring; join 6
2 Ch 1, inc × 6; join 12
3 Ch 1, (sc, inc) × 6; join 18
The small circular section forms the top of the sauce layer. Its drips are added around the edge in the next stage.
7. Form the Uneven Drips
The video uses chain extensions of different lengths, then works back along them with single crochet.
The displayed examples include:
Drip length Chain extension Return along the chain
Short Ch 4 Skip 1, work 3 sc
Medium Ch 5 Skip 1, work 4 sc
Long Ch 7 Skip 1, work 6 sc
For each extension, begin the return in the second chain from the hook.
The difference in length gives the sauce its flowing outline. Keep the return stitches at a steady tension so the drips hang softly instead of twisting into tight spirals.
Check the Connections
The handwritten caption includes abbreviated connections and ends with an ellipsis. It does not establish a complete numbered repeat for the entire edging.
Follow the demonstration for how each returned strip reconnects to the circular rim and where the next extension begins. Do not treat the example lengths as a requirement to repeat one identical sequence all the way around.
Before fastening off, place the topping loosely over the scoop. Check that its crown sits comfortably and the drips leave cream visible between them.
8. Sew the Topping onto the Scoop
Center the purple circle over the cream top.
Temporarily arrange the drips before sewing. Rotate the ice cream and choose how you want the longer drips to appear from the front and sides.
Use small stitches to secure the topping without tightening it into the stuffing. Add discreet stitches beneath individual drips where needed to keep them lying against the scoop.
Avoid sewing a straight, tight line across the visible surface of a drip. That can flatten it or pull its end upward.
Recheck the arrangement as you sew. The purple layer should remain distinct from the cream ruffle below.
9. Finish as an Ornament or Charm
The crochet piece can remain a small decoration, or you can add a hanging attachment.
For an ornament, test a temporary loop first. Check that the cone points downward and the scoop hangs upright before securing the permanent loop.
For a keychain or bag charm, attach the hardware through a firm part of the main structure. Spread the attachment across several stitches rather than placing all the pull on a sauce drip or one decorative ruffle.
Secure the topping separately so it does not carry the weight of the whole piece.
A cone-shaped base is unlikely to stand freely on every surface. A small display support can hold it upright without changing the crochet.
Troubleshooting
Problem What to check
The cone becomes too wide Confirm that increase rounds add only three stitches and that the straight rounds are included.
The cream section has the wrong circumference Check for 27 stitches before Round 14 and 36 afterward.
The scoop looks uneven Redistribute the filling before adding more.
The decorative edge pulls inward Check chain tension and the demonstrated attachment positions.
Sauce drips curl tightly Relax the foundation chains and return stitches.
The topping puckers Ease the sewing tension and reposition it on the scoop.
The finished charm hangs sideways Adjust the suspension point before securing the hardware.
Final Finishing and Care
Inspect the top closure, color transition, cream ruffle, and spaces beneath the purple drips. These are easy places for loose ends to hide.
Secure the remaining tails and remove every temporary marker or pin. Gently arrange the ruffles and drips with your fingers.
Follow the yarn and stuffing care instructions when cleaning. Blot small marks gently, reshape the details, and allow the piece to dry completely. Avoid pressing an iron directly onto the raised cream edge.
Watch the Crochet Tutorial
Use the close-ups for the front-loop transitions, cream ruffle attachments, and connections between the sauce drips. Pause after the first decorative repeat so you can compare it before continuing.
A Sweet Little Summer Project
The tapered cone and rounded scoop give this ice cream its recognizable shape. The cream ruffle and purple drips add the playful details.
With even filling and relaxed attachment stitches, the layers remain clear from every angle—ready to finish as a small ornament, bag charm, or handmade gift.
Watch every stitch up close
Pair these written notes with the complete video tutorial.
Made with yarn, shared with love. 🧶💗