

Crochet Corgi Phone Holder: A Cute Desk Project for Dog Lovers
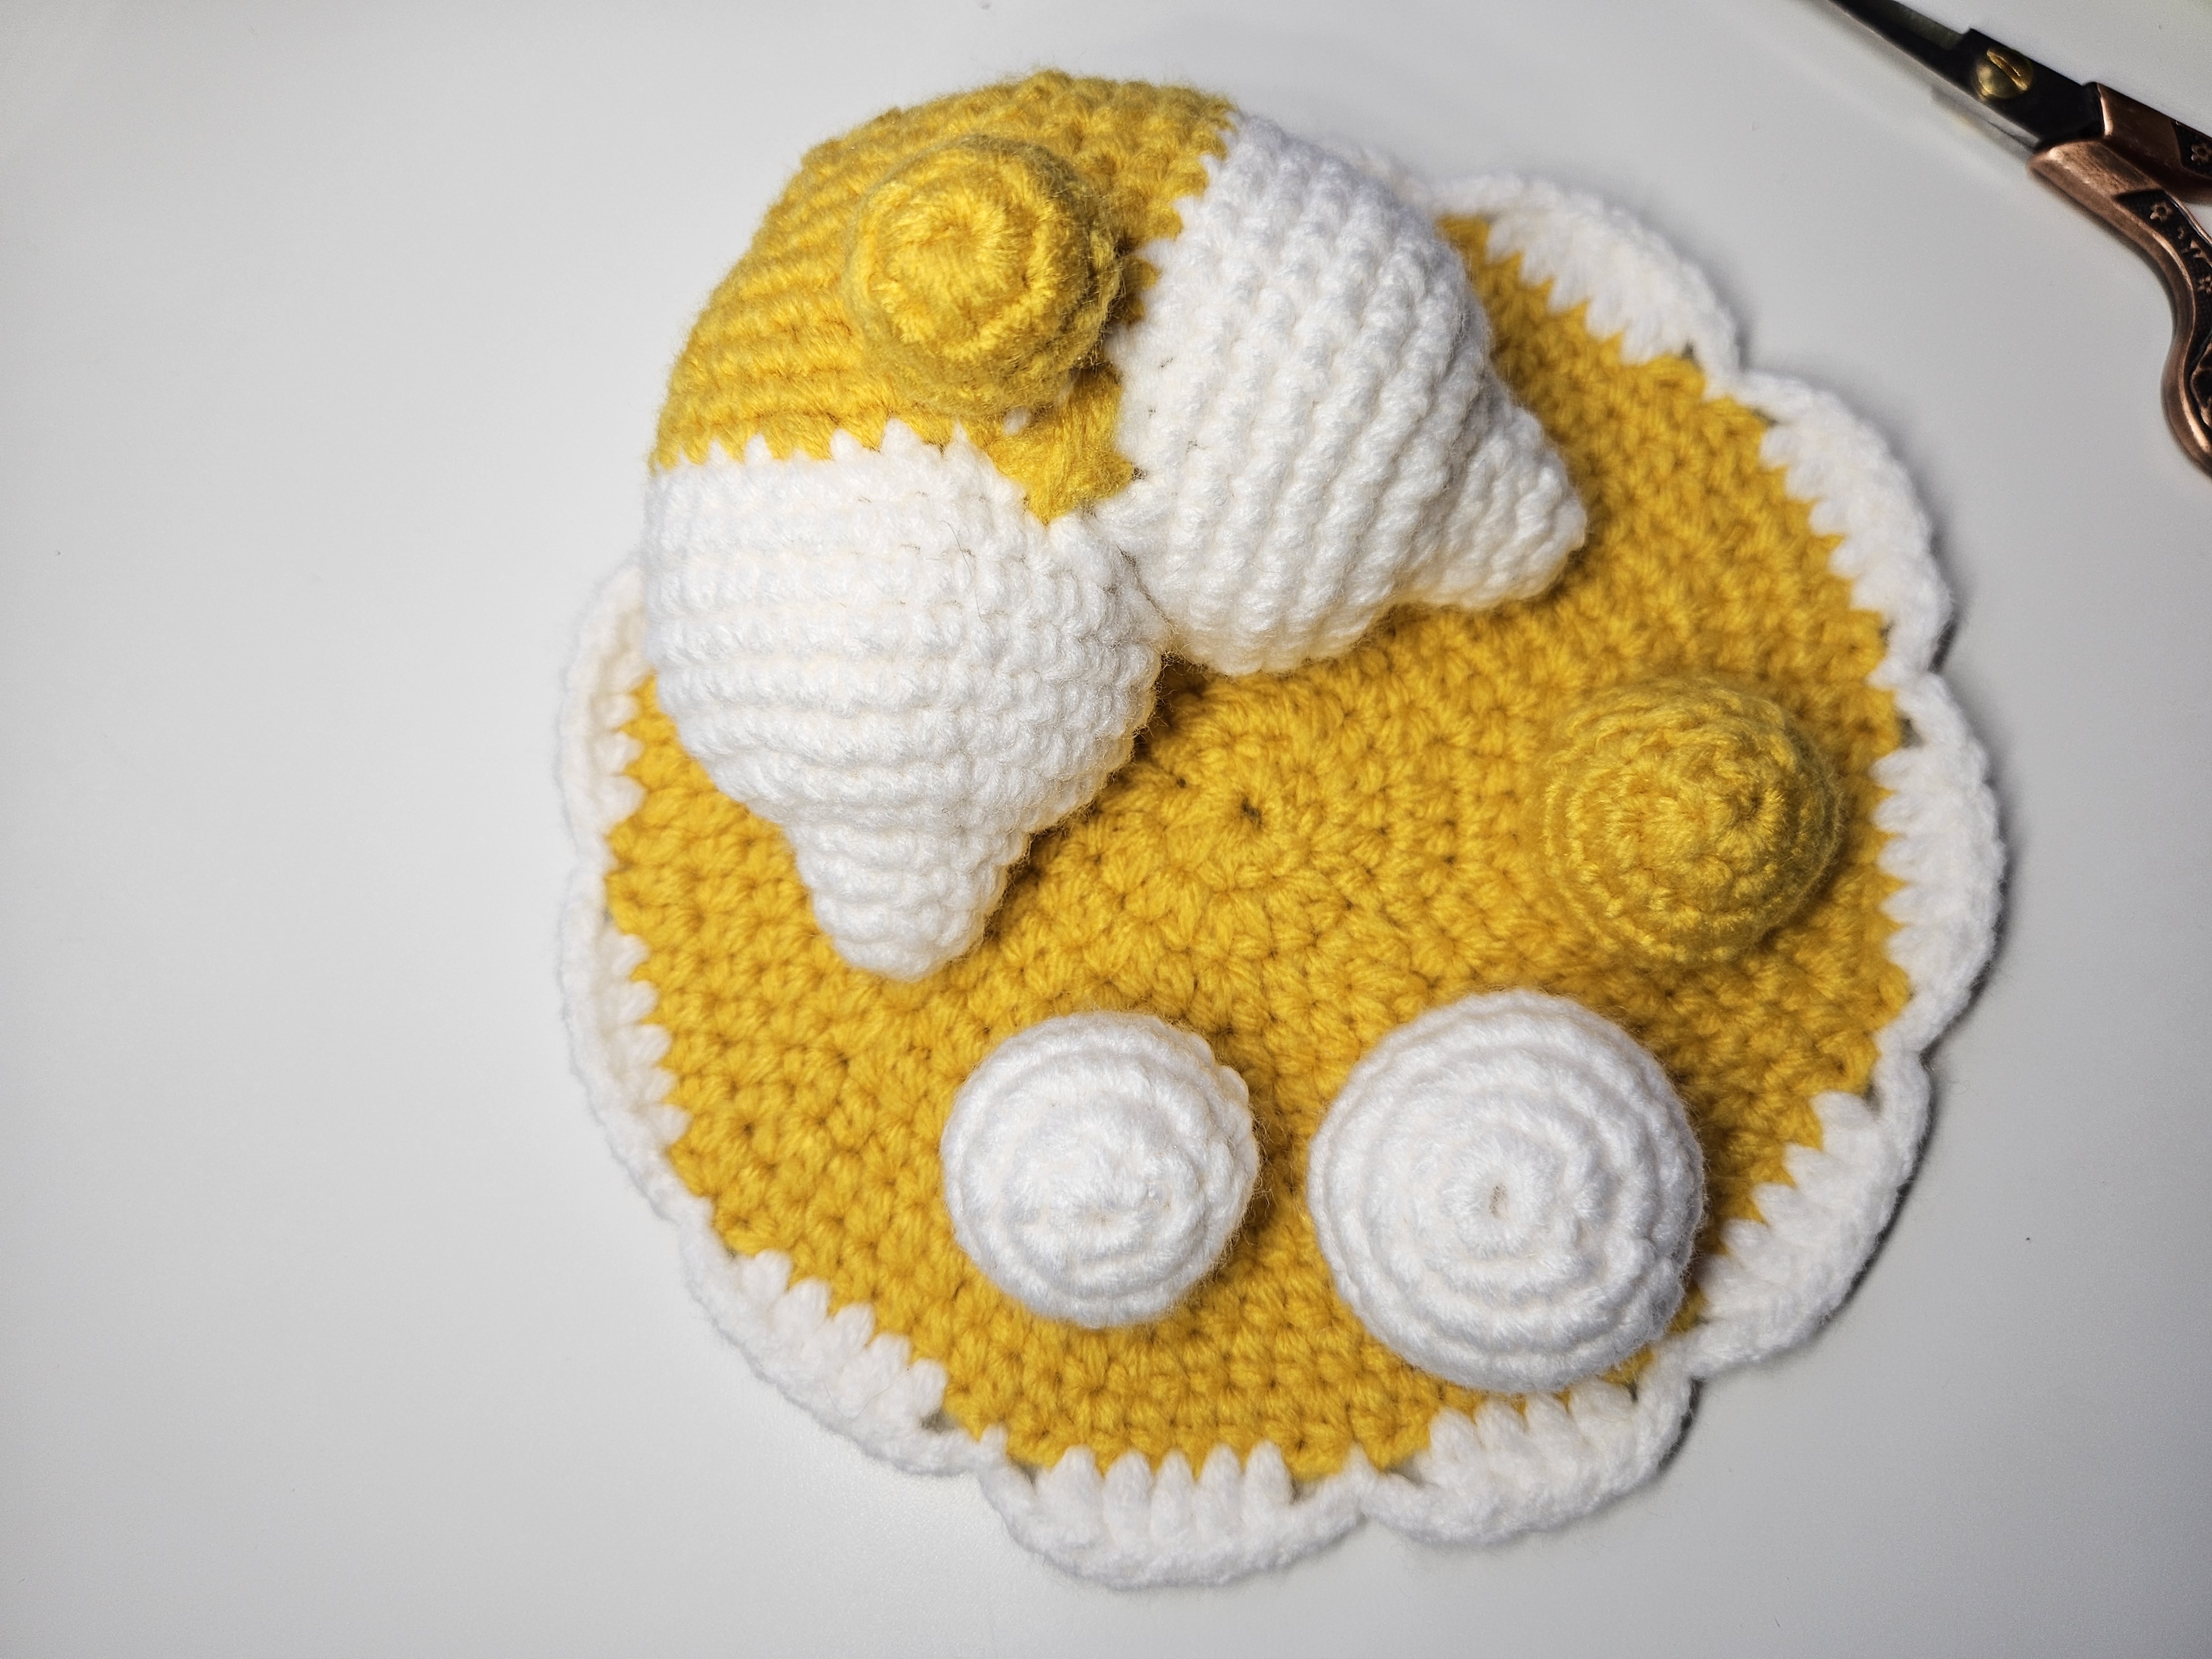
This little corgi has a useful job: holding a phone while you watch a tutorial, follow a recipe, or keep a video call in view. The design is a playful rear view, with two white legs below a golden body and a small yellow tail. A round mat with white scallops holds the arrangement together.
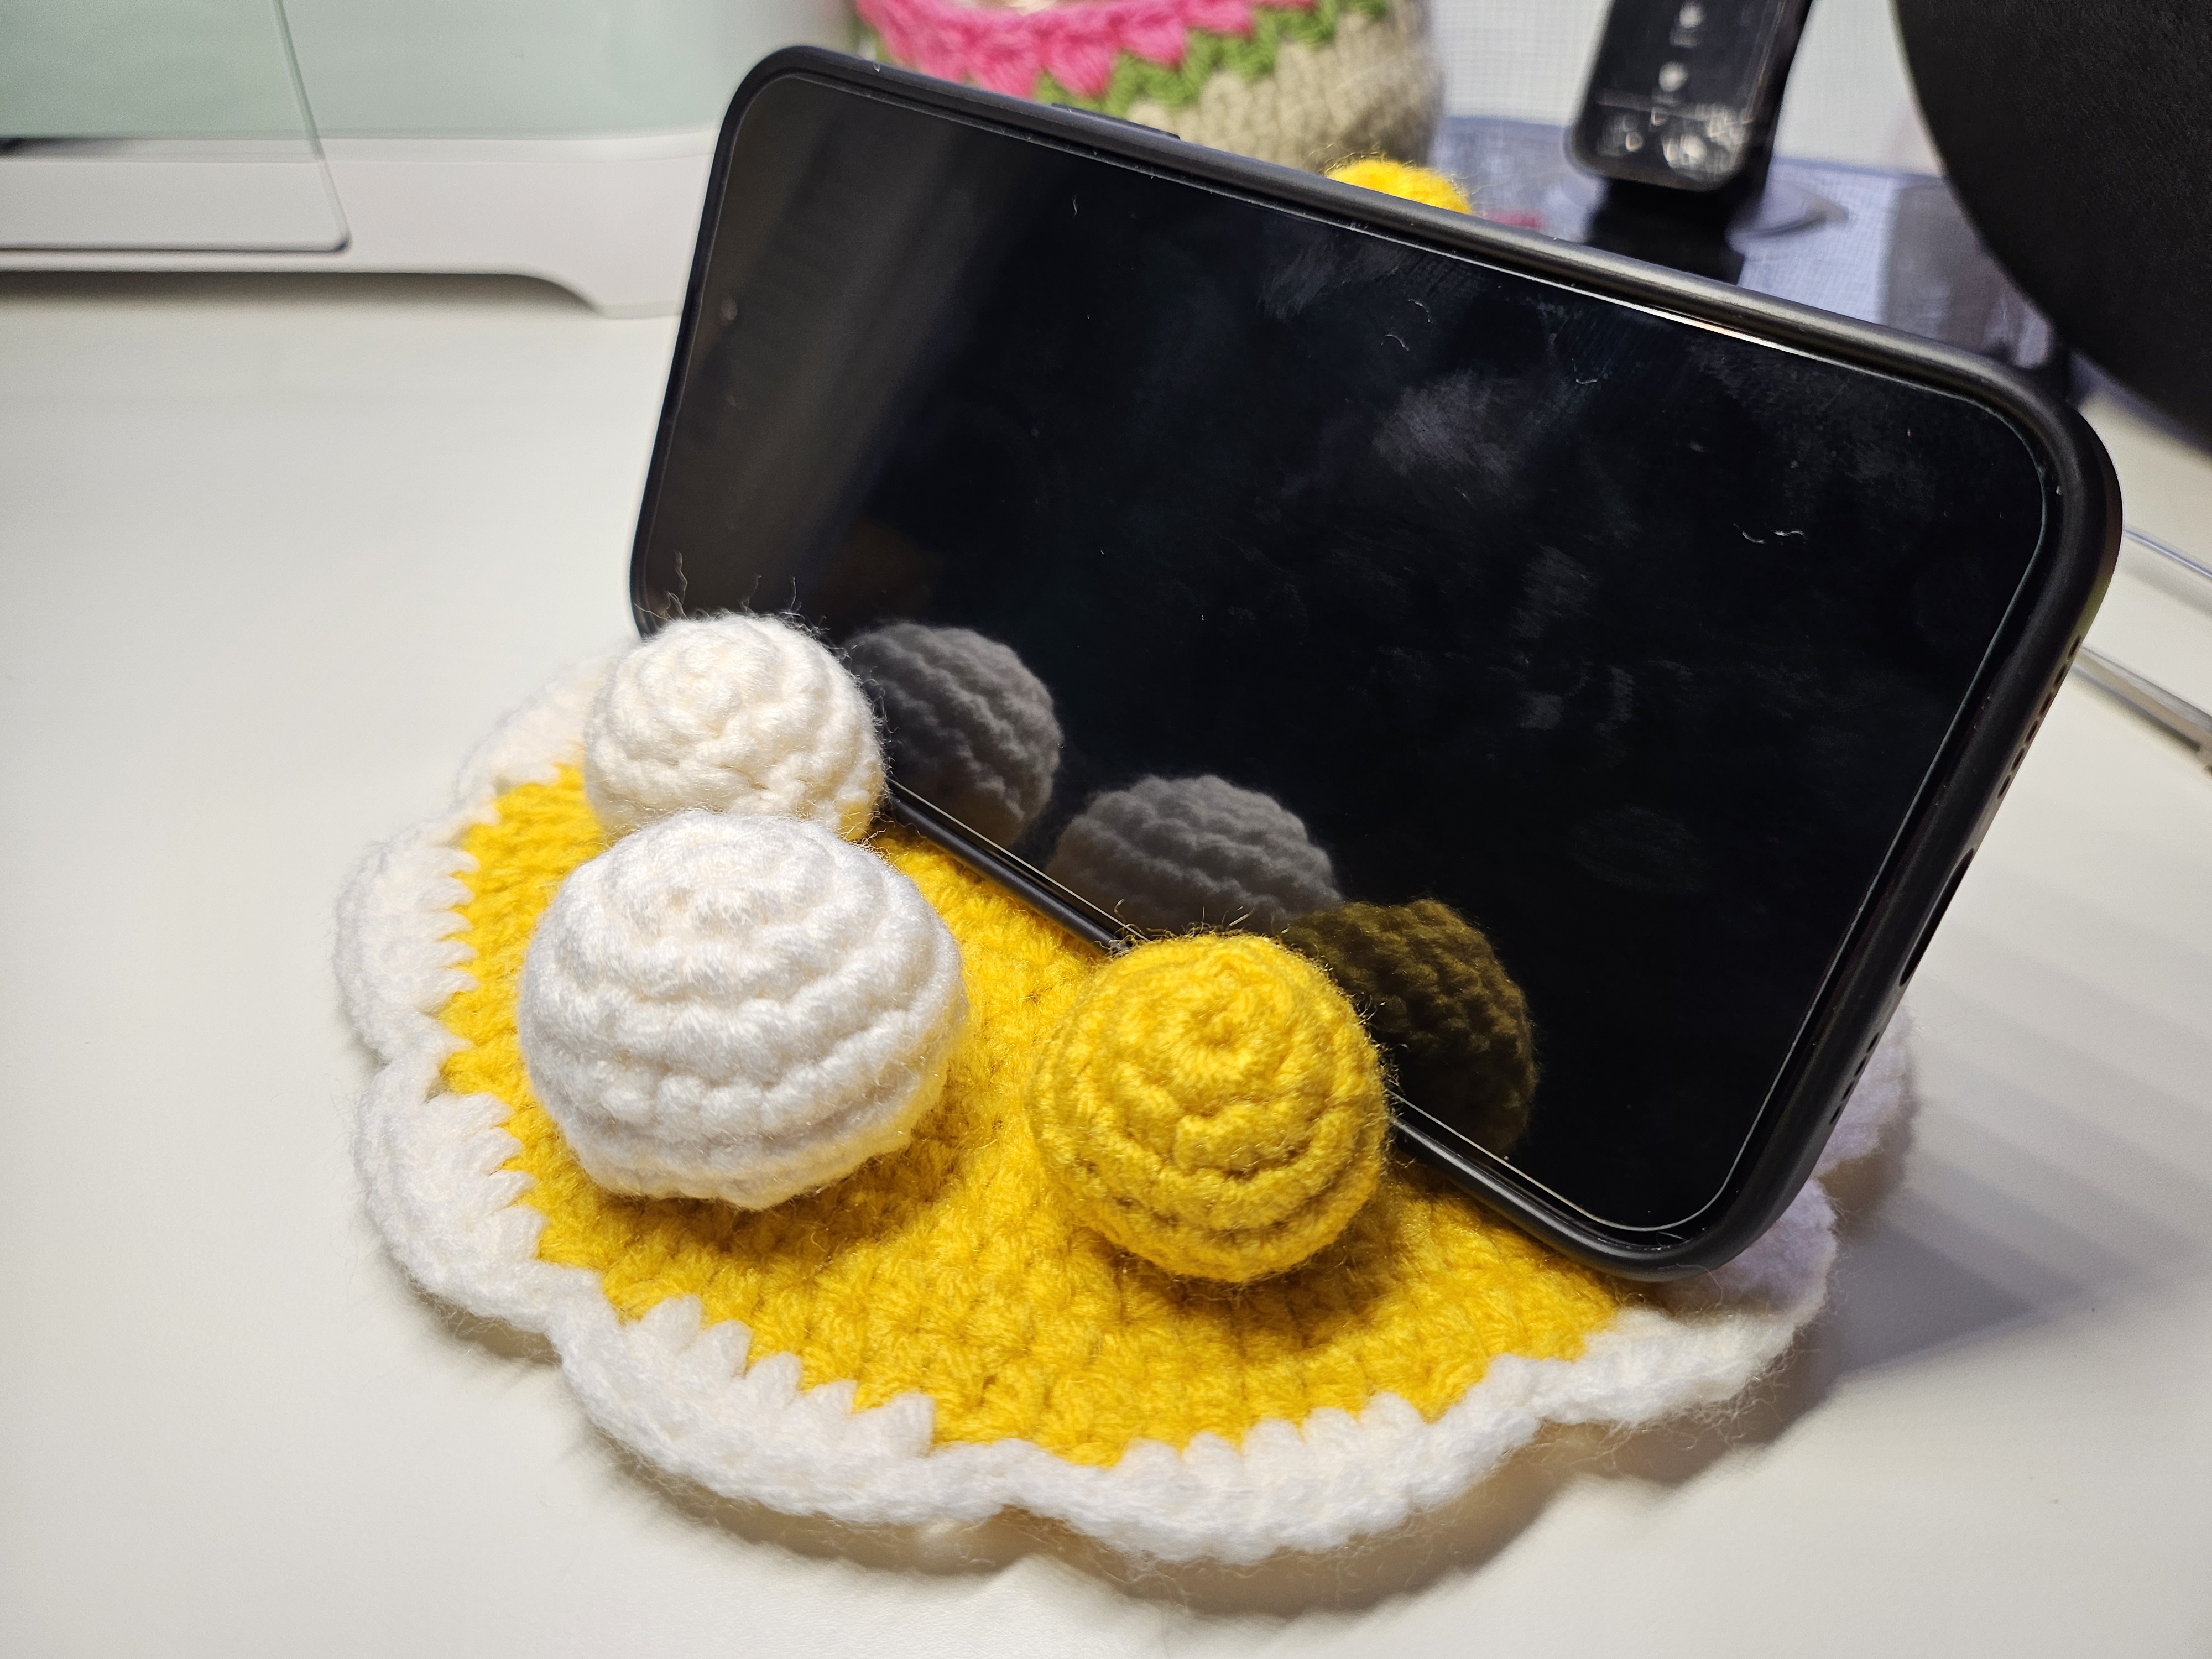
Three raised pieces sit in front of the larger support. Their position matters as much as their appearance, since the phone rests between the front stops and the stuffed section behind it.
The project is built from several manageable pieces. Work the two matching body starts first, join them into the rear support, then make the tail, mat, and smaller stops. Keep your actual phone and case nearby for the final positioning.
Materials and project notes
Prepare golden yellow and white yarn of similar thickness, a hook that gives firm amigurumi fabric, stuffing, a marker, scissors, and a yarn needle. The tutorial also shows a glue gun during assembly. If using adhesive, choose one suitable for your yarn and let it set fully before adding the phone.
The written notes do not assign a hook size, yardage, or load capacity that the chart does not establish. A yarn substitution changes the footprint, height, and firmness, so the finished holder needs testing with the intended device.
The base is a single crocheted mat rather than a rigid manufactured stand. Use it on a flat desk. A phone that is secure in landscape orientation may still be unstable upright.
Abbreviations and counting
US terms: ch = chain; sc = single crochet; hdc = half double crochet; dc = double crochet; sl st = slip stitch; inc = 2 stitches in one stitch; dec = decrease over two stitches; FLO = front loop only; MR = magic ring.
An increase or decrease uses the stitch named in that component. The body uses sc; the mat uses hdc. The video’s `ss` is written as sl st below. Its compact `2sc dec` means two consecutive sc decreases, rather than one decrease preceded by two ordinary sc.
The tables give the number of actual crochet stitches, excluding joining slip stitches and lifting chains. Totals calculated from the displayed formulas are included to help with checking.
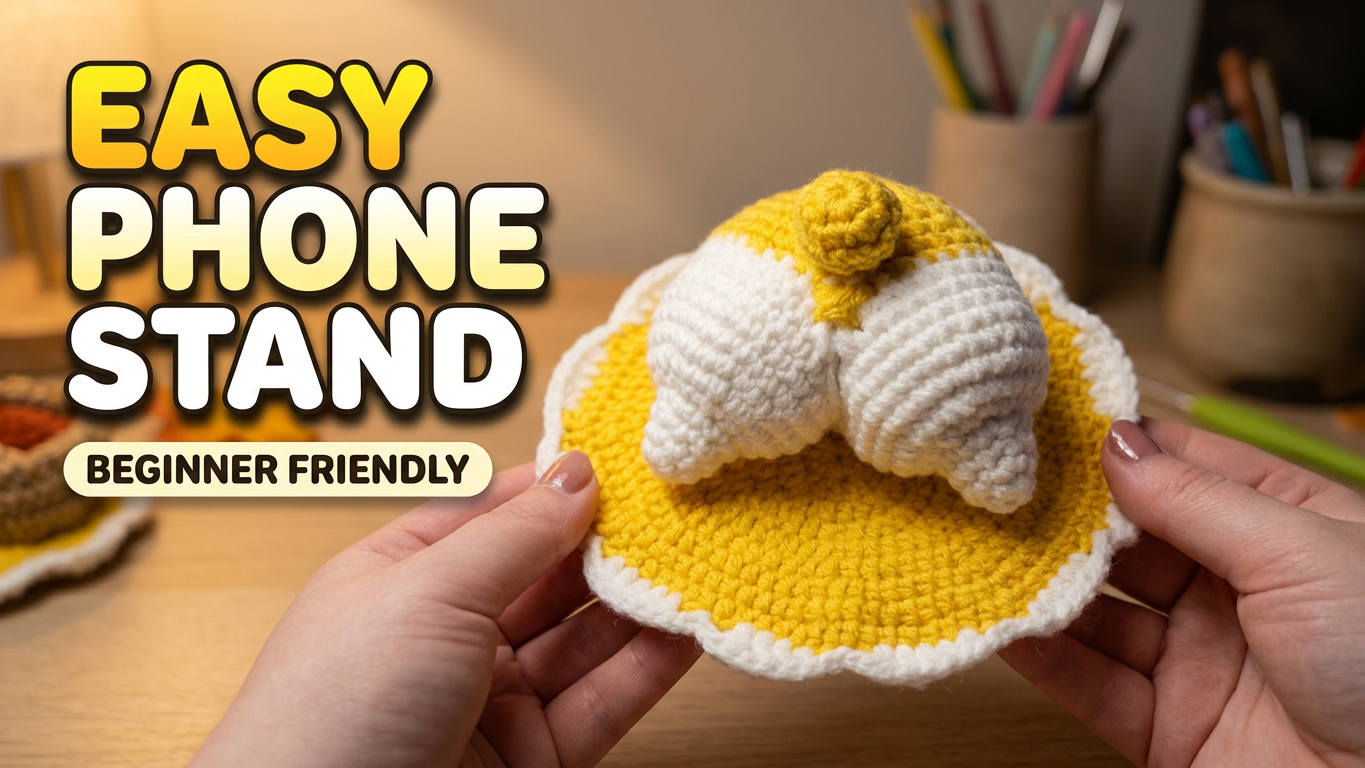
1. Make two white body starts
Begin each piece with a white magic ring. Join each round with a slip stitch as shown, keeping the marker on the first actual stitch.
| Round | Instruction | Stitches | | --- | --- | --- | | 1 | 6 sc in MR; sl st | 6 | | 2 | (Sc, inc) × 3; sl st | 9 | | 3 | (Sc, inc, sc) × 3; sl st | 12 | | 4 | 12 sc; sl st | 12 | | 5 | Inc in each of the 12 stitches, FLO; sl st | 24 | | 6 | (3 sc, inc) × 6; sl st | 30 | | 7–9 | 30 sc each round; sl st | 30 |
Round 5 is an important change in both width and insertion: twelve increases worked through the front loops create 24 stitches. Working only twelve plain single crochets here would leave the piece much too narrow.
Compare the two starts before joining. They should have the same number of rounds and similar height. Keep their narrow leg ends pointing in the same direction.
2. Join the white pieces and form the rear support
The two 30-stitch openings connect before Round 10. Follow the close-up around the connecting edges so the new outer circuit contains 48 stitches. The video’s first joined round is not a 60-stitch circuit around two untouched openings.
Mark the join and count the outside stitches before proceeding. It is easier to correct the connection now than after the upper body has been filled.
| Round | Instruction | Stitches | | --- | --- | --- | | 10 | 48 sc around the joined outline; sl st | 48 | | 11 | 22 sc, dec twice, 22 sc; sl st | 46 | | 12 | 21 sc, dec twice, 21 sc; sl st | 44 | | 13 | 20 sc, dec twice, 20 sc; sl st | 42 | | 14 | Change to yellow; (5 sc, dec) × 6; sl st | 36 | | 15 | 36 sc; sl st | 36 | | 16 | (2 sc, dec, 2 sc) × 6; sl st | 30 | | 17 | 30 sc; sl st | 30 | | 18 | (3 sc, dec) × 6; sl st | 24 | | 19 | (Sc, dec, sc) × 6; sl st | 18 | | 20 | (Sc, dec) × 6; sl st | 12 | | 21 | Dec × 6; sl st | 6 |
For example, Round 11 uses 22 + 4 + 22 = 48 previous stitches and produces 22 + 2 + 22 = 46 new stitches. That is why the two decreases must remain together in the middle.
Add stuffing while the opening is still accessible. Fill the two lower sections and upper body evenly, without forcing the stitches apart. The support should keep its shape when gently pressed, but the front face should not become a hard, uneven lump.
Finish the final opening with the yarn needle and secure the end. Check the connection between the white lower sections for any gap that needs closing.
3. Make the yellow tail
Start a yellow magic ring.
| Round | Instruction | Stitches | | --- | --- | --- | | 1 | 6 sc in MR; sl st | 6 | | 2 | Inc × 6; sl st | 12 | | 3–4 | 12 sc each round; sl st | 12 |
Finish the small tail and attach it to the yellow rear section in the position shown. Do not add an invented decrease round to this four-round chart. Its finishing and attachment create the final little projection.
Temporarily position it before securing it. Keep the white legs and central divide recognizable when you look at the support from the front.
4. Crochet the yellow mat
Start a yellow magic ring. This section uses half double crochet, with ch 2 at the start and a slip stitch at the end of each round.
| Round | Instruction after ch 2 | Stitches | | --- | --- | --- | | 1 | 10 hdc in MR | 10 | | 2 | Hdc inc × 10 | 20 | | 3 | (Hdc, hdc inc) around | 30 | | 4 | (2 hdc, hdc inc) around | 40 | | 5 | (3 hdc, hdc inc) around | 50 | | 6 | (4 hdc, hdc inc) around | 60 | | 7 | (5 hdc, hdc inc) around | 70 | | 8 | (6 hdc, hdc inc) around | 80 | | 9 | (7 hdc, hdc inc) around | 90 |
The Round 2 overlay reads `10sdc inc`, while Round 1 and the following rounds identify hdc. These notes use hdc increase for that round to match the demonstrated mat construction; the printed abbreviation is flagged here rather than silently introducing a different stitch.
Lay the mat flat after the expansion rounds. Check increases and the round joins if the edge cups or ripples. Do not rely on the weight of the assembled corgi to flatten an incorrectly counted mat.
White scalloped edge
Change to white. The displayed Round 10 repeat is ch 2, skip a stitch, 5 dc, skip a stitch, sl st, repeated around the edge. Follow the close-up to place the five double crochets together as a shell, rather than spreading them across five stitches.
The overlay uses `k` for the skipped stitches. It does not supply an exact shell count or an explicit end-of-round spacing adjustment. Match the final shell and join to the demonstration instead of assuming that the 90-stitch mat divides into an unstated number of identical shells.
Keep the edging loose enough that the yellow mat still rests flat.
5. Make two white front stops
These white rounded pieces are larger than the yellow front stop. Make two, starting each with a magic ring.
| Round | Instruction | Stitches | | --- | --- | --- | | 1 | 6 sc in MR; sl st | 6 | | 2 | Inc × 6; sl st | 12 | | 3 | (Sc, inc) × 6; sl st | 18 | | 4 | (Sc, inc, sc) × 6; sl st | 24 | | 5–6 | 24 sc each round; sl st | 24 | | 7 | (Sc, dec) × 8; sl st | 16 | | 8 | (Sc, dec) × 5, sc; sl st | 11 |
Round 8 deliberately ends with one extra sc after the five repeats: it consumes all 16 stitches and produces 11. Keep that final stitch rather than changing the chart to a more familiar six-repeat decrease.
Fill and finish the openings using the demonstration’s needle finishing. Match the firmness of the two pieces so one will not compress much more than the other under the phone.
6. Make the yellow front stop
Start a yellow magic ring.
| Round | Instruction | Stitches | | --- | --- | --- | | 1 | 6 sc in MR; sl st | 6 | | 2 | Inc × 6; sl st | 12 | | 3 | (Sc, inc) × 6; sl st | 18 | | 4–5 | 18 sc each round; sl st | 18 | | 6 | (Sc, dec) × 6; sl st | 12 | | 7 | Dec × 6; sl st | 6 |
Add stuffing before the opening becomes too small, then close and secure it. The finished arrangement shows two white stops and one yellow stop in front of the rear support.
Arrange, attach, and test
Place the rear support toward the back of the mat. Arrange the three small pieces in the front area, leaving room for the lower edge of the phone between the front stops and the rear support.
Use the video’s placement as the starting point, then test with the actual phone and case while holding the device securely. Check the viewing angle from the side and whether the stops meet the case rather than covering the screen.
The demonstration uses a glue gun for attachment. Work a section at a time, keep adhesive out of the visible crochet, and let each bond set before testing. If you choose sewn attachment instead, treat it as an assembly variation and distribute the stitches across the connection so the pieces cannot roll away under pressure.
After attaching everything, test the phone in landscape orientation on a flat surface. Keep a hand nearby, check again after the stuffing settles, and remove the device if the support leans or the lower edge slides forward. Portrait orientation needs a separate balance test.
Troubleshooting and care
| Problem | Check | | --- | --- | | White body halves look different | Rounds 5–9, particularly the FLO increases | | Joined body has too many stitches | The connection before the 48-stitch round | | Mat curls after adding white | Shell placement and edging tension | | Phone tilts sideways | Support placement and unequal stuffing in the white stops | | Parts move under pressure | Attachment area and whether adhesive has fully set |
Remove the phone before cleaning. Follow the care needs of the yarn, filling, and adhesive together; a washable yarn does not automatically make every assembled component machine washable.
Watch the full corgi phone holder tutorial
Use the close-up for joining the two white body starts, placing the scallops, closing the stuffed pieces, and arranging the finished support.
The final fit comes from three things working together: a flat mat, evenly filled supports, and placement matched to your phone. Once those are right, the little tail and short legs turn a practical desk accessory into a cheerful corgi companion.
Watch every stitch up close
Pair these written notes with the complete video tutorial.
Made with yarn, shared with love. 🧶💗