
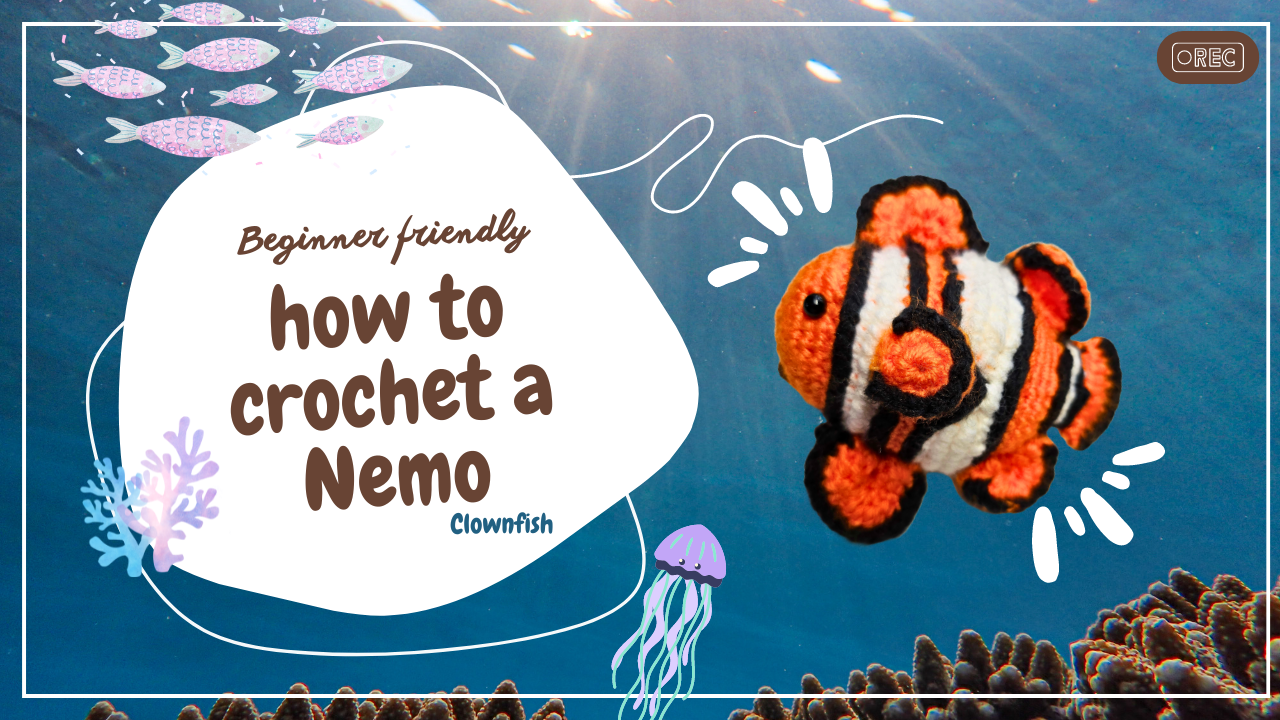
Crochet Clownfish Keychain: A Tiny Ocean Friend to Make
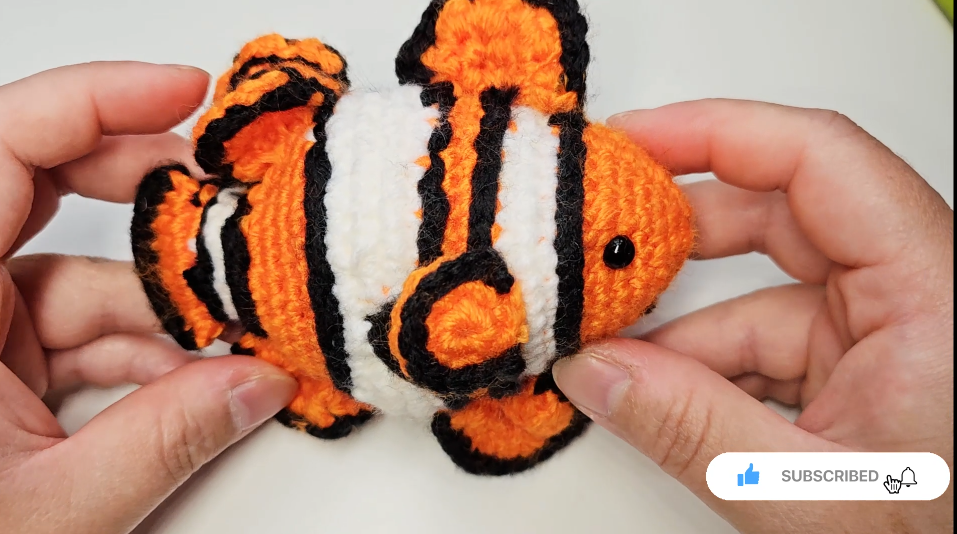
The familiar orange-and-white bands make a clownfish recognizable before its eyes or fins are added. In crochet, the effect depends on more than alternating colors: this fish has a rounded front, a narrowing body, a flared tail, and small fins that change its outline from every angle.
The body and tail are worked together, while the fins are prepared separately. Black details are added afterward, giving the color boundaries a stronger outline without making every body round a three-color round.
This written companion follows the Crochetnotes video’s on-screen formulas. It organizes the long tutorial into manageable sections, adds counting checks, and explains the finishing order. The source contains an unresolved body-round error and an ambiguous fin foundation. Their original wording is preserved below; this guide does not present an invented correction as a tested pattern.
Plan the project before crocheting
Prepare orange, white, and black yarn, a suitable hook, a stitch marker, stuffing, a yarn needle, scissors, eye fittings or embroidery supplies, and your chosen keychain hardware.
The video shows post-style eyes among its supplies. If your chosen eyes require internal washers, install them while the inside is accessible. Do not wait until the tail is closed to discover that the fittings cannot be attached.
Use compatible yarns for the three colors. A much thicker black yarn can make surface outlines bulky, while a very thin white yarn can produce a noticeably looser stripe. Choose a hook that produces close stitches with your materials; no unsupported hook size, yardage, gauge, or finished measurement is assigned here.
This project calls for joined rounds, increases, decreases, front-loop work, color changes within a round, and some small rows for the fins. Read the counting note before starting the body, especially if you prefer patterns that can be followed entirely without the video.
Stitch key
| Abbreviation | Meaning in US terms | | --- | --- | | ch | Chain | | sc | Single crochet | | sc inc | 2 sc in one stitch | | sc dec | Single crochet decrease over 2 stitches | | hdc | Half double crochet | | hdc inc | 2 hdc in one stitch | | dc | Double crochet | | dc inc | 2 dc in one stitch | | FLO | Work in front loops only | | sk | Skip | | sl / ss | Slip stitch; `ss` marks a join in the round charts |
Keep the joining slip stitch separate from the counted body stitches. The totals below are arithmetic checks on the displayed formulas, not claims that the source has been independently corrected or sample-tested.
1. Start the orange body
Begin with orange and a magic ring. Join the displayed rounds with a slip stitch.
| Round | On-screen instructions | Calculated total | | --- | --- | --- | | 1 | 6 sc; ss | 6 | | 2 | 6 sc inc; ss | 12 | | 3 | (sc, sc inc) × 6; ss | 18 | | 4 | (sc, sc inc, sc) × 6; ss | 24 | | 5 | (7 sc, sc inc) × 3; ss | 27 | | 6 | (3 sc, sc inc, 2 sc) × 3; ss | See note below | | 7 | (2 sc, sc inc, 7 sc) × 3; ss | 33, using a 30-stitch base | | 8 | (8 sc, sc inc, 2 sc) × 3; ss | 36 |
Pause at the Round 6 discrepancy
The displayed Round 6 formula is `(3sc, sc inc, 2sc) × 3, ss`. Each repeat uses 6 base stitches and produces 7 stitches. Three repeats therefore use only 18 base stitches and produce 21, which does not account for the 27 stitches from Round 5.
Round 7, as displayed, requires a 30-stitch base. The written overlay does not explain a valid transition from 27 to 30. Review the demonstration around 6–8 minutes and resolve that transition before using the later totals. The original formula is retained here because changing a number without confirmation would create a different instruction from the source.
2. Work the white bands and orange sections
The following chart continues the source sequence after that unresolved transition. Its totals are internally consistent once Round 8 has 36 stitches.
| Round | Color and instructions | Calculated total | | --- | --- | --- | | 9 | White, FLO: (5 sc, sc inc, 6 sc) × 3; ss | 39 | | 10 | White: 39 sc; ss | 39 | | 11 | Orange, FLO: (12 sc, sc inc) × 3; ss | 42 | | 12–13 | Orange: 42 sc in each round; ss | 42 each | | 14 | 10 sc white, 2 sc orange, 19 sc white, 2 sc orange, 9 sc white; ss | 42 | | 15 | 9 sc white, 4 sc orange, 17 sc white, 4 sc orange, 8 sc white; ss | 42 | | 16 | White: (6 sc, sc dec, 6 sc) × 3; ss | 39 | | 17 | White: (sc dec, 11 sc) × 3; ss | 36 | | 18 | Orange: (2 sc, sc dec, 8 sc) × 3; ss | 33 | | 19 | Orange: (7 sc, sc dec, 2 sc) × 3; ss | 30 |
Rounds 14 and 15 change color within the round. They are not plain white bands. Keep the first-stitch marker in place, and count each colored section before beginning the next one.
Lay any inside carried strands loosely against the curve of the body. If a strand is too short, it pulls the two sides together and distorts the stripe; filling the fish more firmly will not fix that tension problem.
The FLO instructions in Rounds 9 and 11 are specific to those displayed rounds. Do not automatically convert every subsequent color change to FLO. The later black surface detail is a separate finishing operation.
3. Narrow the body and flare the tail
Continue from the rounded body toward the tail.
| Round | Color and instructions | Calculated total | | --- | --- | --- | | 20 | Orange: (sc dec, 11 sc, sc dec) × 2; ss | 26 | | 21 | Orange: (sc dec, 9 sc, sc dec) × 2; ss | 22 | | 22 | White: (sc dec, 7 sc, sc dec) × 2; ss | 18 | | 23 | White: (sc dec, 5 sc, sc dec) × 2; ss | 14 | | 24 | White: 14 sc; ss | 14 | | 25 | Orange: (6 sc, sc inc) × 2; ss | 16 | | 26 | Orange: (sc inc, hdc, 4 dc, hdc, dc inc) × 2; ss | 20 |
In Rounds 20–23, the decrease at each end of the bracket is part of the repeat. There are four decreases in each complete round, which explains the change from 30 to 26, then 22, 18, and 14 stitches.
Stuff before sealing the tail
Fill the body while the opening remains reachable. Spread the stuffing toward the rounded front and along both sides. Keep the narrow tail base from becoming a hard lump: the tail should remain visually distinct from the full body.
Fit the eyes at the appropriate stage for your chosen hardware, checking their alignment from the front and both sides. When the body is evenly filled, finish the tail shaping.
The tutorial then uses black single crochet across the flattened tail opening to close it. Work through the paired layers as demonstrated, keeping the two sides aligned. This is a closing edge rather than an invented numbered Round 27. Check that no filling is trapped in the seam before fastening off.
4. Make two side fins
Use orange and begin each side fin with a magic ring.
| Round | Instructions | Calculated total | | --- | --- | --- | | 1 | 6 sc; ss | 6 | | 2 | 6 sc inc; ss | 12 |
Fasten off with yarn for attachment and make a matching second fin. These are small flat pieces, not miniature stuffed body parts. Compare their diameter and tension before sewing them onto the fish.
Keep them aside while preparing the two rowed fins. Sorting the separate pieces now makes it easier to follow the final assembly without confusing a side fin with a top or lower fin.
5. Make the larger rowed fin
The source compresses several rows into a line labeled `R1`. Its literal text is:
R1: 6 ch, sk 1 back, (4 sc, 1 ch) × 5, ss.
The next displayed line reads:
R2: 1 ch, (hdc, hdc inc) × 2, sl.
Follow the turning movements in the demonstration around 52–56 minutes. The first line describes a small rowed panel rather than five rounds worked into one chain space.
Foundation note: A 6-chain start followed by skipping one chain normally leaves five available chain positions, but the overlay specifies four single crochet per row. That leaves the foundation placement unclear in the compact text. Keep the original wording available and use the close-up to establish the placement; this transcription does not silently change either the chain count or row width.
The second line produces six half double crochet stitches from its two increase repeats, excluding the chain and slip stitch. Work it along the edge demonstrated, rather than assuming it is a full round around the entire panel.
6. Make the smaller rowed fin
The smaller panel has a separate chart:
R1: 5 ch, sk 1 back, (4 sc, 1 ch) × 4.
Here, the five-chain foundation and skipped chain leave four working positions. Follow the demonstration for four short rows, turning between them as shown.
Its next displayed line is:
R2: 1 ch, (2 hdc) × 2, sl.
The text says `2 hdc`, not `hdc inc`. Keep that distinction: this line describes four half double crochet stitches in total, with edge placement shown in the video. Fasten off with enough yarn for assembly.
7. Add the black outlines and assemble
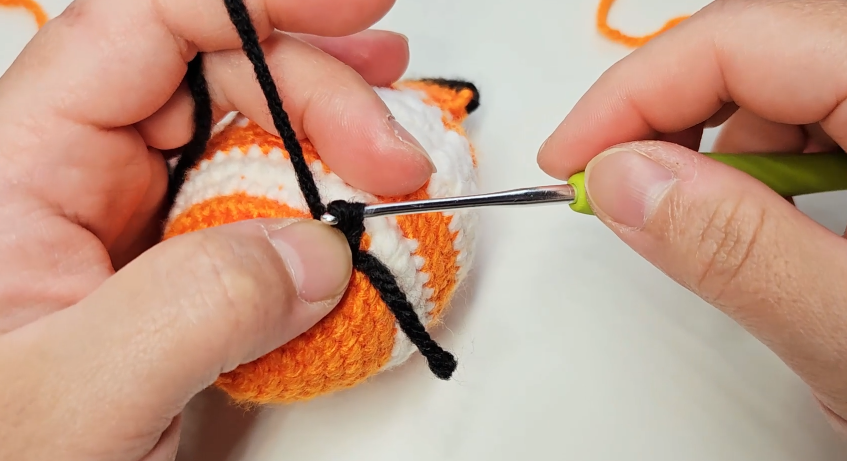
The later tutorial uses the hook to add black surface details along the body’s color boundaries. Work with a relaxed tension so that the dark line sits on the fabric without cinching the stuffed body. Follow the demonstrated route instead of treating the outline as another body round.
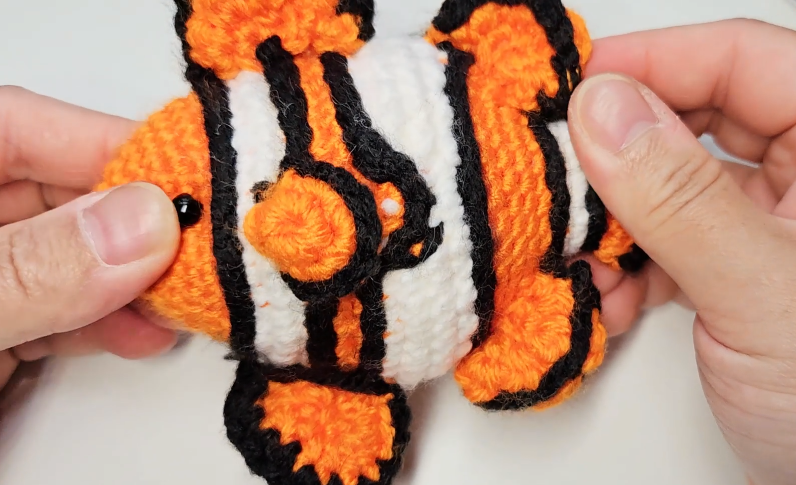
Arrange the paired side fins on opposite sides, then place the larger and smaller rowed fins according to the finished orientation in the video. Hold or pin every part before sewing: the tail should be upright in the same plane as the body, while the side fins should remain visible from a three-quarter view.
Sew each fin along its attachment edge, leaving the free edge clear. Use several small stitches through the body fabric and fin base. Check the opposite side as you sew so that a needle has not accidentally caught another fin or pulled a visible thread across the fish.
Finish the face and secure all yarn ends. If adding keychain hardware, choose a hanging point that balances the fish and keeps the chain clear of the fin seams. Test the position with a temporary thread loop before committing to it; this guide does not supply an unsupported fixed chain count or attachment round.
Troubleshooting the shape
My count fails at Round 6. Read the source discrepancy before reworking earlier rounds. The displayed formula does not account for the previous 27 stitches; following it literally cannot produce the base required for Round 7.
The middle stripe has orange gaps in the wrong place. Recheck the colored sections of Rounds 14 and 15 against the first-stitch marker. Each complete round totals 42 stitches despite its color changes.
The tail twists when closed. Reopen the closing edge and align both layers before working across them. Unevenly paired stitches can rotate the tail relative to the body.
The black lines dent the fish. Relax the surface stitches rather than adding more stuffing. Surface work needs enough length to follow the outside curve.
The rowed fin foundation seems one stitch too long. The larger fin has a source ambiguity noted above. Do not force an extra stitch into every row and assume the resulting panel is the demonstrated one.
Watch the full tutorial
Use the video for the unresolved early body transition, rowed-fin edge placement, black surface outlines, and the final orientation of all the fins.
Finish the fish from every angle
Before attaching the ring, turn the fish slowly in your hands. Look at the stripe boundaries, paired fins, tail alignment, and eye placement together. The careful arrangement of those small details gives this little ocean character a clear silhouette and makes the finished accessory feel complete.
Watch every stitch up close
Pair these written notes with the complete video tutorial.
Made with yarn, shared with love. 🧶💗