
Crochet Bunny Bag: Colorwork Tutorial and Finishing Guide
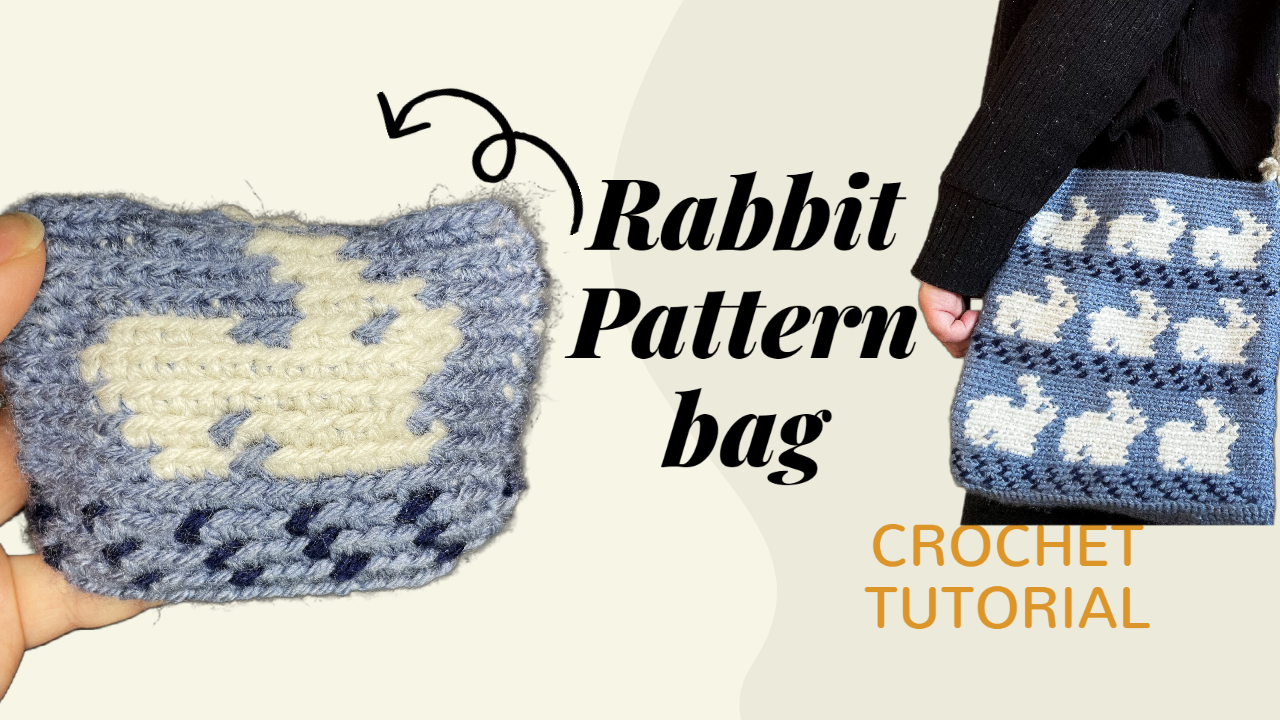
A little white rabbit stands out against a blue-gray background, with dark blue stitches adding a dotted accent beneath the motif. This crochet project combines a simple bag shape with carefully placed color changes, allowing the picture to emerge one round at a time.
The accompanying video introduces a larger repeating bunny-bag chart and then demonstrates the technique on a small pouch with one rabbit on each side. That smaller construction makes it easier to study the stitch placement and color changes before planning a larger project.
This guide explains the demonstrated construction, provides the color sequences that can be verified from the video captions, and covers the finishing decisions that affect the result.
Pattern source: The larger chart displayed at the beginning of the video is credited to Breathingblue. Keep that credit with the chart. The notes below describe the video demonstration rather than presenting the chart as a new original design.
What the Video Demonstrates
The practical demonstration includes:
- A foundation chain and an oval base.
- Back-loop stitches worked around the bag.
- Staggered dark blue accent stitches.
- White and blue color changes that form the rabbit.
- An optional plain upper round and closure ideas.
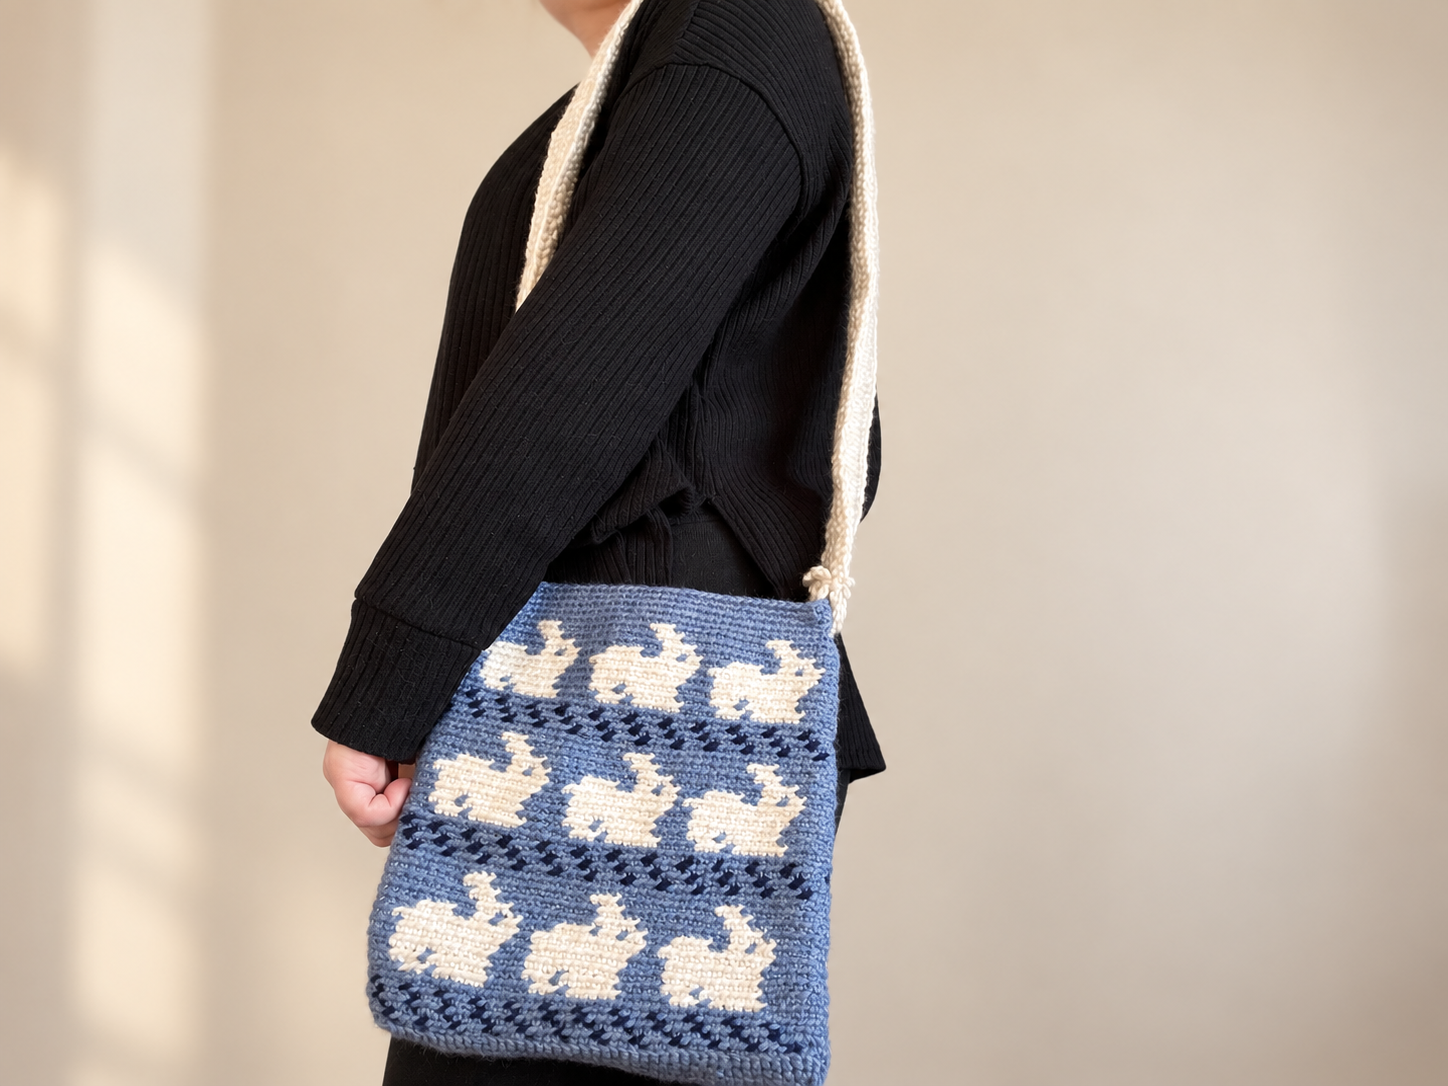
The pictured shoulder bag is a larger application of the design. Its complete dimensions, repeat arrangement, and strap instructions are not established by the small-pouch demonstration, so they are not supplied here as a verified shoulder-bag pattern.
Materials and Color Choices
Prepare three yarn colors:
Color role Demonstrated color
Main background Light blue or blue-gray
Accent stitches Dark blue
Rabbit motif White or cream
You will also need a suitable crochet hook, stitch markers, scissors, and a yarn needle.
Choose yarns of similar thickness. If the white yarn is noticeably thicker than the blue, the motif may bulge; if it is much thinner, its stitches may look smaller and leave uneven spaces.
The video does not establish a verified yarn quantity, project gauge, or finished measurement for these written notes. Make a sample with your selected yarns before deciding on the size of a larger bag.
Understand the Stitch Terminology
The captions use “DC” in the base instructions and “BLO” or “BLC” in the colorwork instructions. The demonstrated short stitch corresponds to US single crochet, also called UK double crochet.
For these notes:
- ch means chain.
- sc means US single crochet.
- BLO means work through the back loop only.
- sl st means slip stitch.
Do not substitute US double crochet simply because the caption says “DC.” A taller stitch changes the proportions of the rabbit.
To work a back-loop single crochet, insert the hook under the back loop of the next stitch, pull up a loop, then yarn over and draw through both loops on the hook.
Start the Oval Base
The foundation caption specifies 16 chains.
The next caption gives this sequence:
15 DC, DC3TOG, 14 DC, DC2TOG, SL.
Read this alongside the demonstration. The work travels along the foundation and around its ends to create an oval. The end groups are used to turn around the foundation; the caption’s “TOG” notation should not automatically be interpreted as a standard decrease.
There is also a count issue to resolve before treating the captions as a standalone pattern: reading all those base groups as separate stitches gives 34, while the later colorwork captions describe two 16-stitch sides, totaling 32.
The video additionally explains that the demonstrated bag is wider than the chart and includes extra light blue stitches at the sides. Keep those side stitches separate from the motif count. Do not silently remove stitches from the rabbit sequence to make a different base fit.
Before beginning the colorwork, identify and mark the two motif sections and any additional side stitches in your own construction.
Change Colors Before the Next Stitch
Clean color changes depend on when the new yarn enters the stitch.
When the next stitch needs a different color:
- Begin the current single crochet with the current color.
- Stop with two loops on the hook.
- Draw the new color through those two loops.
- Work the next stitch with the new color.
The video demonstrates this change on the unfinished stitch before the new color section.
Keep the unused yarn relaxed as you move between colors. Spread the recently worked stitches to their natural width before tightening a strand. Pulling the carried yarn too firmly can narrow the motif and gather the surrounding fabric.
Read the Color Sequence
The following tables use:
- L = light blue background.
- D = dark blue accent.
- W = white rabbit.
A number tells you how many stitches to work in that color. For example, L3, W6 means three light blue stitches followed by six white stitches.
Each listed sequence describes one 16-stitch side. The video captions instruct you to repeat it on the other side, beginning with ch 1 and ending with a slip-stitch join.
Any added side-width stitches belong outside these 16-stitch motif sections.
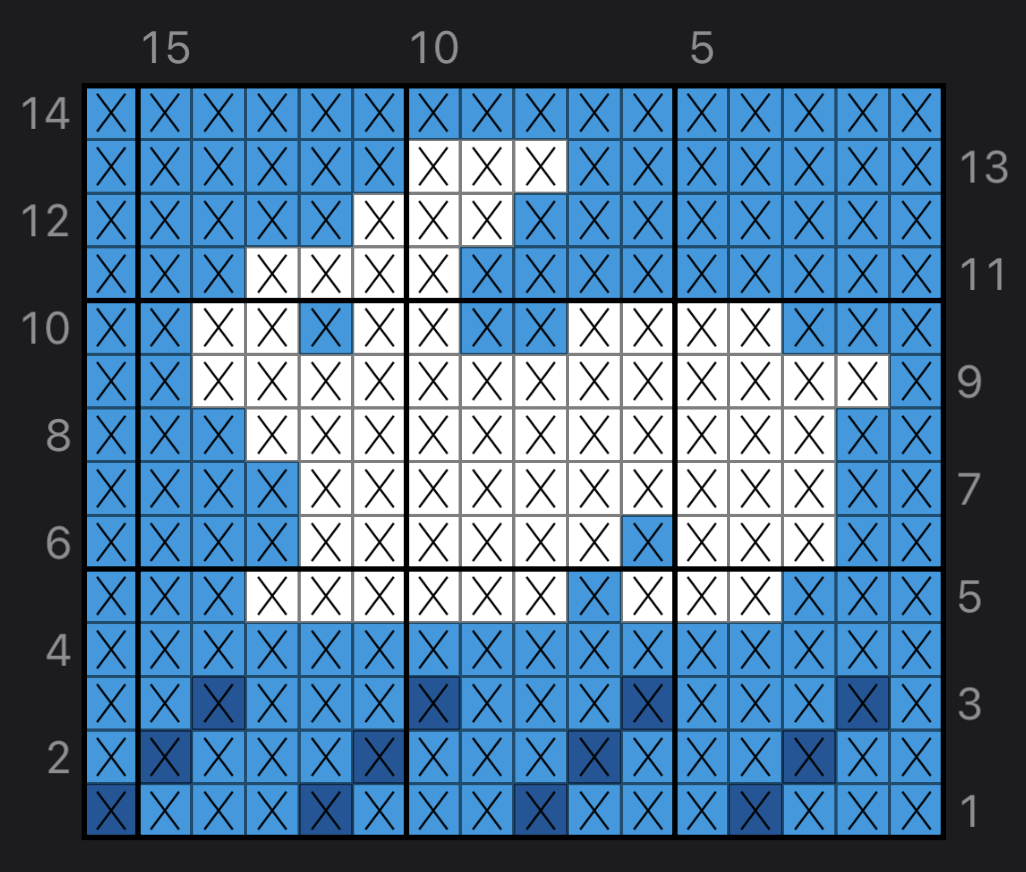
Accent Section
Body round Color sequence for one side Total
1 (D1, L3) × 4 16
2 L1, (D1, L3) × 3, L2 16
3 L2, (D1, L3) × 3, L1 16
4 L16 16
The changing position of the dark stitch produces the staggered accent. Count the initial light blue stitches carefully in Rounds 2 and 3; they establish the offset.
Rabbit Section
The table preserves the round numbers displayed in the video.
Body round Color sequence for one side Total
5 L3, W6, L1, W3, L3 16
6 No independently verified caption; see note below —
7 L4, W10, L2 16
8 L3, W11, L2 16
9 L2, W13, L1 16
10 L2, W2, L1, W2, L2, W4, L3 16
11 L3, W4, L9 16
12 L5, W3, L8 16
13 L6, W3, L7 16
Round 6 note: The readable captions move from Round 5 to Round 7. A separate Round 6 sequence has not been verified. Use the source chart to resolve this row before working the motif as a complete pattern. Do not assume that it repeats Round 5 or follows Round 7.
The other listed sequences each total 16 stitches. That arithmetic checks the width of the transcribed rows, but it does not resolve the missing row or the base-to-body count difference.
Check Each Side Before Joining
After completing one motif section, compare the color changes with the table before starting the second side.
Pay particular attention to Round 10. Its short alternating sections are easier to miscount than the longer white runs in the preceding rounds. One misplaced background stitch can alter a small part of the rabbit’s outline.
Use a marker to identify the beginning of each side. This helps distinguish a genuine motif error from a shift caused by extra side stitches.
Finish the Upper Edge
The video gives an optional final instruction:
Ch 1, 32 light blue back-loop stitches, sl st.
That count belongs to the two 16-stitch sections described in the captions. If you have deliberately included extra side stitches, account for them rather than forcing the whole bag into 32 stitches.
A plain background round gives the opening a clear border above the rabbit. Keep the tension similar to the preceding fabric so that the edge does not draw inward or flare outward.
The video also suggests adding a closure or sewing the opening as an option. Choose the finish according to how you intend to use the small pouch.
Secure the Ends Without Distorting the Motif
Turn the pouch inside out and inspect the color-change areas.
Weave yarn ends through suitable stitches, preferably within matching color sections. Avoid pulling an end so tightly that it draws the white outline out of shape.
Check the inside for loose strands that could catch on small belongings. If you add a lining, fit it to the finished crochet fabric rather than stretching the crochet to match a lining cut too large.
Before securing the last ends, look at both rabbits in ordinary light. Small mistakes are easier to identify when the fabric is relaxed and viewed as a whole.
Planning a Larger Shoulder Bag
The larger chart shown at the beginning provides the repeating-bunny design reference. The small demonstration is useful for learning the technique, but enlarging it requires more planning than increasing the foundation chain.
For a larger version:
- Work a complete motif sample and measure its relaxed width.
- Establish how complete repeats meet the side sections.
- Plan the base and body counts together.
- Check the height and spacing of repeated motif bands.
- Choose a strap construction and attachment method separately.
The video does not verify a strap chain count, strap width, or attachment stitch count. Those details should come from the complete bag pattern or a separately tested construction.
Before permanently attaching a strap, mark both positions and check that the bag hangs evenly. Reinforce the attachments over an appropriate area of fabric rather than relying on a single stitch.
Troubleshooting the Colorwork
What you notice What to check
The fabric puckers around the rabbit Check whether the unused yarn has been carried too tightly.
Dark accent stitches drift unexpectedly Recount the starting light blue stitches in the offset rounds.
The white outline changes shape Compare each color run with the correct row before continuing.
The motif looks too tall Confirm that you are using the short stitch demonstrated, not US double crochet.
The sides do not match Check the motif markers and keep added side stitches separate.
Watch the Bunny Colorwork Tutorial
Use the video to study the oval-base construction, back-loop insertion, and color changes. The opening chart is the reference for the larger repeating design; the hands-on demonstration shows the smaller pouch.
Finish with a Clear, Even Rabbit Motif
This project rewards careful counting more than complicated stitchwork. Consistent short stitches, relaxed carried yarn, and well-timed color changes help the white rabbit remain distinct against the blue background.
Begin with the small version to understand the technique, resolve the source’s missing and differing counts before following it as a complete pattern, and use a measured sample when planning a larger bag. A neatly worked motif gives you a useful foundation for both the pouch and future colorwork projects.
Watch every stitch up close
Pair these written notes with the complete video tutorial.
Made with yarn, shared with love. 🧶💗