
Crochet an Ocean Notebook Cover with Dolphins and Sunshine
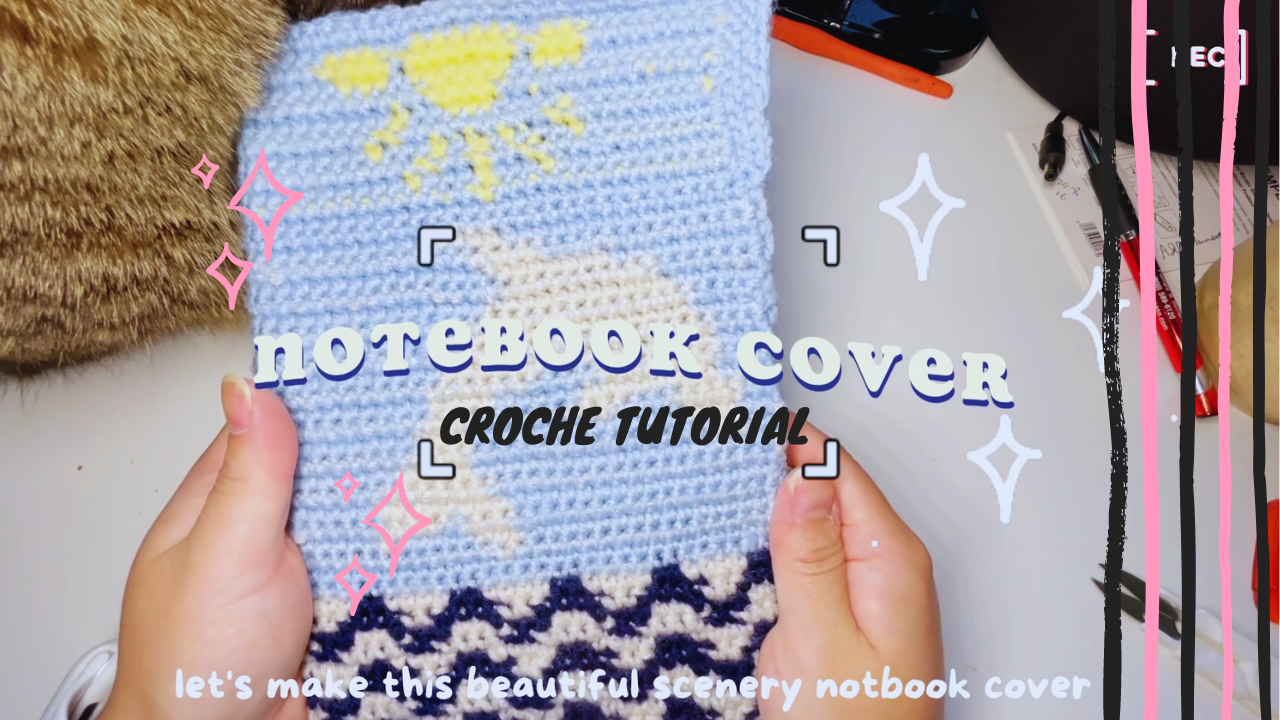
A notebook cover can be a small landscape as well as a useful accessory. Here, bands of waves run beneath leaping dolphins, with yellow sunshine above. The picture extends across the outer panel, giving the front and back of the notebook a coordinated scene.
The Crochetnotes video demonstrates the colorwork in a soft blue, cream, navy, and yellow palette. The cream dolphin blends gently into the sky, while the navy wave sections create stronger contrast near the lower edge. You can use the original colors or choose your own, provided the neighboring shapes remain distinguishable.
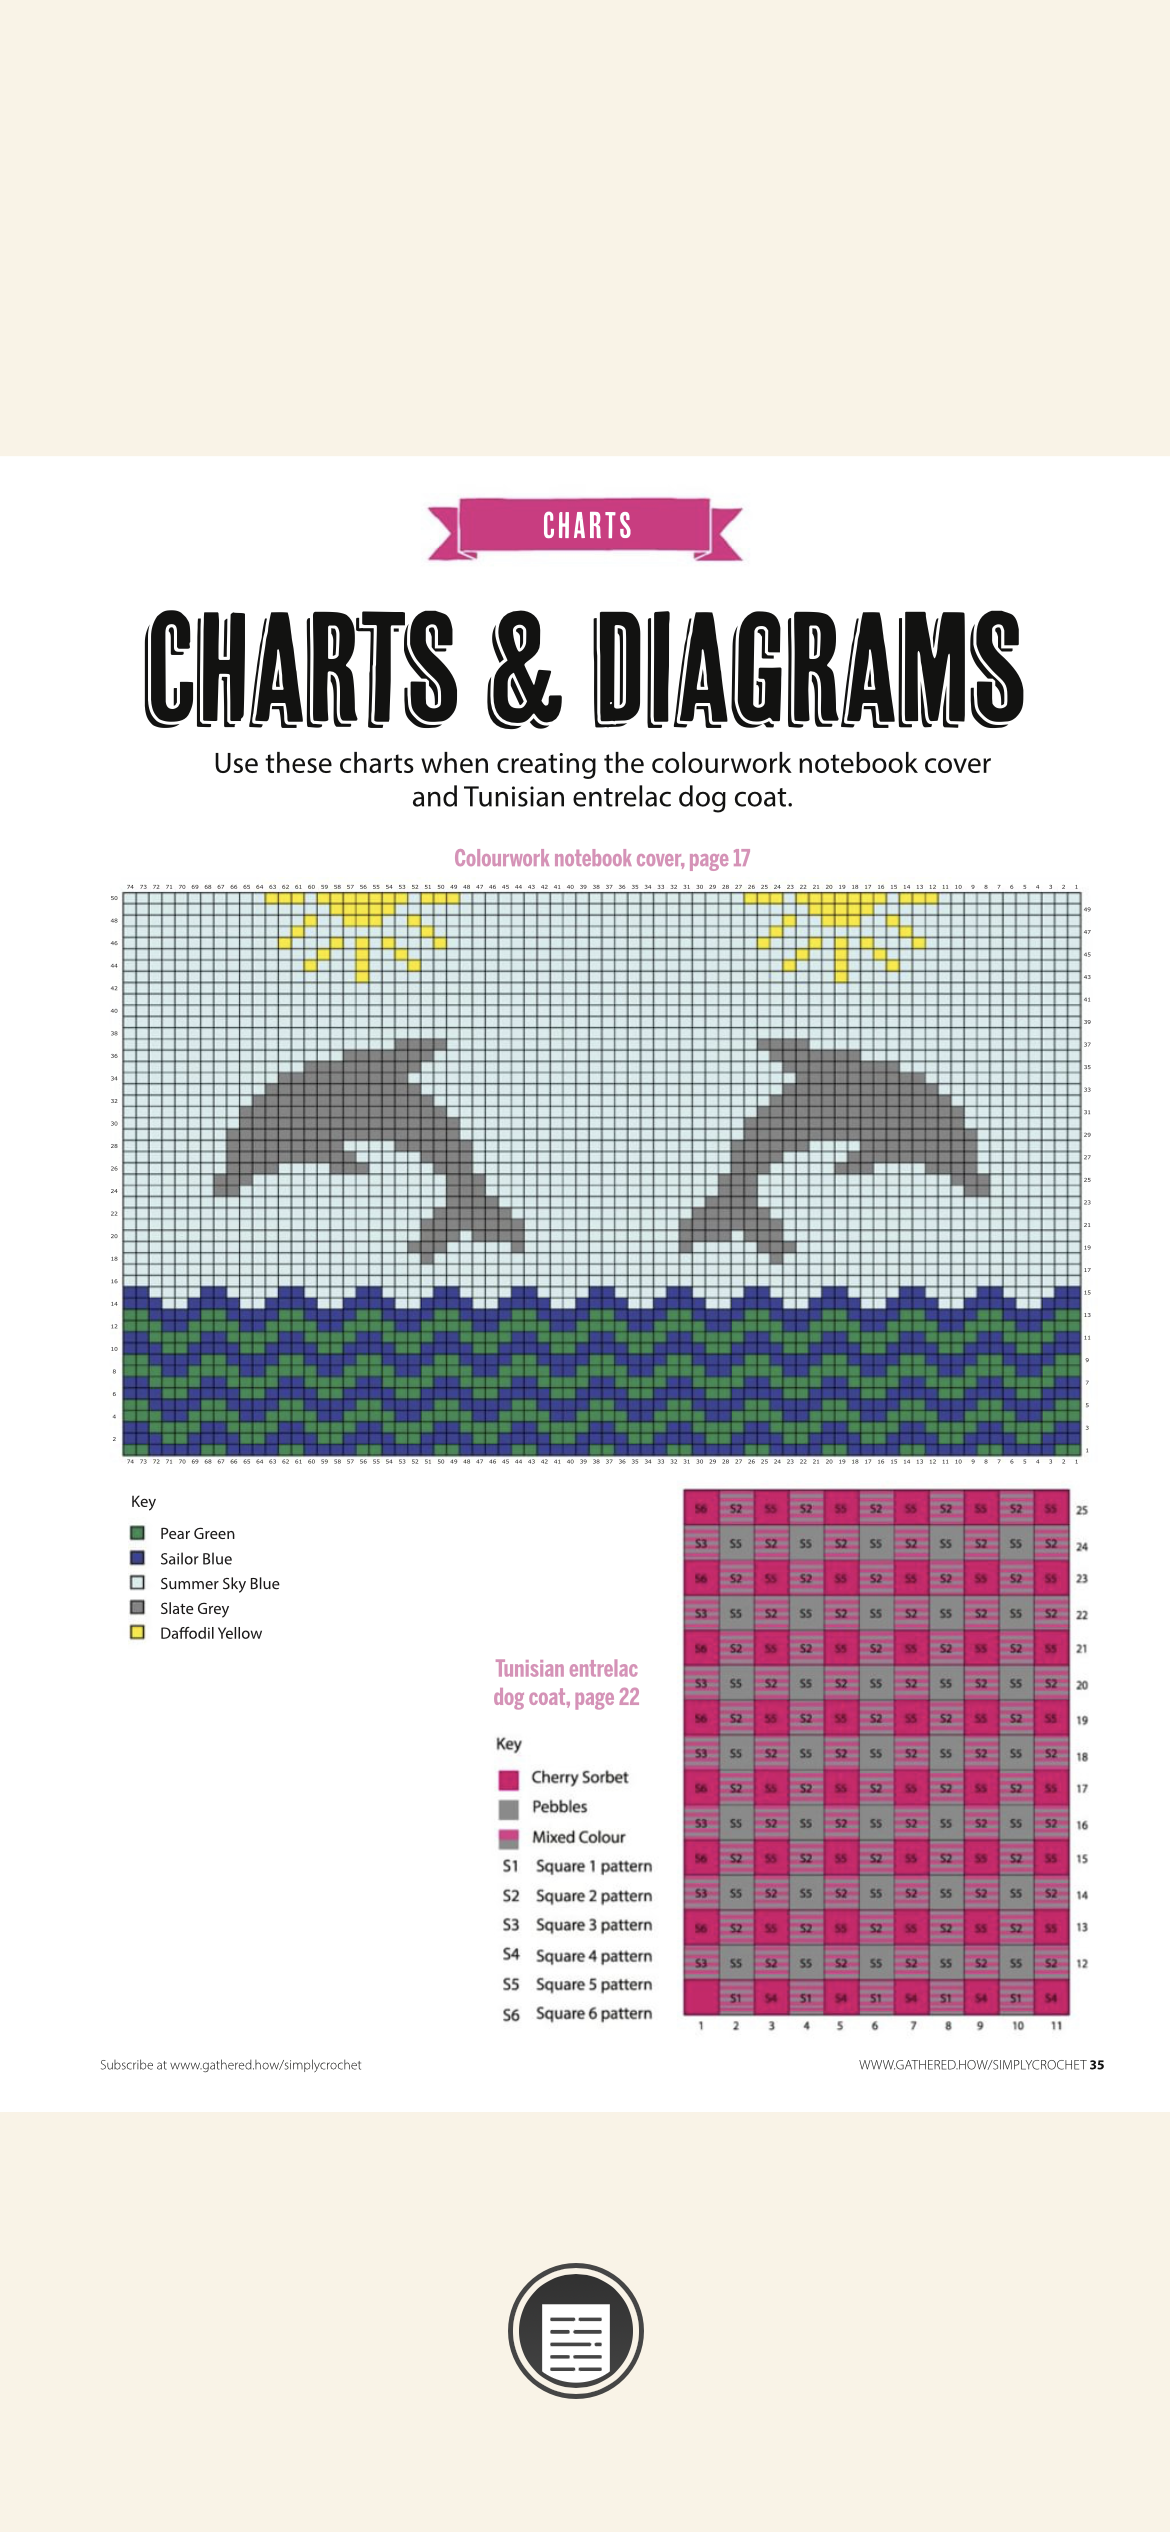
Original design: “Dive right in” by Becky Skuse, published in *Simply Crochet*, Issue 138. This article is a practical companion to the video and the published pattern. Use the original publication for the complete chart, stitch counts, and construction instructions. The chart is essential to reproducing the dolphins and suns accurately.
Choose the notebook before choosing the fit
Keep the actual notebook beside you throughout the project. Measure its height and its width when closed, then measure around the outside from one fore-edge, across the spine, to the other fore-edge. The spine matters: two notebooks sold as A5 can need different amounts of room if one is much thicker.
The published reference is an A5 notebook cover measuring approximately 33 × 22 cm. Its listed gauge is 22 stitches and 22 rows per 10 cm, using cotton DK yarn and a 3 mm hook. The materials also include lining fabric. These are specifications for the original design, rather than measurements guaranteed for every yarn substitution. See the original publication preview.
A tightly stretched cover can pull the scene sideways and make the book difficult to close. A very loose cover can bunch beneath your hand while you write. Check both the crochet panel and the finished internal fit rather than relying on the notebook's size label alone.
Prepare the colors and tools
Use the published pattern's materials list as your starting point. You will also need scissors, a yarn needle, a tape measure, markers for tracking the chart, and the sewing tools required by the lining instructions.
Make a simple color key before beginning. The chart's green wave sections are worked in a pale color in the video version, so a caption that says “green” can refer to a chart color rather than the strand currently in the demonstrator's hand. Write down your substitutions explicitly: chart green → chosen pale wave color, for example.
Keep separate small supplies of yarn organized where the pattern's colorwork method calls for them. Labeling the strands helps prevent a pale dolphin section from being confused with a pale wave section when you return after a break.
Swatch with the color changes included
Work a sample in the pattern's stitch and colorwork method. A plain single-color sample may not reveal how tightly you pull an unused strand or a new color at a change.
Measure the relaxed middle of the sample. Check both the stitches across and rows vertically. Width affects the wrap around the notebook, while row height affects the height of the cover and the proportions of the dolphins.
As an example, if a sample has fewer stitches per 10 cm than the reference gauge, each stitch is wider and the charted panel will also be wider. If the stitch gauge matches but the rows are taller, the cover may become too tall even though its width looks correct. Adjust the swatch before investing time in the picture.
Make color changes without tightening the scene
Complete the transition with the new color at the point demonstrated, so the next stitch begins in the intended shade. Keep the unused strand positioned as instructed for that section. The video shows attention to concealing the other yarn behind or within the work; avoid pulling it sharply after every change.
After several stitches, spread the fabric gently to its natural width. If it contracts at the color boundary, relax the carried strand before continuing. A small repeated pull can gradually turn a rectangular panel into a cupped piece.
Do not assume every section uses the same yarn-management method. The original design introduces different colorwork techniques. Read the relevant instructions before switching from the repeating wave band to the larger picture areas.
Keep the two sides of the cover in mind
Before joining or lining the panel, mark the intended spine position and identify the front and back. Check where the dolphins and suns fall when the fabric wraps around the notebook. A scene that looks centered on a flat rectangle can sit differently once part of that rectangle curves around a thick spine.
Lay the panel flat at intervals without stretching it. Inspect both side edges as well as the picture. A narrowing side often comes from a missed end stitch; a localized pinch is more likely to involve the color changes. Correct the cause while that section is still accessible.
Finish yarn ends so they cannot unravel or form bulky knots under the cover. Where appropriate for your yarn, gently block the completed panel according to its care guidance. Let it dry before taking final measurements or fitting the lining.
Fit and line the cover
Follow the original construction instructions for the inner sections and lining. The video shows the crocheted scene and the finished lined cover, but it should not be treated as a substitute for every published assembly measurement.
Test the outer panel around the closed notebook first. Then open the book gently and check that the crochet can move across the spine without dragging the picture toward the middle. If the construction uses pockets for the notebook boards, check the insertion depth on both sides before securing the seams.
Fit the lining to the settled crochet rather than stretching the crochet to match an undersized fabric rectangle. Pin or clip the layers as the original instructions direct, keeping the spine and fold areas free to move. Stitch without catching the notebook pages, and remove the notebook for the sewing itself.
After lining, repeat the fit check. Fabric and crochet have different amounts of stretch, so a cover that fitted before sewing may become restrictive if the lining is pulled taut.
Troubleshooting the most visible problems
| What you notice | What to check first | | --- | --- | | The waves drift sideways unexpectedly. | Chart direction and the starting color run for that row. | | The dolphin's outline has a notch. | The color-change position in the current and preceding rows. | | The panel cups around a color section. | Carried-strand tension and whether the fabric was allowed to relax. | | One side becomes narrower. | The first and last working stitches of each row. | | The notebook closes poorly after lining. | Lining width, spine allowance, and the placement of internal seams. |
Avoid adding an extra stitch merely to make the edge look straighter. First establish whether the row count is wrong or the tension is pulling it inward; the remedies are different.
Give the finished cover a writing test
Open the notebook at the beginning, middle, and end. Turn pages and rest your hand on it as you normally would. Check whether an internal seam creates a ridge, the cover slips off a board, or the fabric bunches near the spine.
For a gift, include the notebook or record its board dimensions and spine thickness. A later replacement with similar measurements is more likely to fit than one chosen by the A5 label alone.
Remove the notebook before cleaning the cover. Follow the care requirements of both the yarn and lining, and dry it completely before putting paper back inside.
Watch the colorwork demonstration
Pair the video with Becky Skuse's published chart to follow the wave changes, dolphin outline, and sunshine placement. The video version's color substitutions are useful examples of how the same picture changes with a softer palette.
A cover made for everyday use
The ocean scene is the reason to start this project, but an even panel and comfortable fit are what make it useful afterward. Track the chart a row at a time, keep the color changes relaxed, and check the actual notebook before final sewing. Those practical steps help the finished cover keep its picture clear while opening easily for everyday notes.
Watch every stitch up close
Pair these written notes with the complete video tutorial.
Made with yarn, shared with love. 🧶💗