
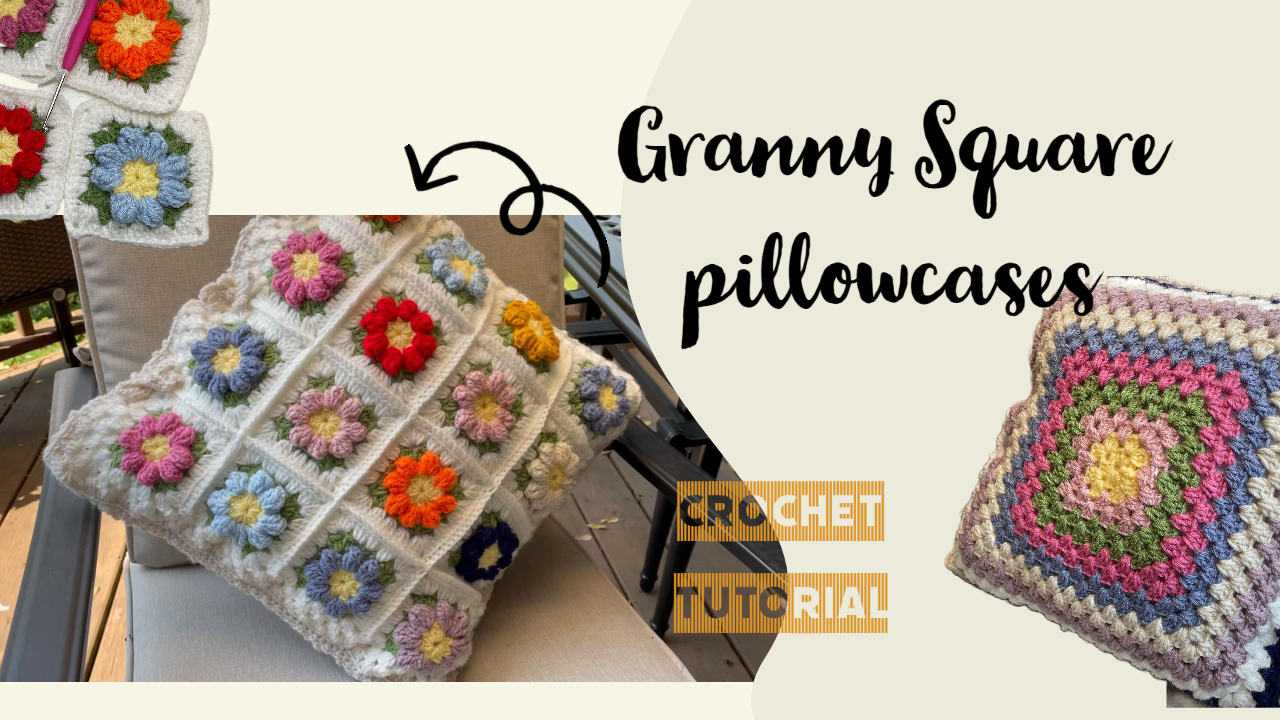
Crochet a Two-Sided Granny Square Pillowcase
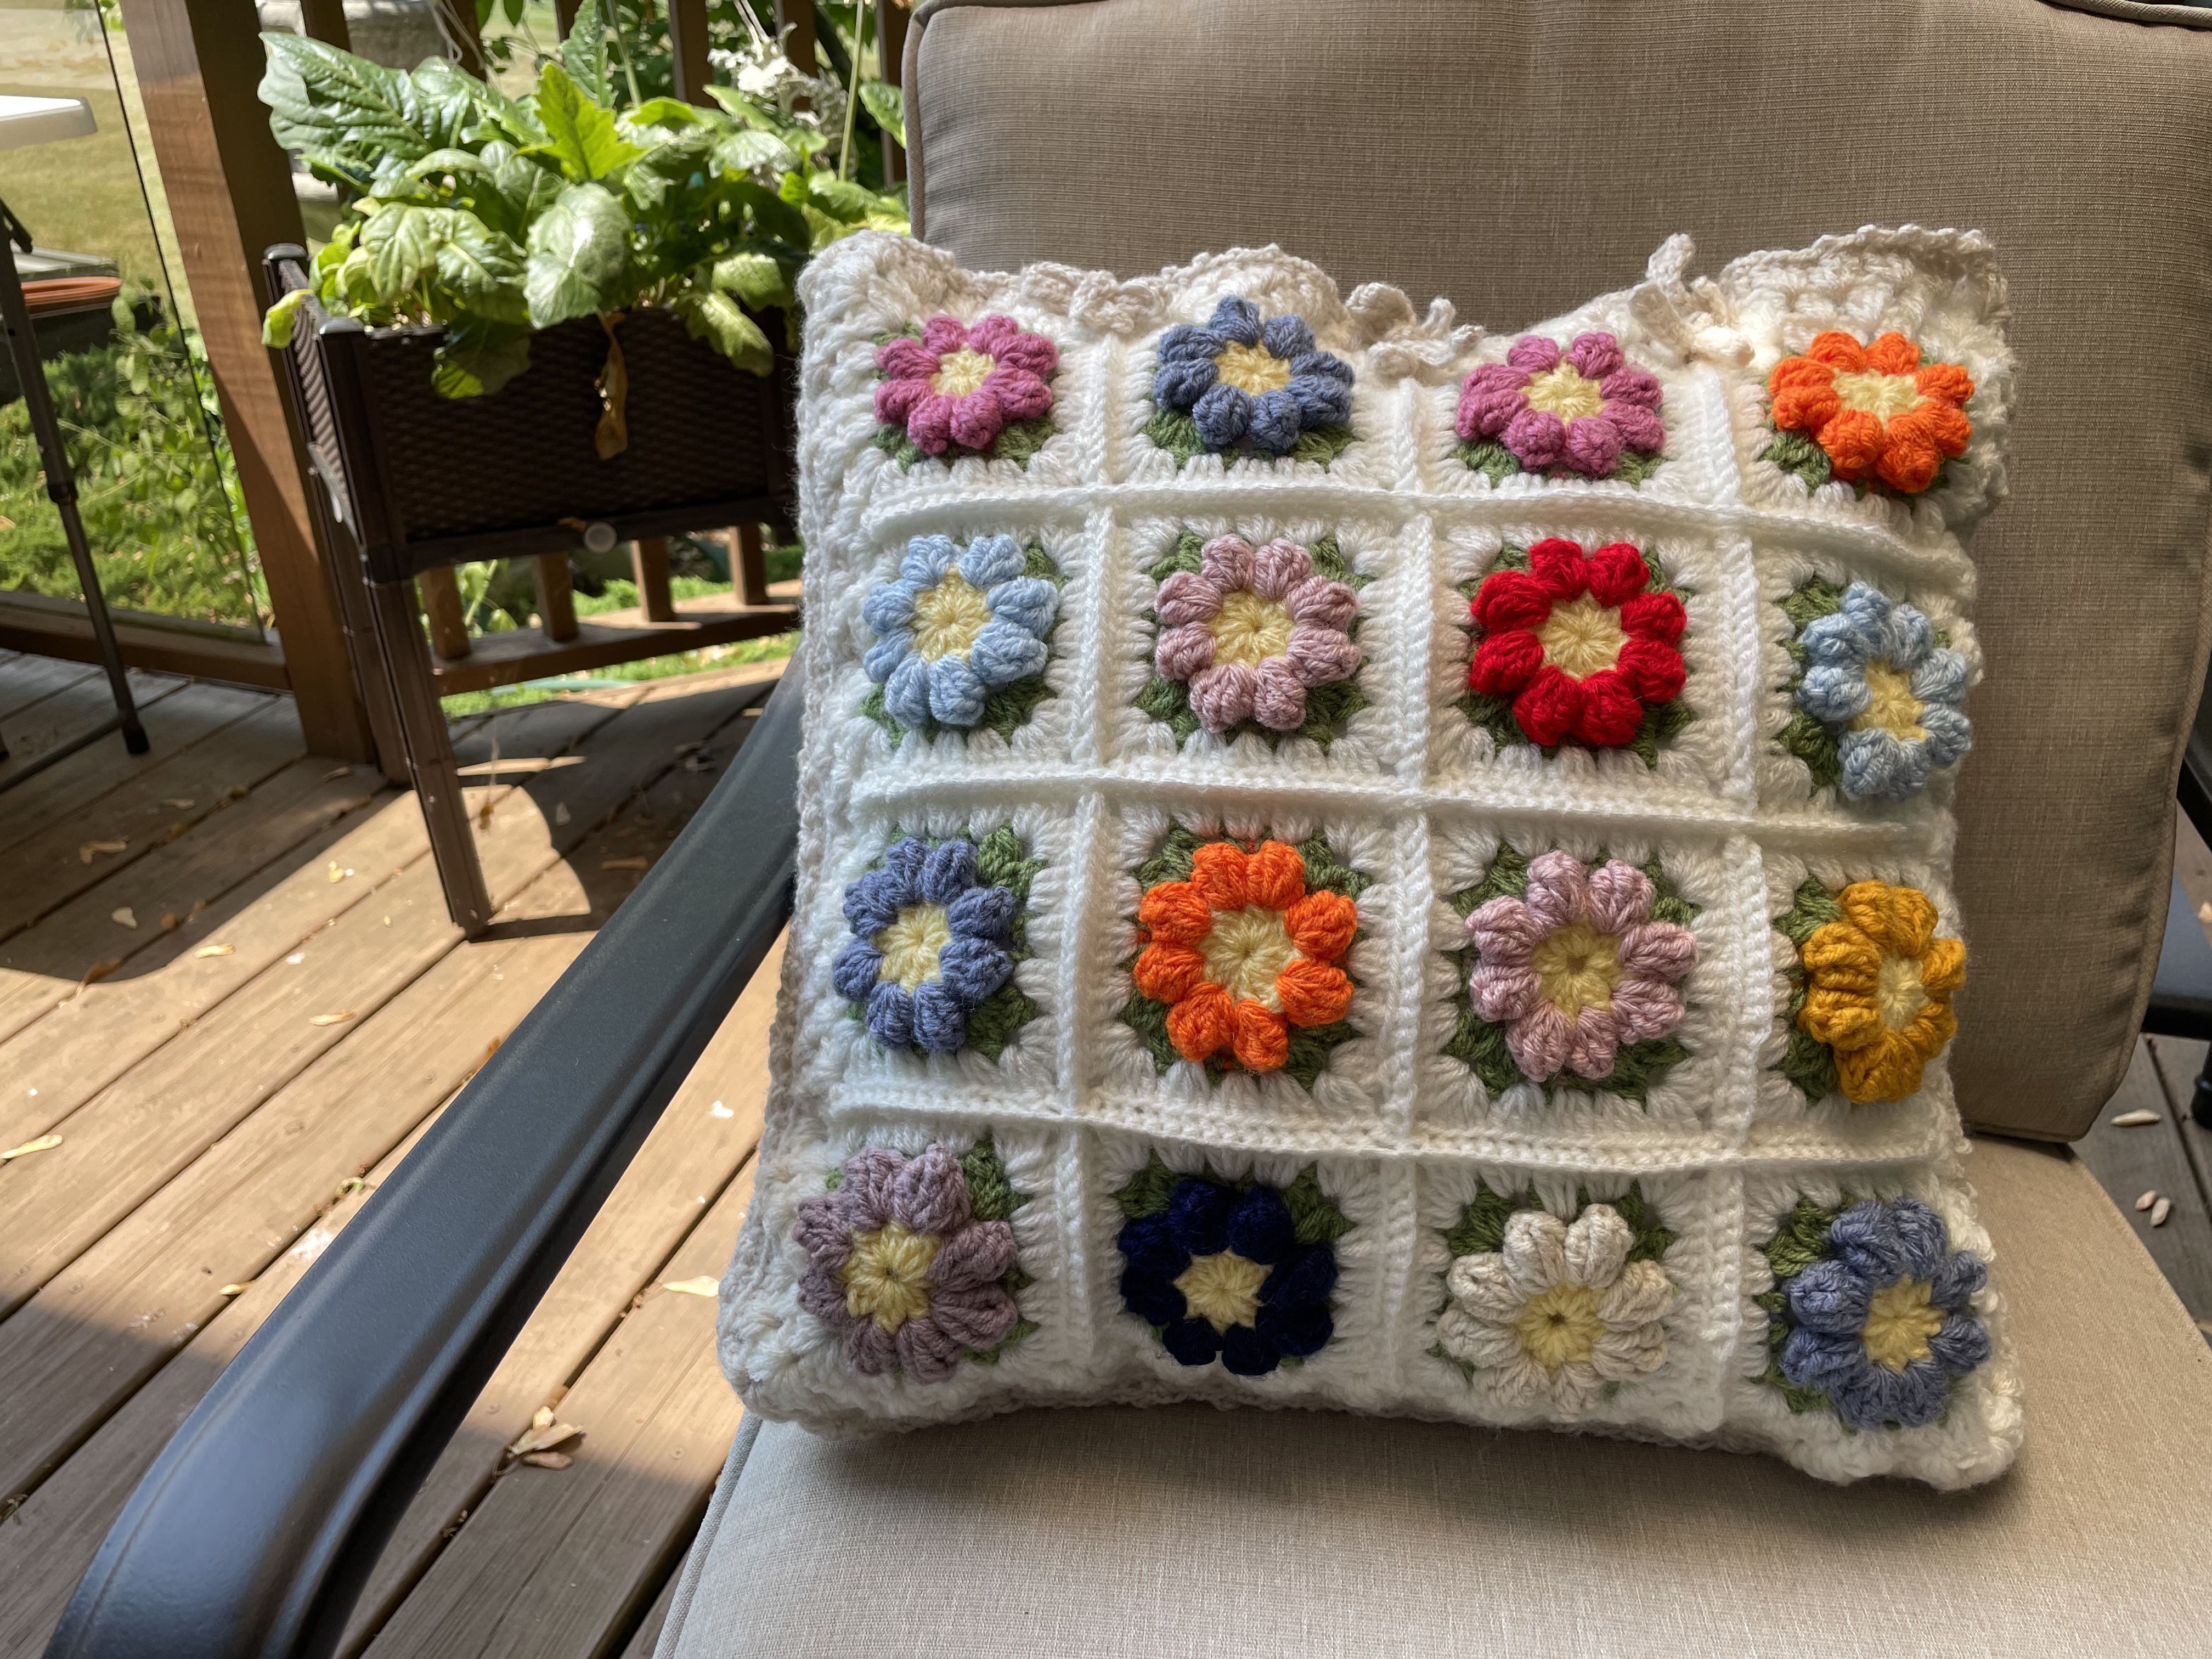
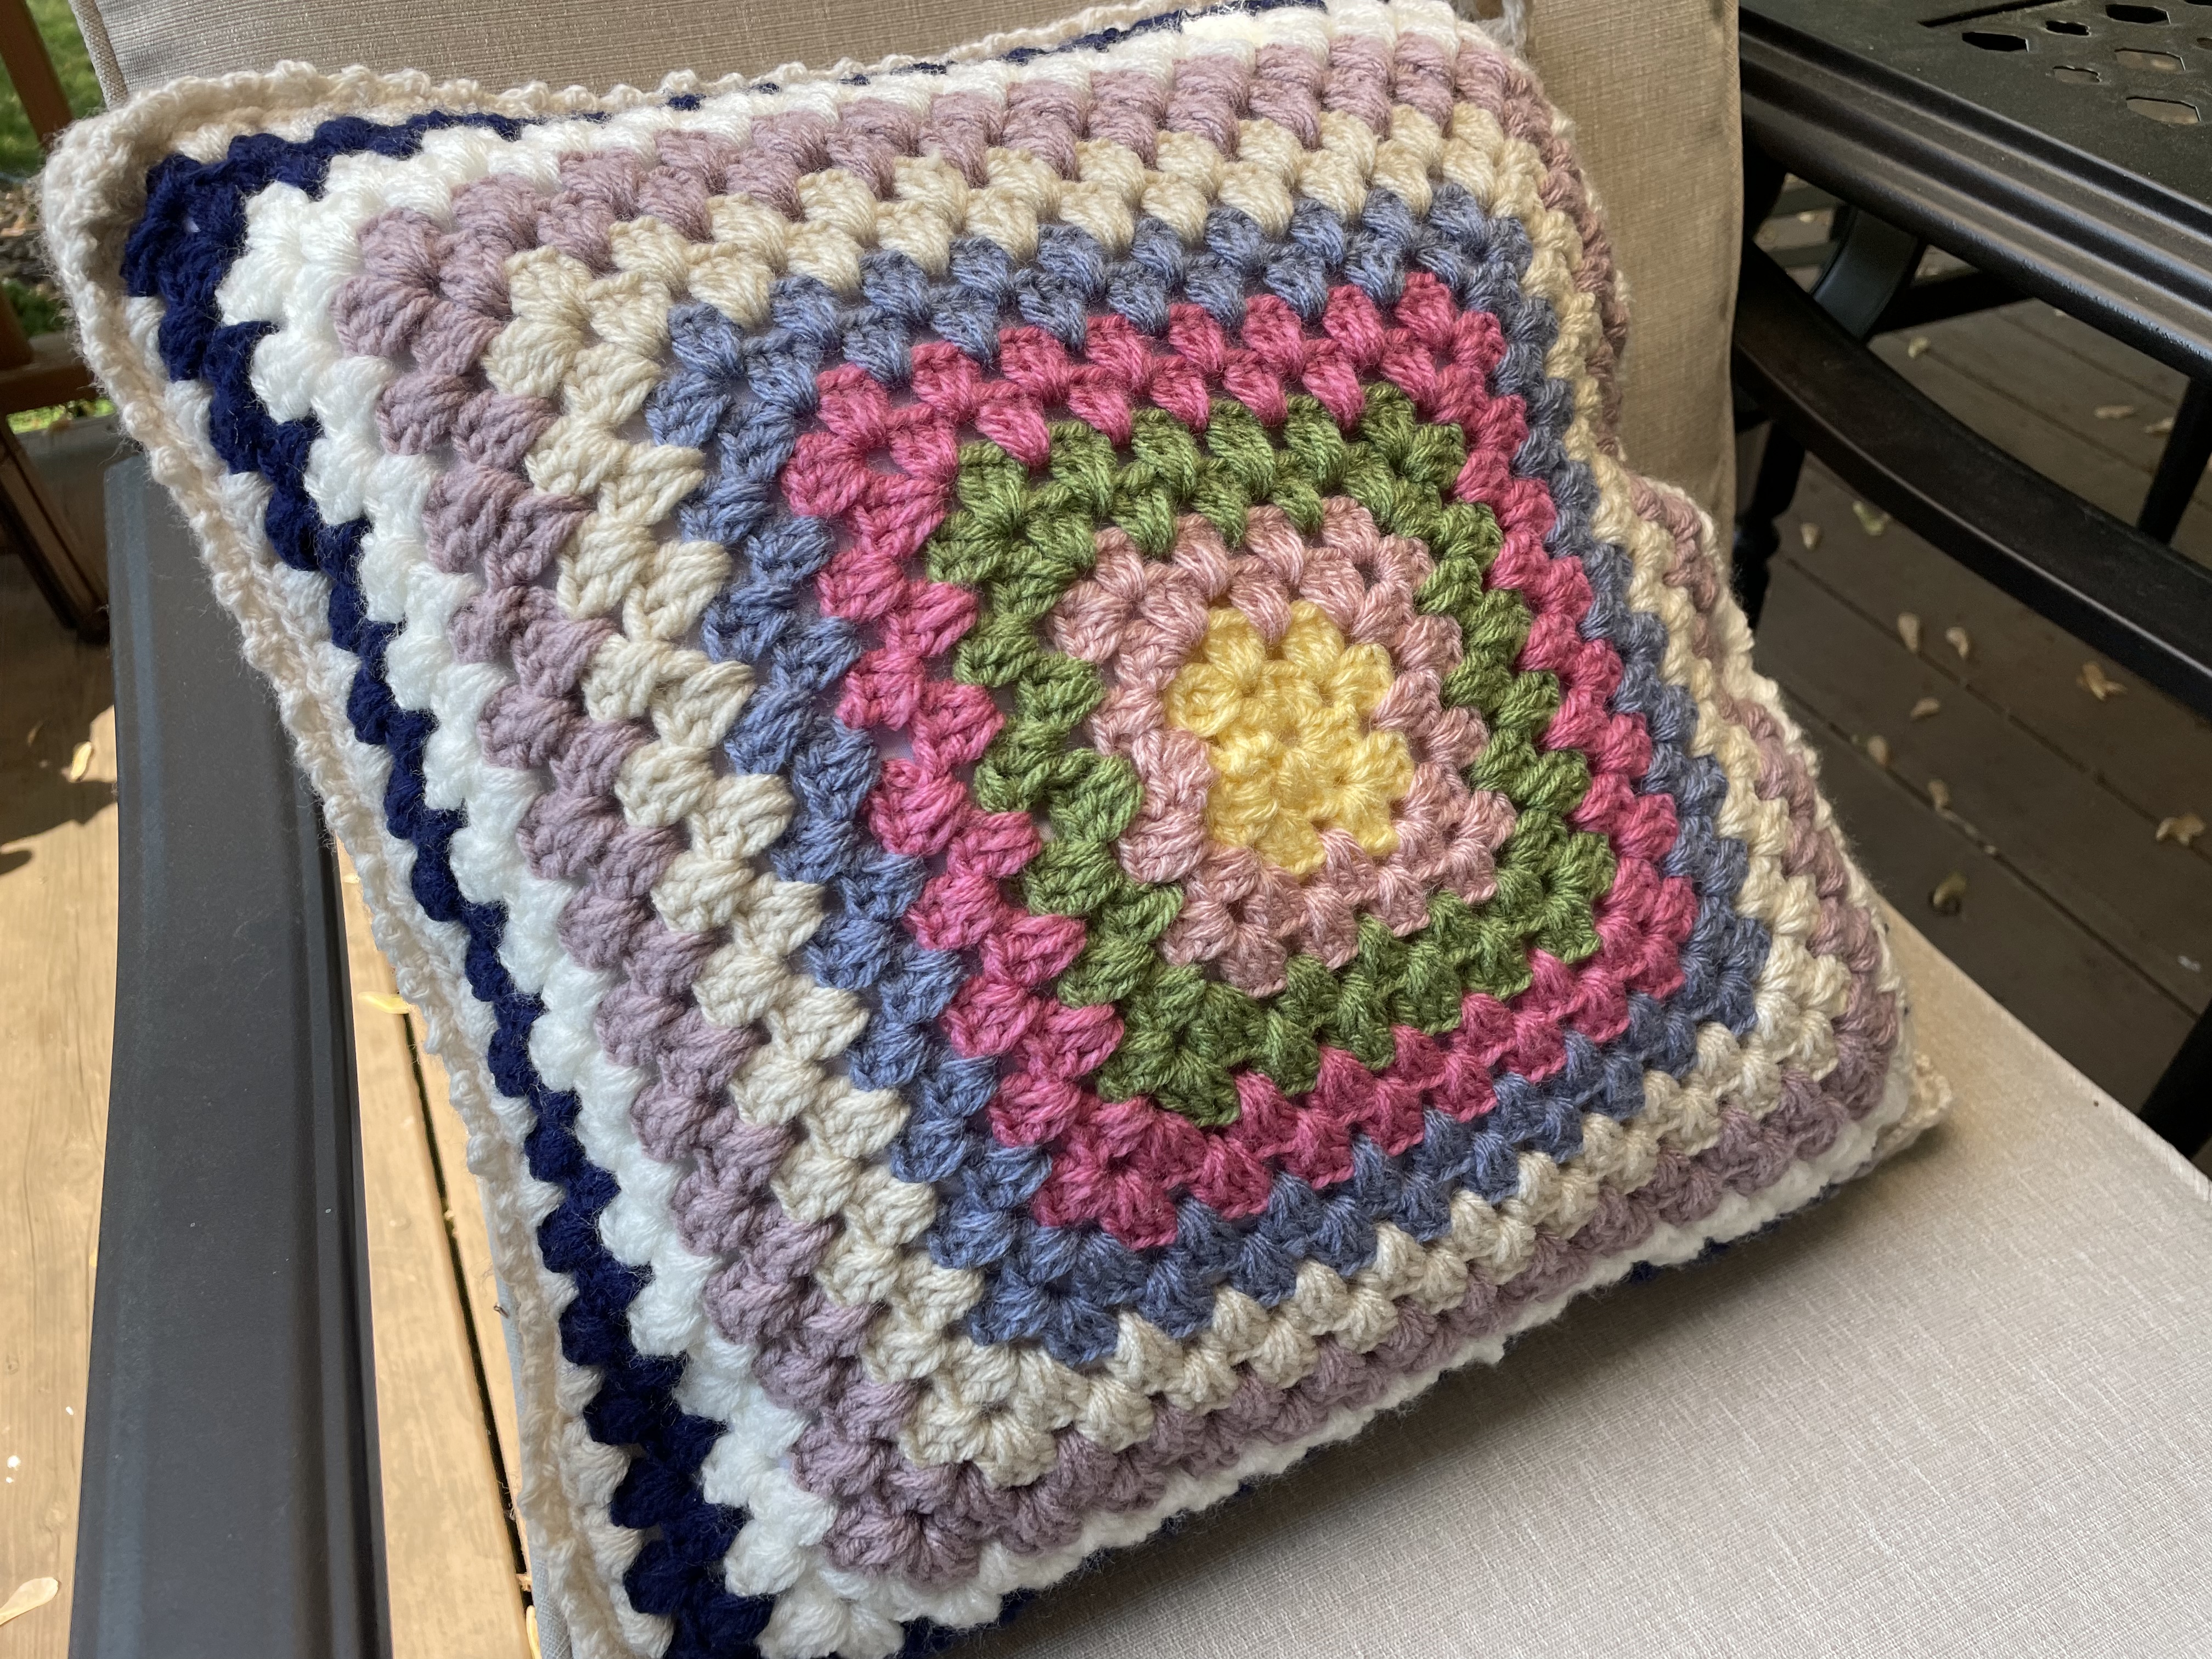
This pillow changes character when you turn it over. One side is a flower garden: sixteen raised blooms sit inside green surrounds and white square frames. The reverse uses one large granny square, with bands of color expanding from the center. Repeating the same yarn colors across both sides makes the different structures feel like one project.
The main challenge is getting those structures to meet comfortably. The flower panel and large granny square grow in different ways, so start with a pillow insert, make one complete flower motif, and use that sample to plan the rest.
Materials and Size Planning
Gather yarn for the flower centers, petals, green surrounds, and a common white or cream frame. Reuse some petal shades for the reverse. You will also need a suitable hook, scissors, a yarn needle, removable markers, a measuring tape, and a fabric-covered pillow insert.
Keep the yarns similar in thickness and compatible in care. A thick scrap can create a larger square even when you follow the same instructions. Allow enough of the frame color for every motif, joining, and finishing.
The front layout is 4 squares across by 4 squares down: 16 motifs altogether. Finish one motif before calculating your cover size. Joining two samples shows how much width the seam adds or removes. The construction does not guarantee a particular pillow size with every yarn-and-hook combination.
Stitch Guide
These notes use US terms: ch means chain, sc means single crochet, dc means double crochet, tr means treble crochet, and sl st means slip stitch.
A dc2tog group uses two unfinished double crochets closed together; a dc3tog group uses three. Here, grouped stitches build texture, rather than automatically meaning a decrease across separate base stitches.
For the five-treble popcorn, work five trebles in the indicated space, release the working loop from the hook, insert the hook through the first treble, and pull the working loop through as demonstrated.
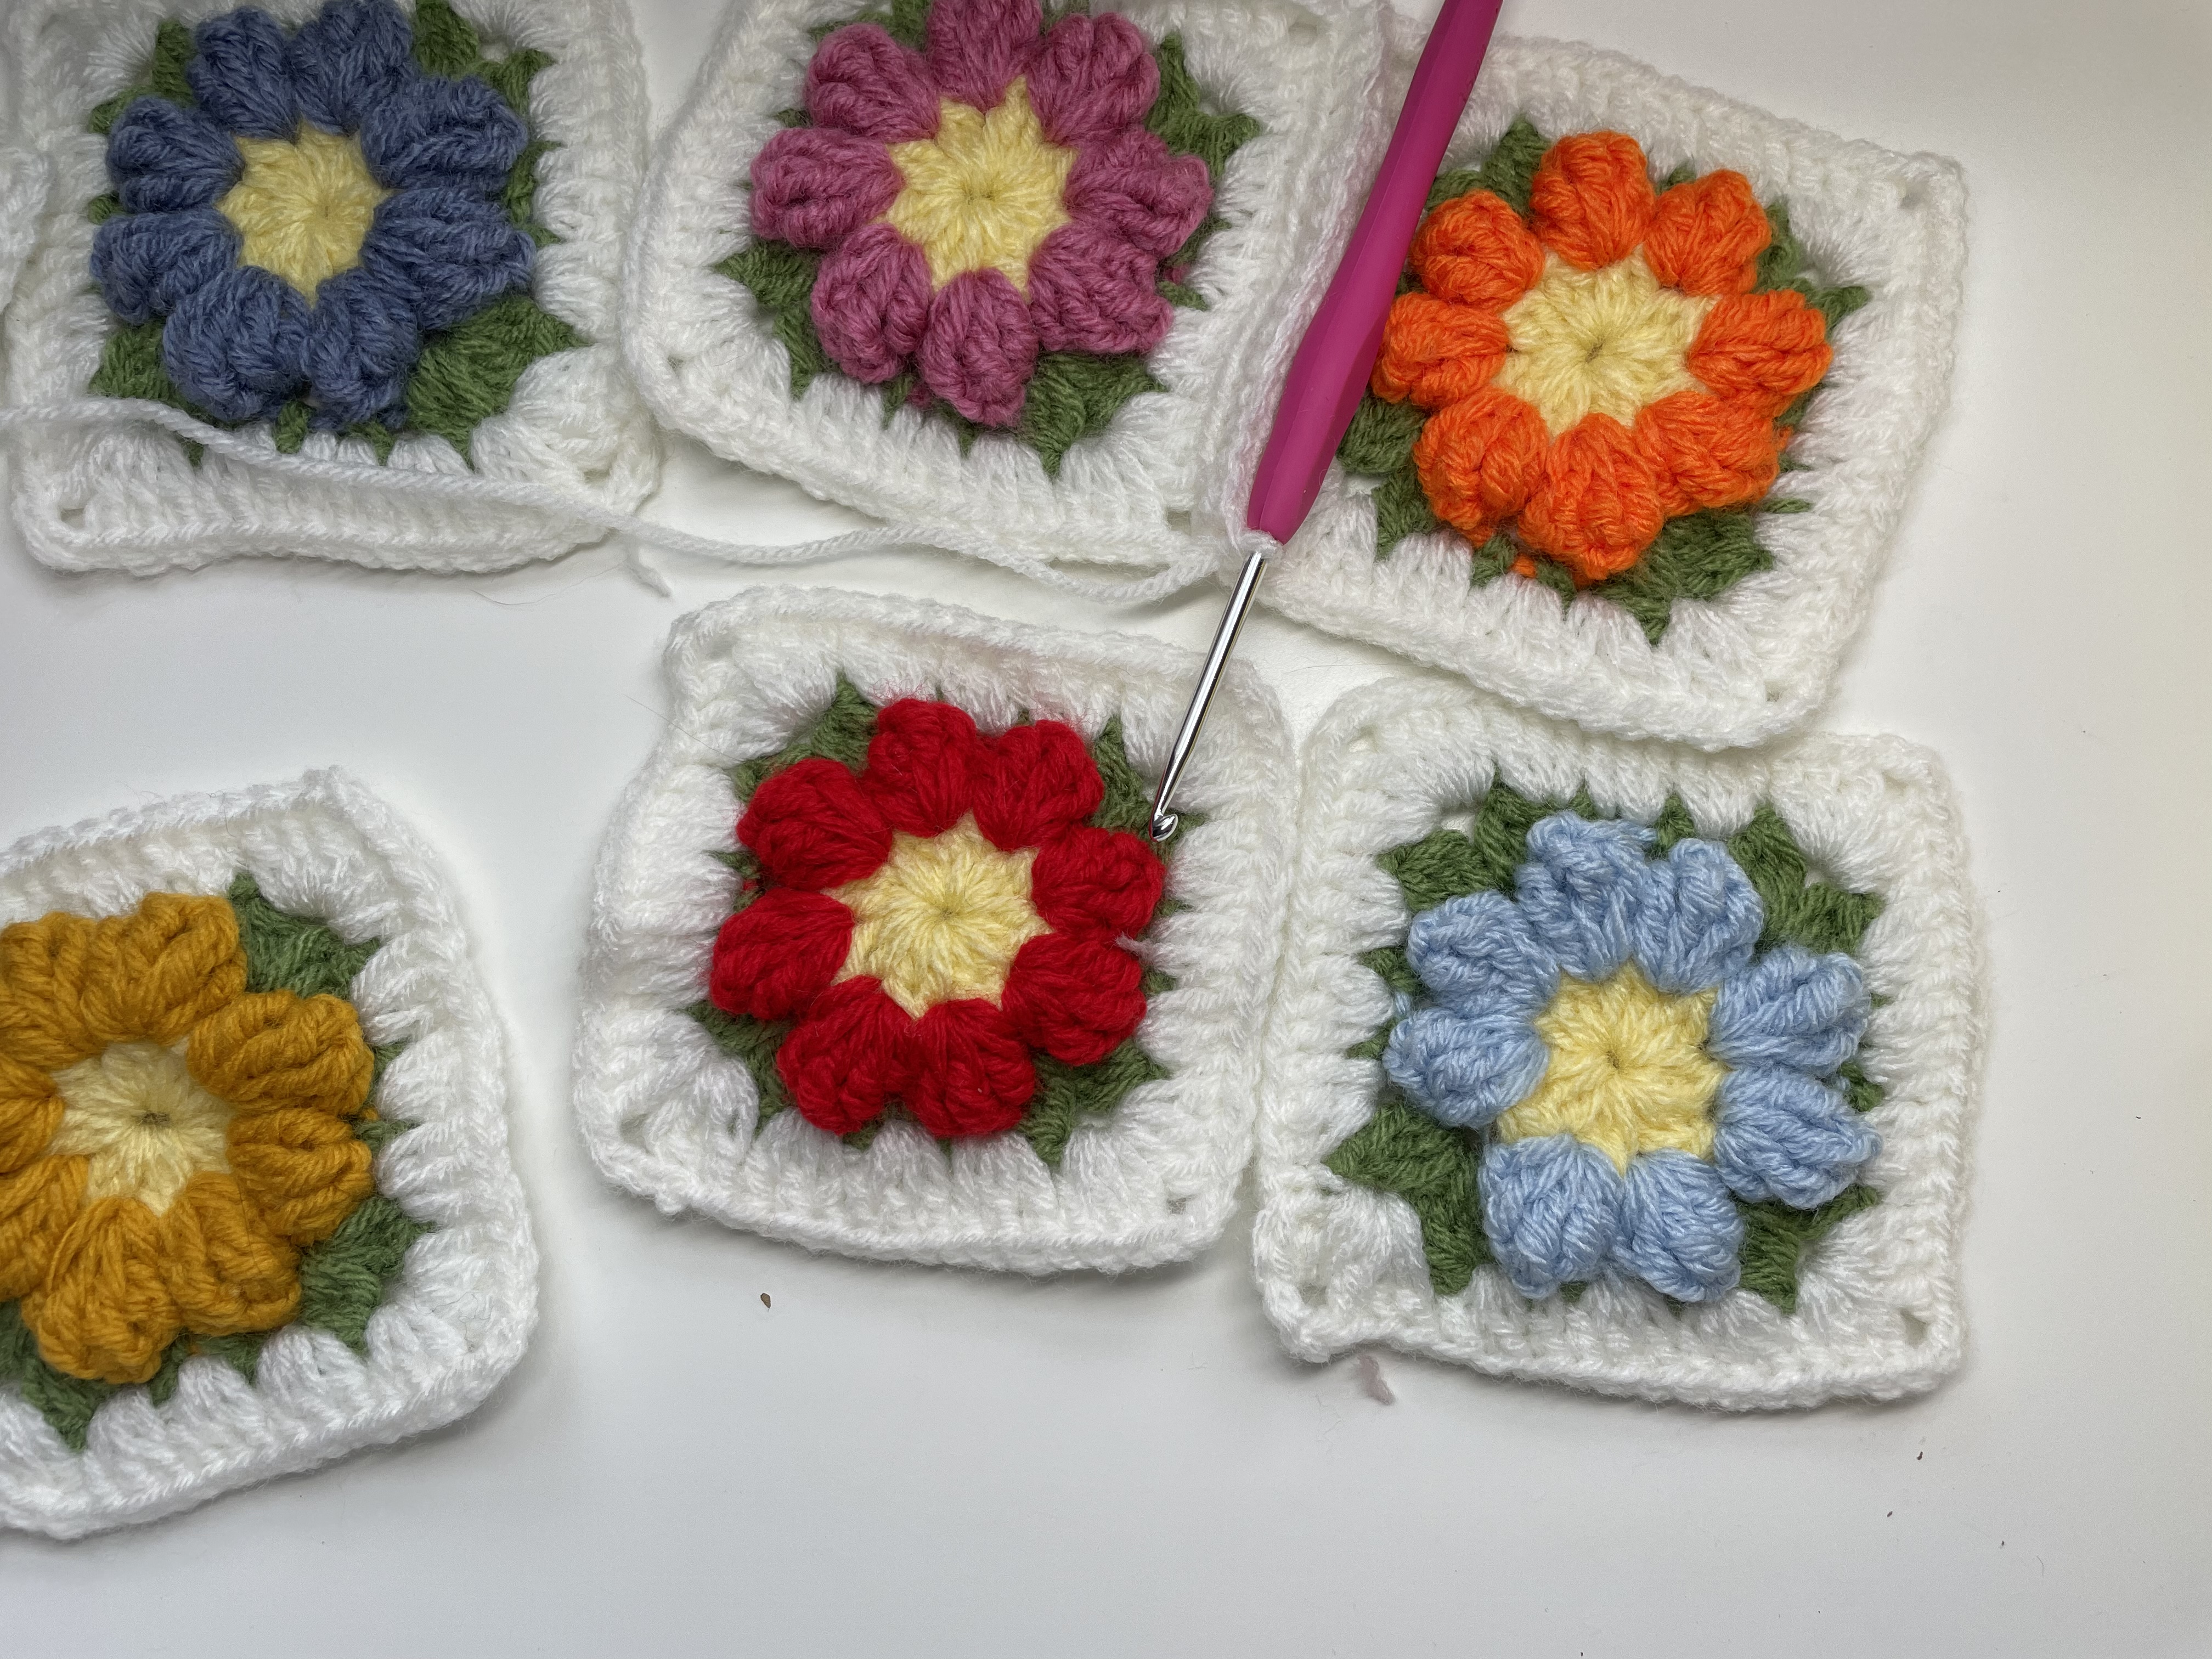
1. Make the Yellow Flower Center
The first-round caption is:
Ch 2, dc, ch 1, (dc2tog, ch 1) x 8, sl st.
Work the center into the starting ring as shown. The beginning chain and double crochet form the starting group; the following groups are separated by chains.
Count before continuing: Round 2 explicitly specifies eight petal repeats. The first caption does not clearly state whether the starting group is included in its x 8 wording. Compare your center with the demonstrated arrangement and check the eight petal positions before Round 2. Treating the setup as an extra ninth repeat would create a mismatch. Resolve this on the first sample before making sixteen centers.
Close the center neatly without pulling the chain spaces shut. Leave room to insert the petals.
2. Crochet the Raised Petals
Change to the petal color for Round 2:
Ch 3, (5 tr popcorn, ch 3) x 8, sl st.
Make eight raised groups with three chains between them. Follow the demonstrated starting group so the beginning chain does not create an additional petal.
Count the petals and spaces when complete. Keep the trebles at a similar height; tightening one popcorn excessively can make the flower lean or hide part of its center.
3. Work the Green Surround
Round 3 is captioned:
Ch 2; repeat [(dc3tog, ch 2), (sc, ch 2, sc, ch 2), (dc3tog, ch 3)]; sl st.
The green round combines taller groups with shorter stitches and chain spaces, preparing the flower for its square frame. The caption supplies the stitch order; the close-up shows where the stitches attach around the petals. Follow those insertion points rather than distributing the sequence by guesswork.
Keep the petals on the intended face and check that none are trapped under a green connection. Lay the work down and compare the developing corners before changing to white.
4. Add the White Square Frame
The Round 4 caption reads:
(3 dc, 3 dc, 3 dc, 3 dc, 3 dc, ch 3) x 4, sl st.
The three-dc groups fill the green spaces, and the three-chain sections establish the corners. Follow the demonstrated corner placement: this compact list does not mean every group goes into a separate ordinary stitch.
Inspect both faces of the square. Identify four corners and corresponding joining edges. Finish the ends and measure the frame without including the height of the petals.
5. Arrange and Join Sixteen Motifs
Lay the squares in a four-by-four grid. Spread strong colors across the panel, or group them deliberately into a diagonal or repeated arrangement. Photograph the layout so the order stays consistent as you join.
The tutorial demonstrates a crochet join through aligned edges. Match corners first, then corresponding positions between them. Keep the seam relaxed enough that it does not shorten a row. At the intersections of four squares, secure every corner without creating a bulky knot.
Finish the front panel's perimeter as demonstrated and measure its outer dimensions. This completed panel is the reference for the reverse, including any border that sits inside the final seam.
6. Make the Large Granny-Square Reverse
The reverse begins with the captioned Round 1:
Ch 6, (3 dc, ch 3) x 3, 2 dc, sl st.
The starting chain supplies the beginning height and corner space in the demonstrated arrangement, creating a four-corner foundation.
As the square expands, work a three-dc group in each side gap and (3 dc, ch 3, 3 dc) in each corner space. The later caption uses an ellipsis for the growing number of side groups; it is not a fixed three-group side for every round.
The video suggests changing colors every two rounds. Repeat that rhythm for broad bands, reusing colors from the flowers to connect the two faces visually.
Compare the reverse with the finished front as it grows. Stop when they match in usable size, allowing for finishing edges. Forcing a much smaller reverse to fit by stretching would distort the cover.
7. Assemble and Add the Tie Closure
Orient the panels so both decorative faces will be outside the finished cover. Mark corners and edge midpoints, then follow the joining demonstration while preserving an opening for the insert.
The demonstrated closure uses three ties. The tie section shows half double crochet worked back along a chain, beginning in the fourth chain from the hook. Check the chain length against your cover and the allowance needed for tying; no universal cord length is specified here.
Position the ties using the video's closing arrangement and test with the insert inside. They should close the opening without pulling it into puckers. A zipper or button band would be a separate adaptation, rather than the demonstrated finish.
Final Fit and Care
Turn the pillow over several times. The outer seam should remain around the perimeter, the insert should fill the corners, and neither panel should be stretched enough to open its gaps excessively. Gently lift any petals caught during assembly.
Take out the insert for cleaning and follow the care instructions for every yarn used. Support both panels while drying and avoid pressing the flowers flat. Hanging a wet cover from one corner can distort the joined grid.
Watch the Pillowcase Tutorial
Use the close-ups for the flower-center count, green-round attachment points, crochet joins, and three-tie closing arrangement.
This cover combines small repeated details with a broad, colorful reverse. Taking time over the first motif and the fit between the two panels will make the project more consistent, whichever side you display.
Watch every stitch up close
Pair these written notes with the complete video tutorial.
Made with yarn, shared with love. 🧶💗