

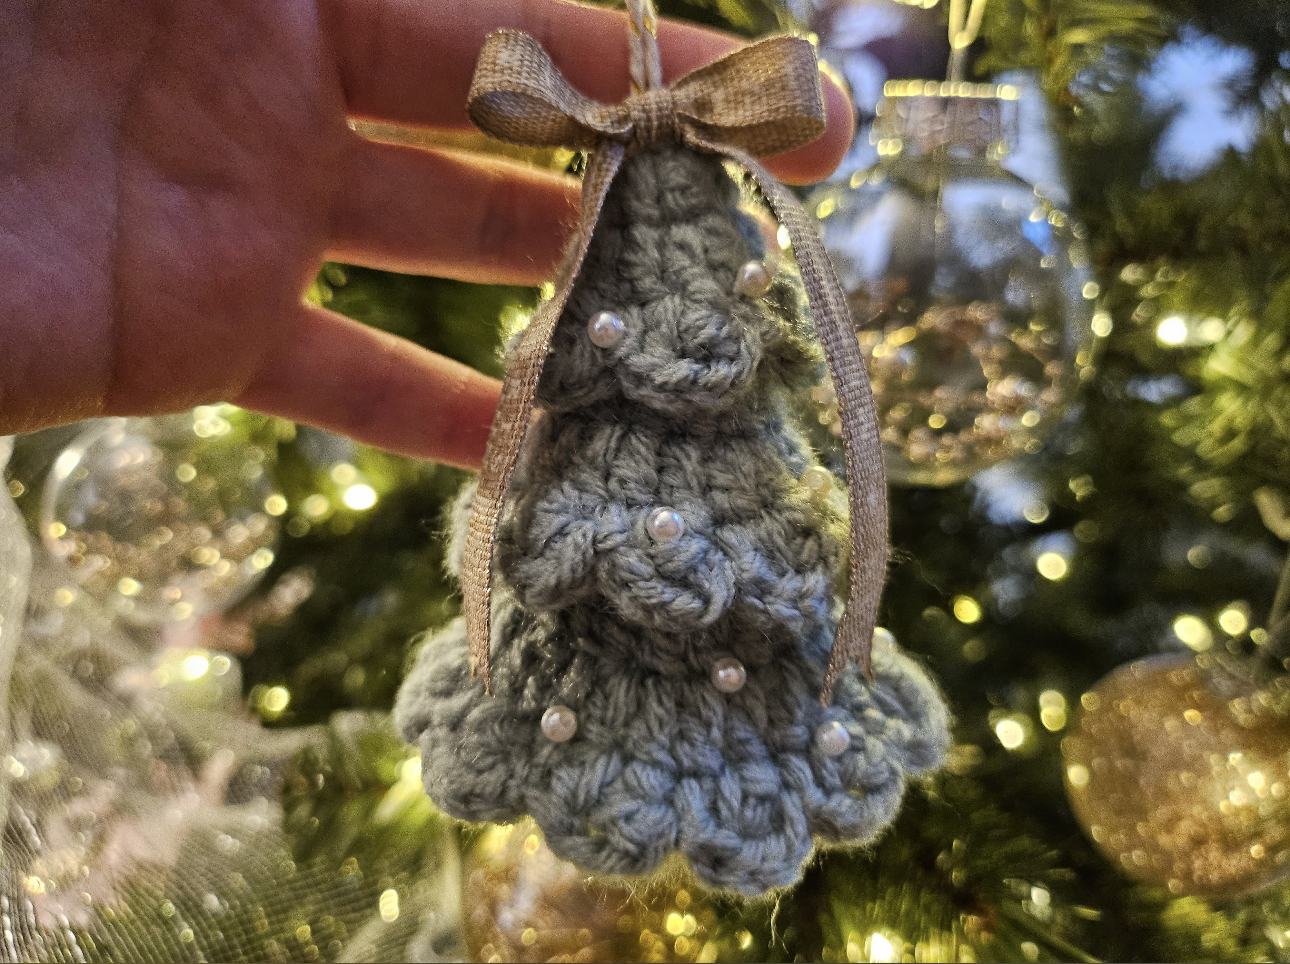
A little crochet tree can bring a softer texture to a Christmas display filled with glass ornaments and sparkling lights. This design combines three graduated sections, rounded branch edges, pearl accents, and a ribbon bow. The layers give it depth, while the narrow top and wider base create a recognizable tree shape.
The pictured ornament uses muted sage-green yarn with a neutral bow and long ribbon tails. Small pearls catch the light without covering the crochet texture. It is a lovely combination for a natural holiday palette, but the same design can also suit brighter, more traditional decorations.
This guide accompanies the video tutorial below. Use the video for the stitch sequence and construction details, and the notes here to plan your materials, check the proportions, and finish the ornament neatly.
Gather Your Materials
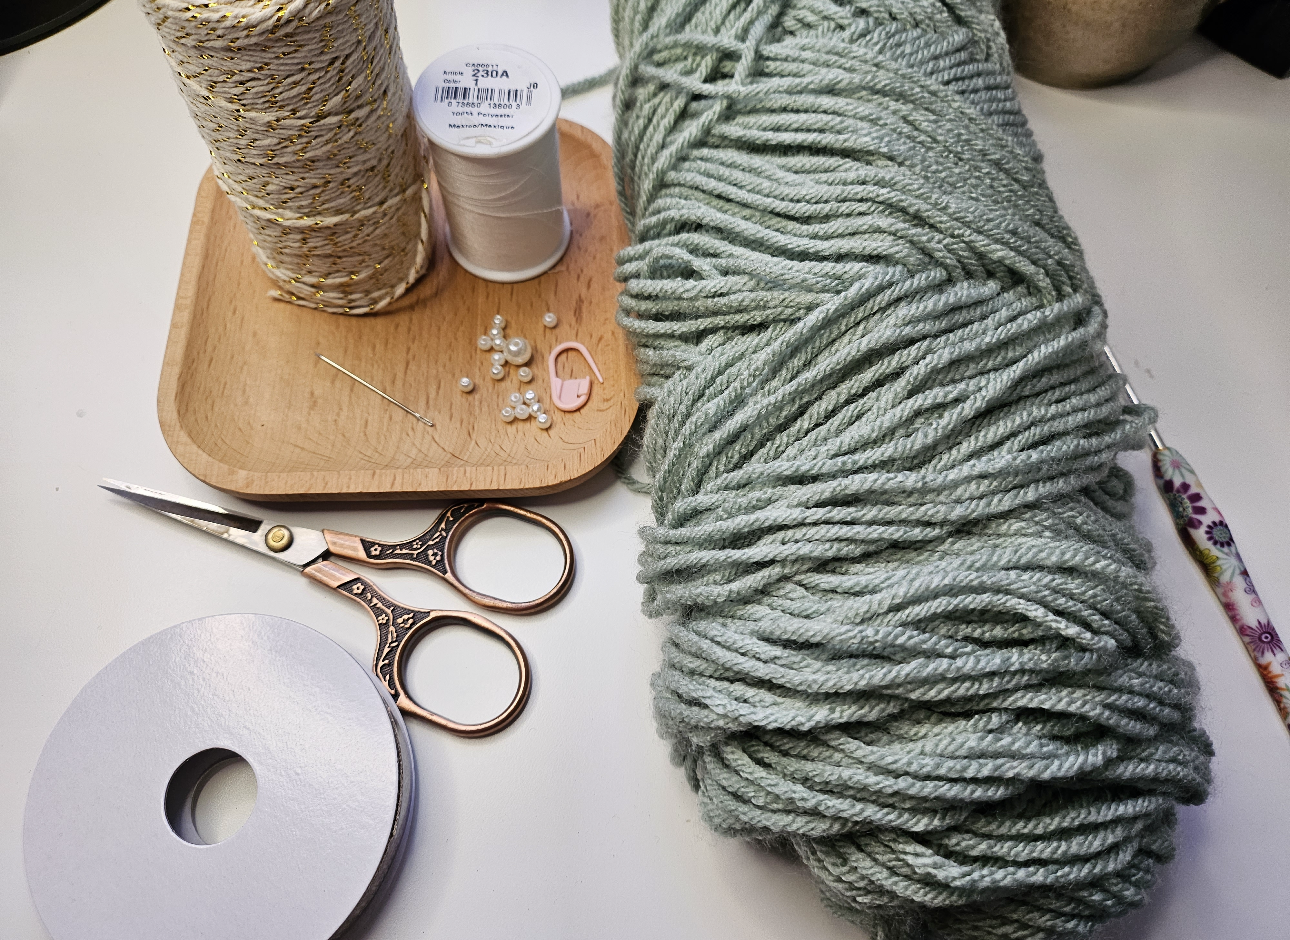
Have the crochet supplies and finishing details ready before you begin:
- Yarn for the tree.
- A crochet hook suited to your chosen yarn.
- Scissors and a yarn needle.
- Small pearl beads.
- A fine sewing needle and suitable thread for attaching the beads.
- Ribbon for the bow.
- Cord or yarn for a hanging loop.
- A stitch marker, if helpful while following the tutorial.
The materials photo shows sage-green yarn alongside pearls, thread, ribbon, and decorative cord. You do not need to match every supply exactly, but keeping the decorations small will help the crochet remain the focus.
Choose Yarn That Shows the Branch Edges
The rounded edges are an important part of this ornament. A yarn with visible stitches makes those shapes easier to follow and gives you clearer places to attach the finishing details.
If you substitute a different yarn, expect the ornament’s size and thickness to change. Make the first section before committing to a whole set. Check whether the fabric holds its outline comfortably and whether the edge details remain distinct.
Give Each Layer Room to Show
The tree is built from three sections: a small top, a middle section, and a wider bottom section. Their relationship matters more than any one section viewed on its own.
As you follow the tutorial, keep the pieces in order. Before securing the arrangement, check that the tree narrows toward the top and that the lower branch edges remain visible beneath the sections above them.
Too much overlap can hide the middle layer. Too little can make the sections look disconnected. Aim for an arrangement that reads as one tree while still showing the rounded edges of each tier.
Check the Tree Before Adding Decorations
Lay the arrangement on a plain surface and look at it from a little distance. This makes uneven spacing easier to notice.
Check three things:
- The top sits above the center of the lower sections.
- The bottom layer gives the tree a balanced base.
- The branch edges are visible on both sides.
Gently arrange the fabric with your fingers. Avoid pulling individual scallops hard to make them match; stretched edges can be harder to correct than a slightly uneven placement.
Place the Pearls Before Sewing Them On
The photographed tree uses scattered pearls rather than a bead on every branch. Leaving areas undecorated allows the stitch texture to stand out.
Try the arrangement before attaching anything permanently. Spread the pearls across the tiers, with a few near the branch edges and others farther inward. Look for balance rather than exact symmetry.
When sewing on a pearl, anchor it to the crochet fabric rather than catching only a loose surface strand. Keep the thread tension gentle enough that the attachment does not pinch or distort the surrounding stitches.
For a simpler version, leave off the beads and let the layered crochet provide the decoration. A plain tree can work especially well beside busier ornaments.
Finish with a Bow and Hanging Loop
The bow sits near the top of the pictured ornament, with its tails falling along the sides. This placement frames the tree while leaving much of the center visible.
Test the ribbon length before trimming it. Very long tails may cover the bottom branches, while a large bow can overwhelm the small top section. Adjust both while holding the ornament upright, since ribbon falls differently when the piece is hanging.
Keep the hanging loop separate enough from the bow that it is easy to place over a branch or hook. Once attached, suspend the ornament and check that the tree faces forward.
If the Ornament Tilts
First check the hanging point. A loop attached away from the center can pull the tree to one side.
Next, check the decorations. A heavy cluster of beads or an uneven bow may shift the balance. Adjust the placement before adding more attachments to compensate.
Finally, look at the layers themselves. If one section sits noticeably off-center, correcting that alignment may improve the whole ornament.
Watch the Crochet Tutorial
Follow the video for the stitches and assembly. Pause between sections to compare their sizes and check how they fit together.
Allow extra time for sewing on pearls, arranging the bow, and securing the hanging loop. These finishing steps are worth doing carefully, especially if you are making the ornament as a gift.
Make a Small Coordinated Set
For several ornaments, keep the yarn and basic construction consistent, then vary one finishing detail. You might use the same sage-green tree with different neutral ribbons, or repeat one ribbon color across trees in several shades of green.
Complete the crochet sections first and decorate the trees together. Comparing them side by side makes it easier to keep the bows and pearl arrangements in proportion.
Before packing the finished ornaments away, check the attachments and tuck in any visible yarn ends. Store them without crushing the layers or placing heavy decorations on top. A little care will help preserve the branch shapes and keep the ribbon ready for the next holiday season.
Watch every stitch up close
Pair these written notes with the complete video tutorial.
Made with yarn, shared with love. 🧶💗