
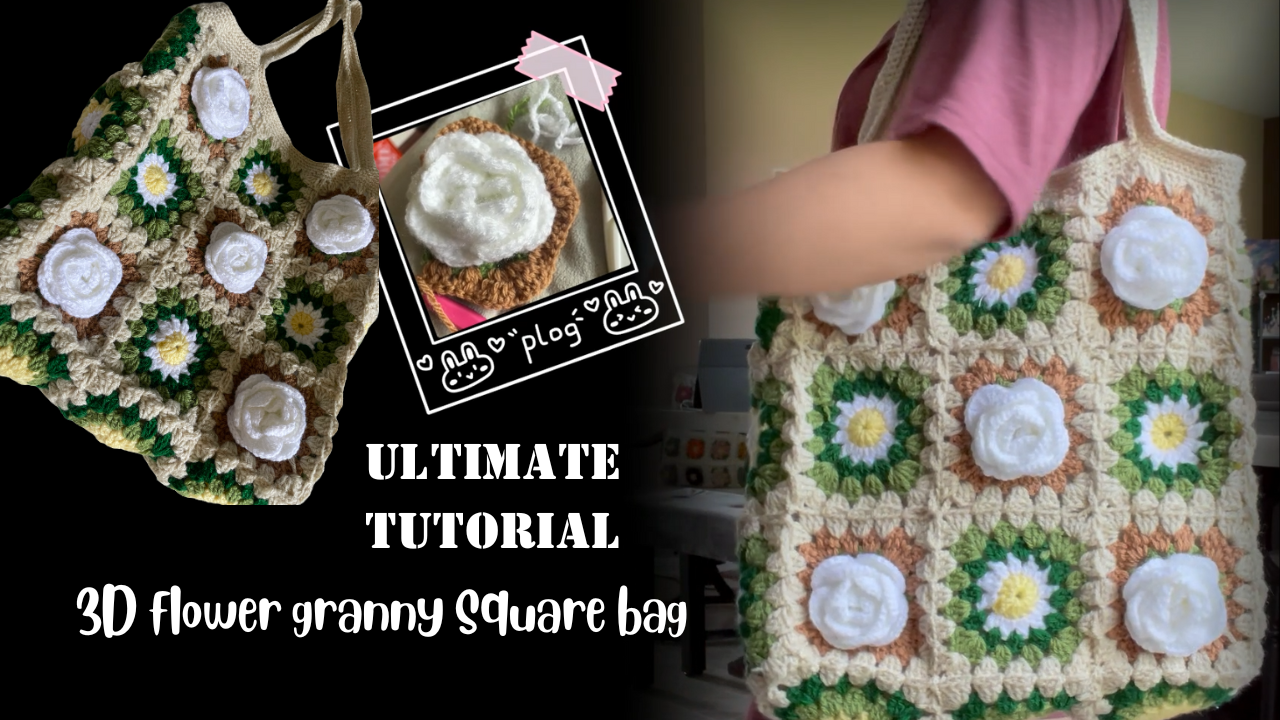
3D Flower Granny Square Bag: A Floral Crochet Tote
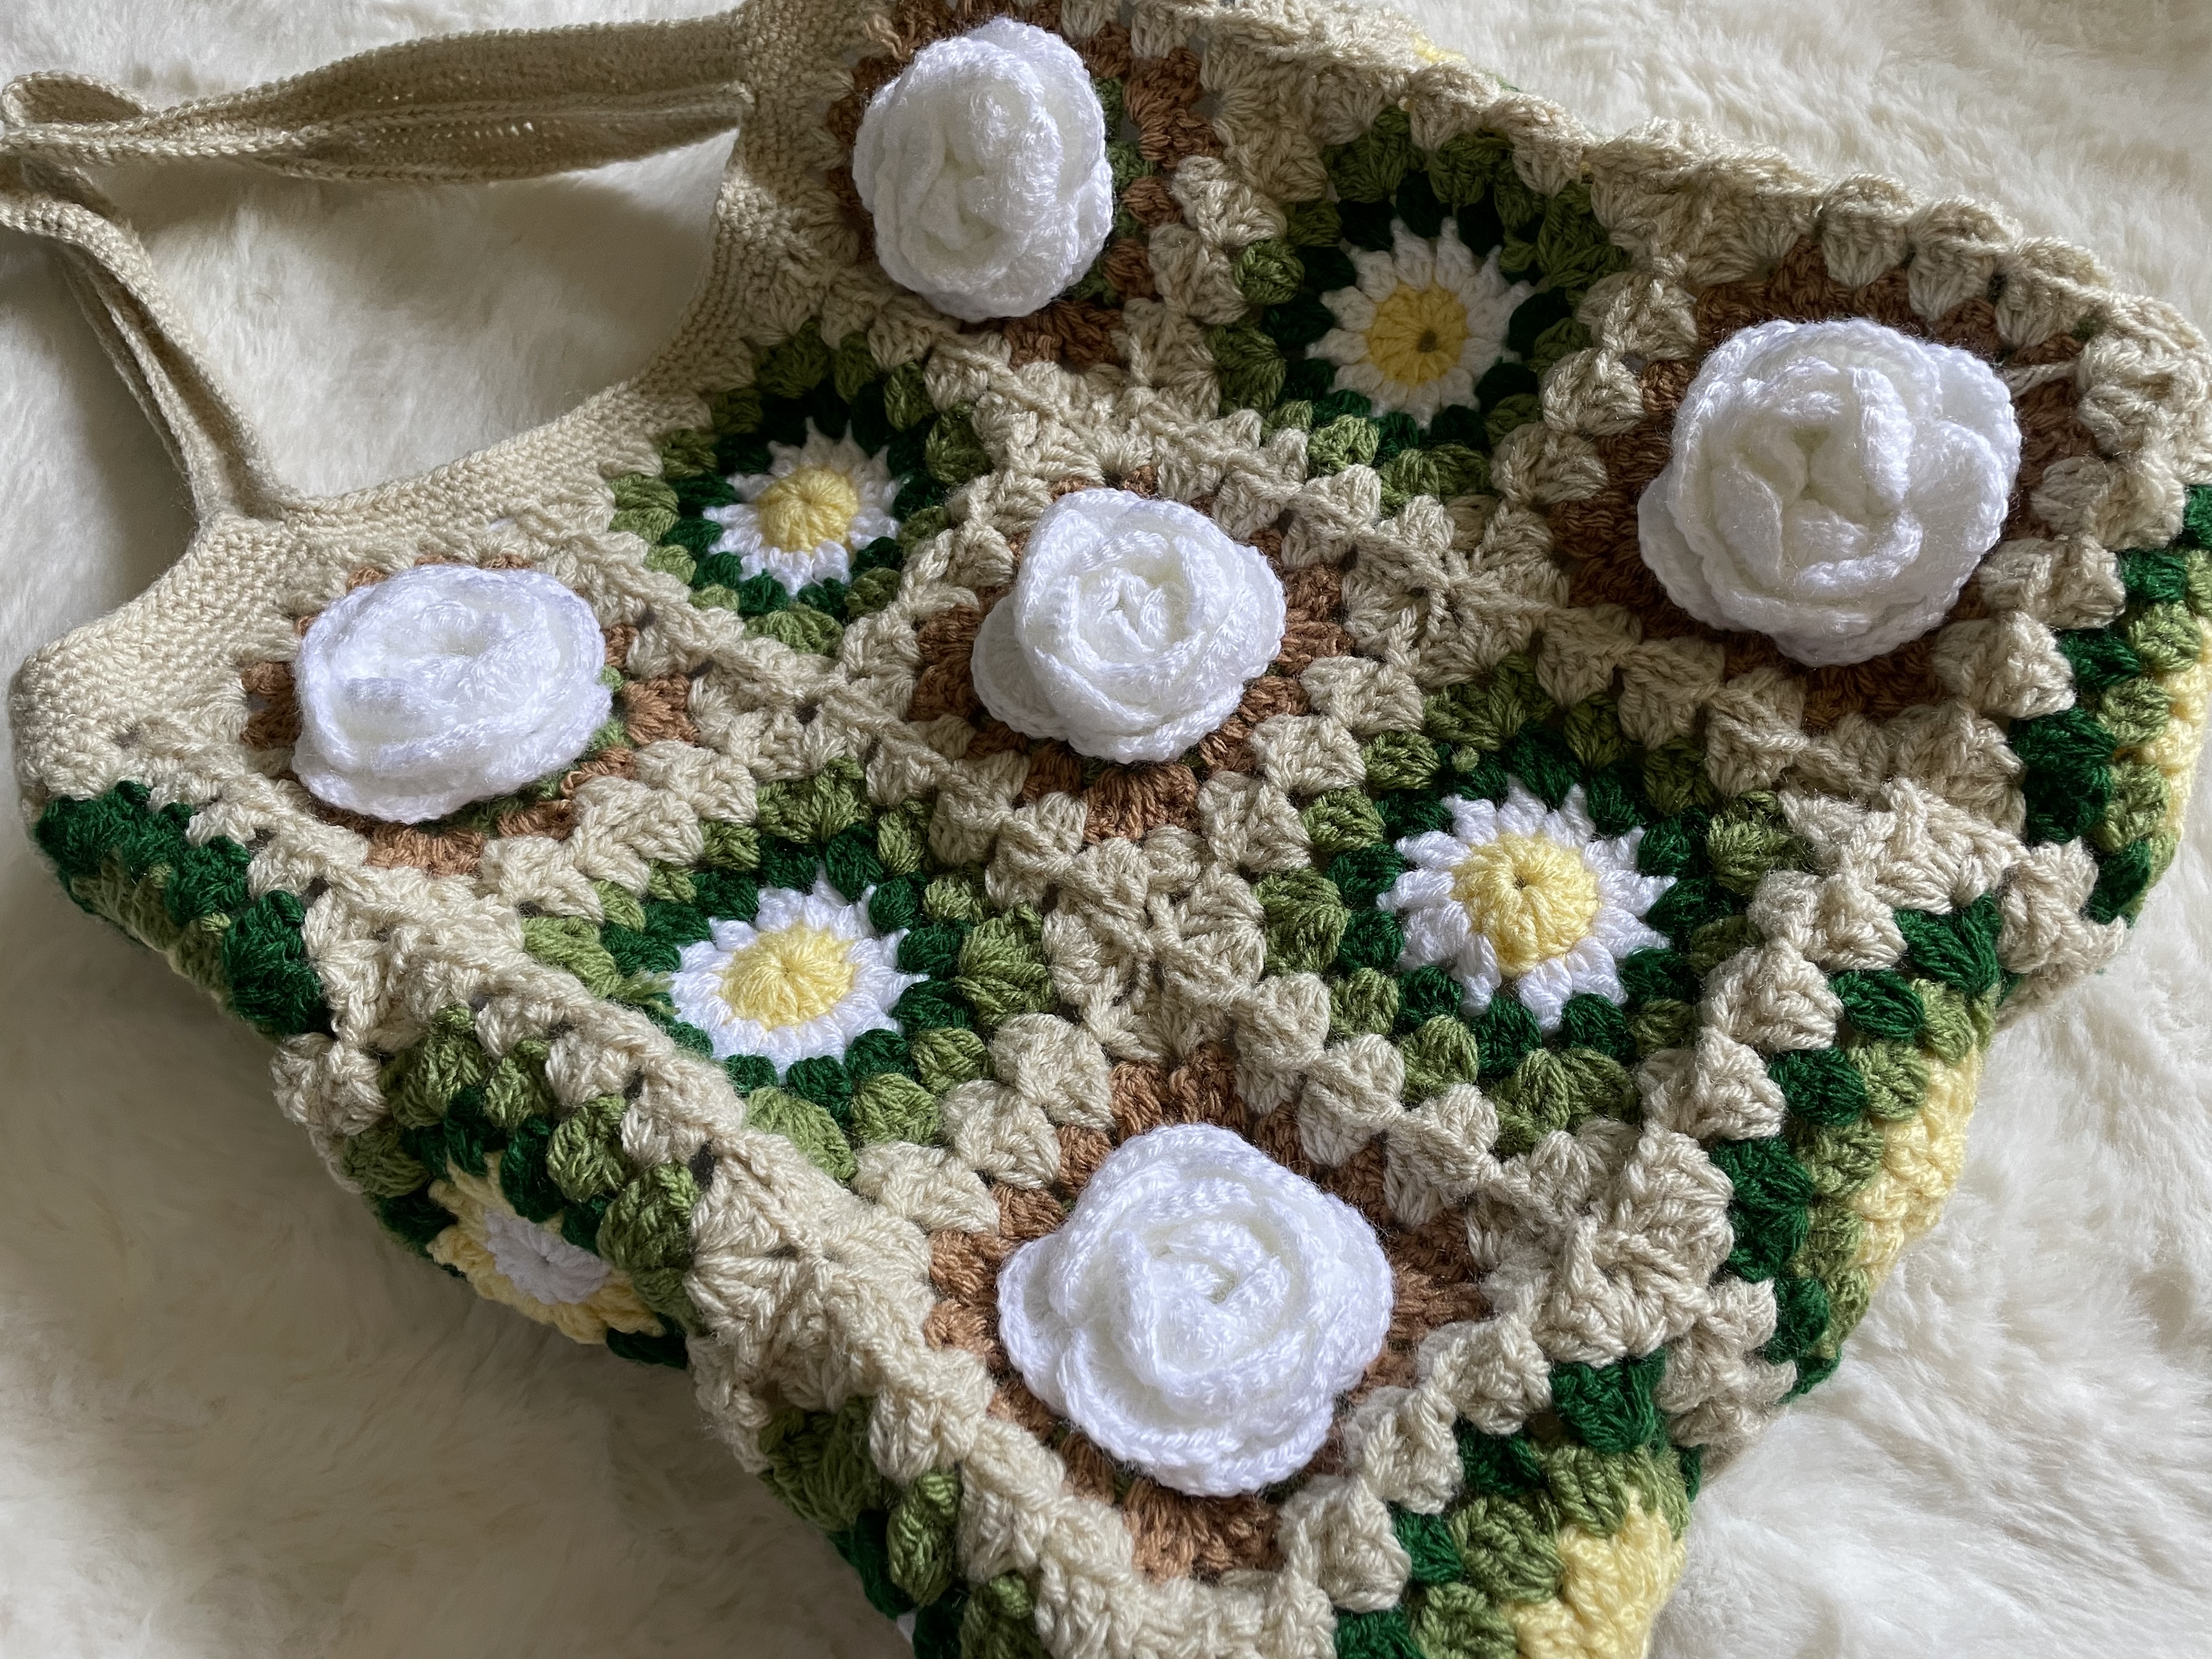
This bag combines two kinds of texture. Layered white roses stand away from their square bases, while smaller yellow-centered motifs provide flatter spaces between them. Green, brown, and cream connect the different centers into one coordinated surface.
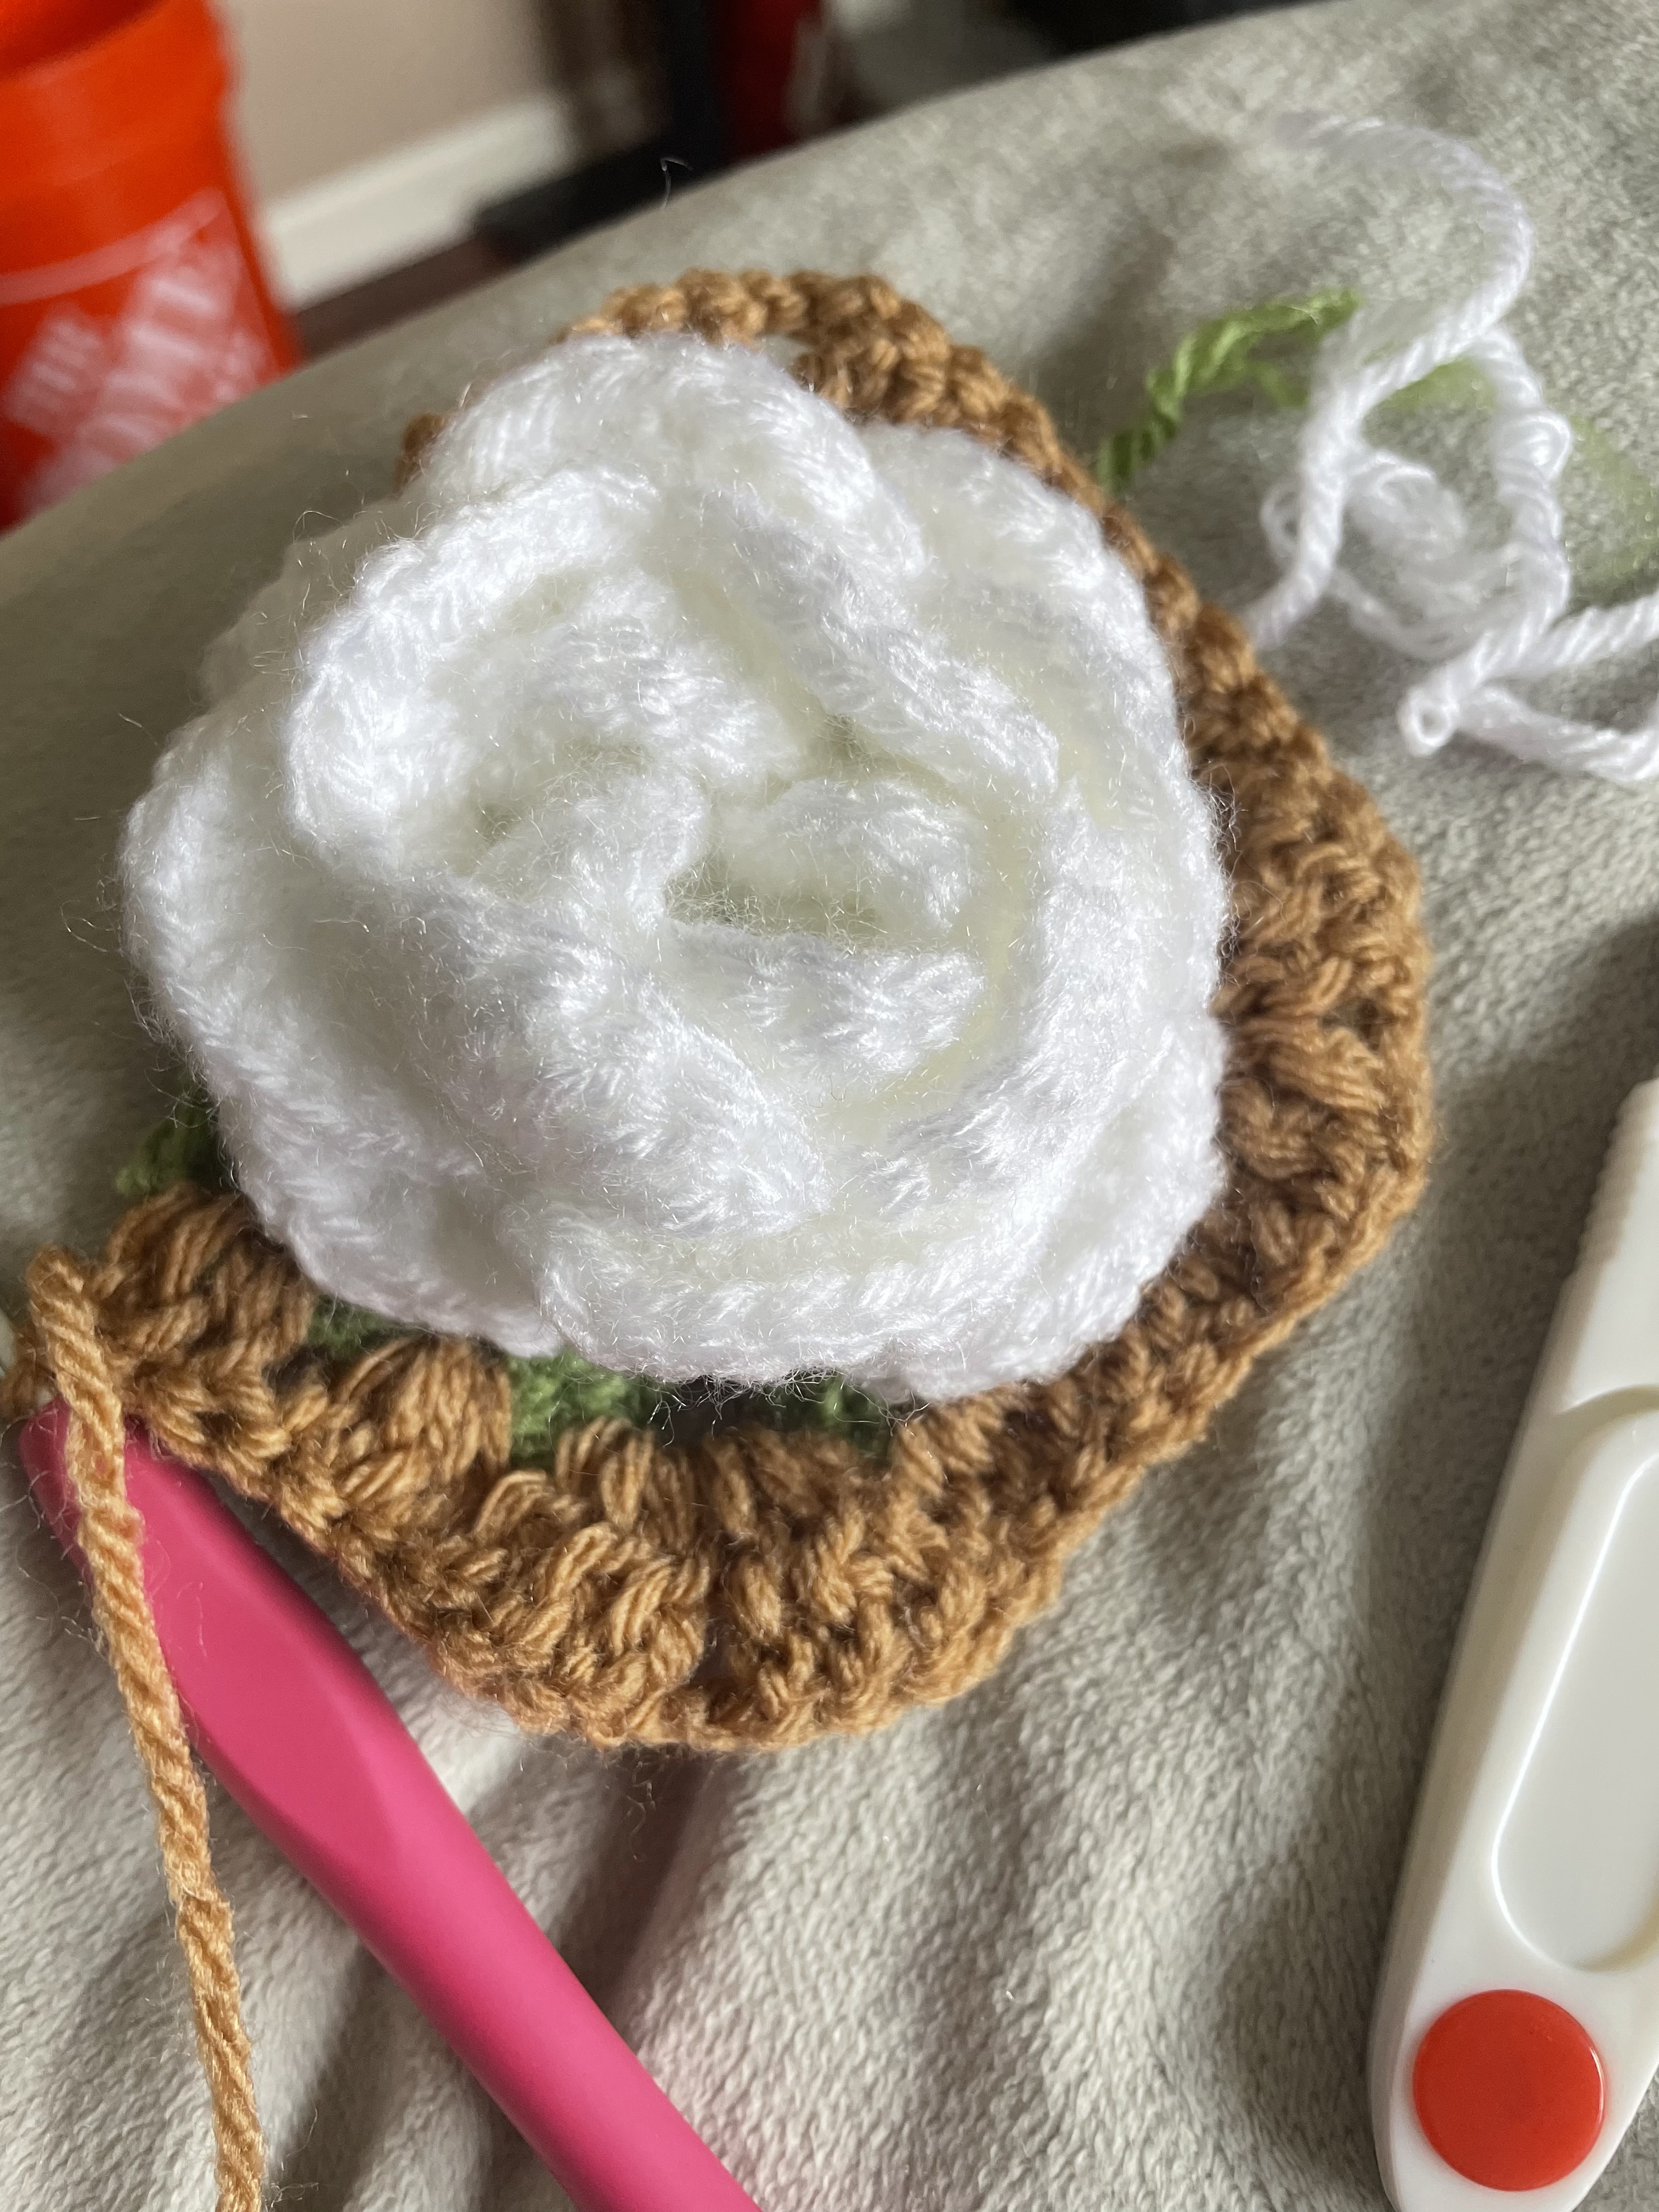
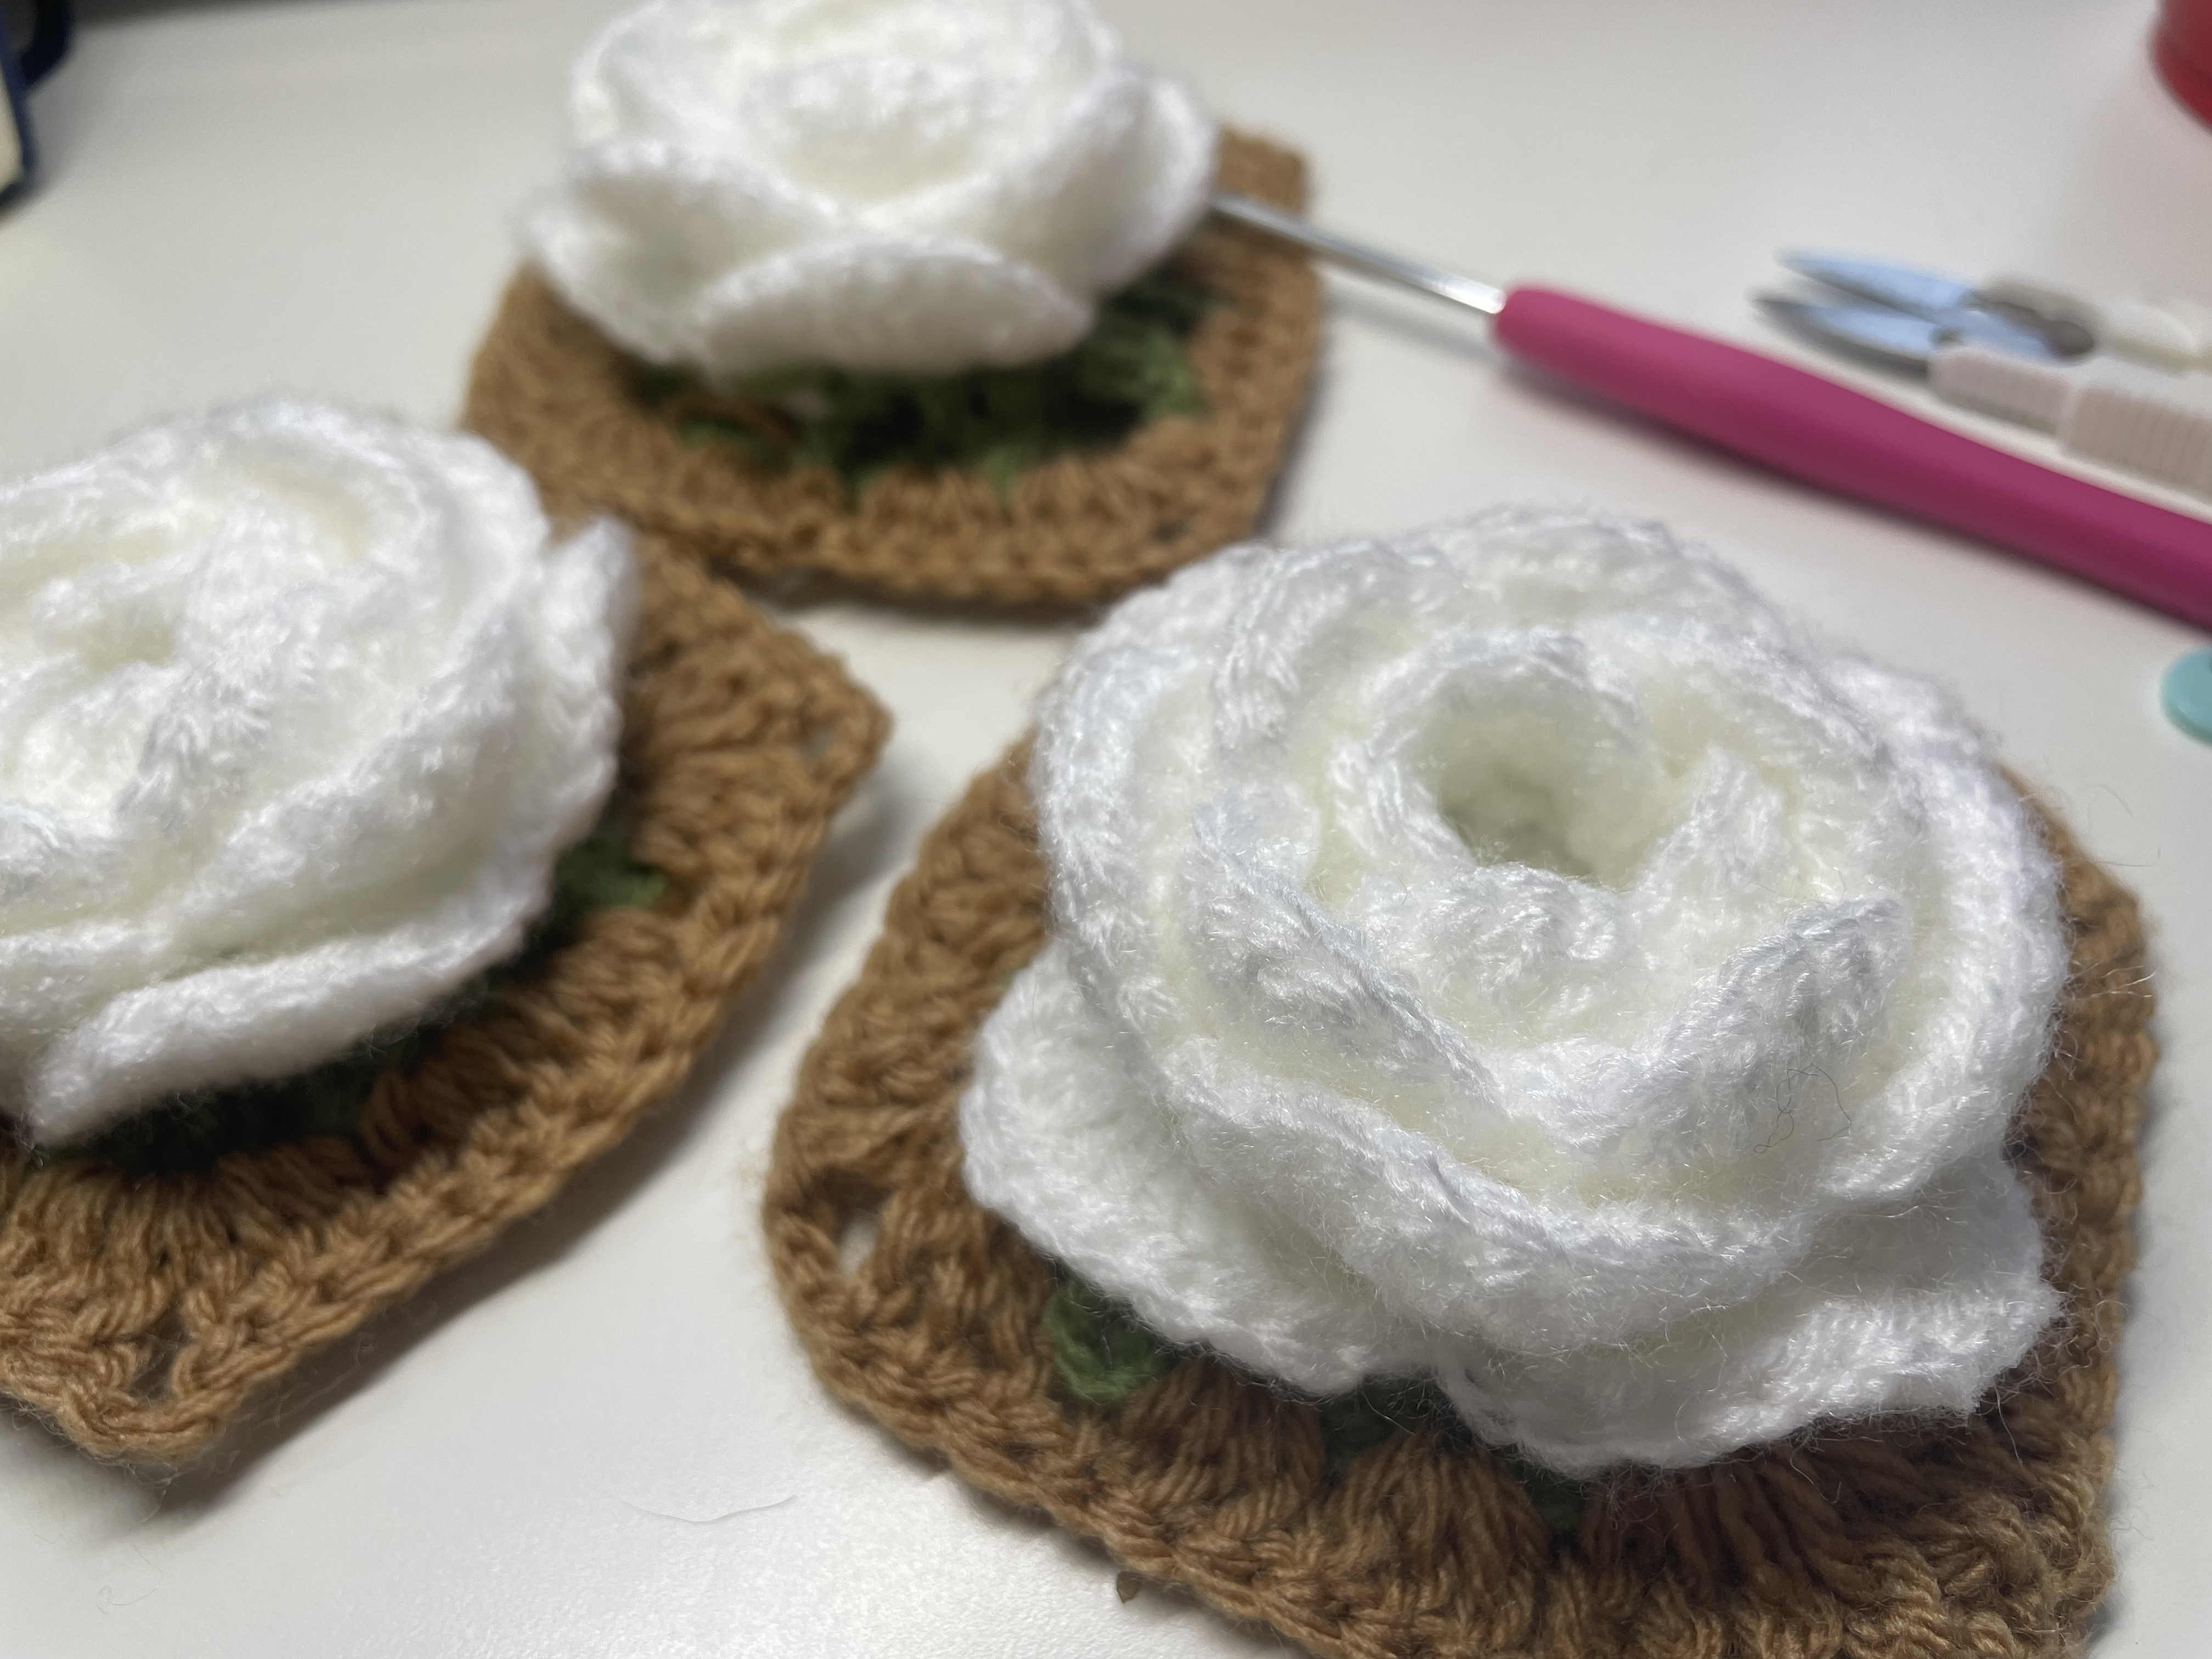
The rose is crocheted in successive layers rather than sewn onto a plain square as a finished separate flower. Each new support round sits behind the previous petals, allowing the next layer to spread outward. A green shaping round and brown frame then prepare the motif for joining.
The useful starting point is one complete square of each type. Their finished borders need to work together before you repeat the motifs for a bag.
Materials and Planning
The video's materials card specifies a 3.5 mm hook, yarn described as medium, scissors, a marker, needle and sewing thread, lining fabric, and a magnetic fastening. The samples also show yellow, brown, and different greens alongside the white and cream.
The word medium on the card is not a complete yarn specification. If substituting materials, make the two sample squares and compare their dimensions and firmness. Keep the structural yarns compatible in thickness; otherwise one square can be larger or heavier than its neighbor.
Prepare enough cream for the connecting borders and top finishing. Choose lining fabric after considering the actual finished bag dimensions. No fixed yarn quantity or universal finished measurement is supplied here.
Stitch Guide
These notes use US terms. Ch means chain, sl st means slip stitch, sc means single crochet, dc means double crochet, and tr means treble crochet. Brackets group stitches or a repeated sequence; they do not by themselves specify the insertion point.
The video uses compressed notation such as “tr dc” for the taller stitches and “cluster” for grouped unfinished stitches. Match the demonstrated yarn overs and group closure when making the green corner structures. A cluster closed together is different from three completed stitches standing separately.
- Build the Layered Rose
Begin with the white flower center and follow the joins shown. The sequence below records the displayed rounds; work the petal groups into their support spaces, not into arbitrary stitches along the previous petal edges.
| Round | Displayed sequence and purpose | | --- | --- | | 1 | Ch 3, 15 dc, sl st: circular center. | | 2 | Ch 2; repeat [(sc, ch 2), skip 1]; sl st: first support spaces. | | 3 | Starting setup (sl st, ch 1, sc), then 5 dc; repeat (sc, 5 dc); sl st: first petal layer. | | 4 | Repeat (sl st, ch 3) behind the petals; join: next support layer. | | 5 | Starting setup (sl st, ch 1, sc), then 7 dc; repeat (sc, 7 dc); sl st. | | 6 | Repeat (sl st, ch 4) behind the petals; join. | | 7 | Starting setup (sl st, ch 1, sc), then 9 dc; repeat (sc, 9 dc); sl st. | | 8 | Repeat (sl st, ch 4) behind the petals; join. | | 9 | Starting setup (sl st, ch 1, sc), then 11 dc; repeat (sc, 11 dc); sl st. | | 10 | Repeat (sl st, ch 4) behind the petals; join: foundation for the green shaping. |
The petal groups increase from 5 to 7 to 9 to 11 double crochets. Round 8 still uses four chains; it should not be changed to five merely because the petals have become larger.
The back attachment is important. Move the previous petals out of the way and follow the insertion points shown for each support round. Working directly across their visible upper edges would flatten the layered structure.
- Shape and Frame the Rose Square
For Round 11, change to green. The caption reads:
Ch 6; repeat [(3 “tr dc” cluster, ch 4, 3 “tr dc,” ch 2), dc]; sl st.
The green groups and chain spaces establish the square's structure around the rose. The caption abbreviates the tall grouped stitches, so use the close-up for both the starting corner and the corresponding group on its other side. Keep four clearly defined corners and the intervening side connections.
Round 12 frames the green section in the brown shade shown. Begin with ch 3 and 2 dc. The caption specifies:
Corner: (3 tr, ch 3, 3 tr). Other edge spaces: 3 dc; continue around and sl st to join.
Keep the corner groups in the corner spaces and the side groups in the indicated gaps. Check the frame while moving the white petals aside; the raised flower can hide a missed space or an uneven corner.
Finish one complete sample before repeating it. Its outer edges should lie comfortably even though the rose stands above the surface.
3. Make the Smaller Granny-Square Motif
The second demonstrated motif begins with the captioned ch 3, 12 dc, sl st. Follow the shown treatment of the beginning chain rather than adding an assumed extra center position.
For Round 2, begin with ch 3 and follow this corner-and-side arrangement:
Corner: (3 dc, ch 2, 3 dc, ch 1). Other spaces: (3 dc, ch 1).
Rounds 3 and 4 use the same kind of corner treatment and three-dc side groups, with more side spaces as the square grows. Work one group in each indicated gap; the caption's “other stitch” wording is a compressed reference to the demonstrated placement, not an instruction to put three dc into every ordinary stitch top.
Change colors to suit the palette. The demonstration and finished examples show different combinations, including yellow centers, white details, and green outer sections. Keep the finished edge size compatible with the rose square rather than relying on color changes to correct a size mismatch.
4. Arrange the Motifs Before Connecting Them
Lay the sample squares together and compare their dimensions, corner shape, and available joining spaces. Treat both types consistently if shaping or blocking is needed, supporting the rose petals so they are not pressed flat.
Plan the complete bag layout before making every connection. Alternate the raised and flatter motifs as in the sample, and photograph the arrangement so its orientation remains clear as you work. Mark which edges will form the opening and which will connect around the body.
The close-ups do not provide a fully dimensioned cutting-style net or a verified motif-total chart in these notes. Use the demonstrated arrangement as your visual reference; adding a guessed number of squares can change the base, side seams, opening, and handle placement together.
5. Join as You Crochet the Cream Borders
The connecting cream round uses three-dc groups along the sides, with one chain between groups, and (3 dc, ch 2, 3 dc) at the corners.
The tutorial demonstrates connecting to an adjacent square at its chain-space position while making the border. Find the corresponding one-chain opening on the neighboring square and follow the shown hook insertion to form the connection. Continue the border while linking the matching positions.
This is different from completing all cream borders and then assuming an ordinary sewn seam will reproduce the same result. Keep the first joined pair nearby as a reference for the remaining connections.
Match corners before the intermediate spaces. If a connection requires substantial stretching, stop and compare the samples. A tighter join may make one row curl even when each individual square was the correct size.
Keep the raised petals clear while folding and turning the work. Check the inside for loose ends and open intersections before completing the bag's body connections.
6. Finish the Opening and Plan the Handles
The video instructs working single crochet for three rows, or the depth needed, around the upper edge. Use consistent tension so the rim supports the opening without drawing it sharply inward.
Cream crochet handles are visible on the finished tote. The transition into the lining section does not establish a fixed handle foundation-chain count, row count, or attachment measurement in these notes. Do not assume those details from the rim's three-row instruction; that instruction refers to the opening.
For a handle adaptation, select the desired drop with the actual bag held in its carrying position, make two matching handles, and mark corresponding attachment areas. Secure the ends through firm structural fabric and test them with light contents before adding more weight. Treat this as a separate fitting step rather than an unverified counted handle pattern from the video.
7. Measure and Fit the Lining
Measure the completed crochet body before cutting the fabric. The tutorial shows this directly: the lining is fitted to the actual bag rather than cut to a universal measurement.
Allow for the fabric seams and a turned upper edge. Assemble the lining and test it inside the bag before attaching it permanently. It should reach the base without hanging loosely below the crochet or pulling tightly across the opening.
The video shows sewing the fabric together and states that the bottom can be glued or sewn. For a sewn adaptation, use suitable seams and check that the bottom corners fit the crochet body. If using adhesive, choose one intended for the fabric and allow it to cure according to its instructions.
Turn the lining's upper edge neatly and sew it to the bag at the opening, as demonstrated. Keep the attachment below the visible rim and avoid stitching through the raised flowers. Inspect the inside after each section so a fold is not trapped unintentionally.
The material list includes a magnetic fastening, but a detailed installation sequence is not established here. If fitting one, use the instructions belonging to the actual hardware and reinforce its fabric attachment so repeated opening does not pull against a loose crochet strand.
Test the Finished Tote
Start with a few light items and lift the bag by both handles. Check the attachment areas, cream connections, lower corners, and lining fit. The lining should support the contents without dragging the outer crochet out of shape.
If a seam puckers, inspect its tension and matching spaces. If the opening twists, compare the rim and handle positions before trying to block the whole bag into a new shape. If a flower catches in a connection, release the trapped edge gently rather than pulling hard on a petal.
Follow the care requirements of every component, including the yarns, fabric, adhesive if used, and fastening. Support the tote while drying and preserve space around the roses during storage.
Watch the Floral Tote Tutorial
The video is especially useful for the support rounds behind the rose petals, green corner groups, cream joining connections, and lining attachment.
The finished bag works best when its decorative and structural parts cooperate. Make the two samples first, match their edges, keep the joins comfortable, and fit the lining to the completed body so the flowers can remain the feature without carrying all the strain.
Watch every stitch up close
Pair these written notes with the complete video tutorial.
Made with yarn, shared with love. 🧶💗